
The following provides a detailed outline of the configuration and troubleshooting involved in configuring a Zephyr Reader for use in a WAN environment. Please check your packaging and ensure you have all required components. If you are unable to establish communication with your Zephyr Terminal and the InfiniTime Software please contact your authorized InfiniTime Dealer, be sure to have the BIOS version and Clock Name of your Zephyr reader available.
Technical Note: Even if you do not intend to utilize your Zephyr Reader in a Wide Area Network Environment the following instructions are still helpful for resolving communication issues with Ethernet Luna Readers. By clearing the clock's memory and communication options and then configuring them properly most common issues are resolved. Simply ignore steps 11 and 12 in the procedure below, as they only apply to configuration in a WAN environment.
1. Check Device Name
a. Press the menu button on the zephyr terminal. If an administrative user is enrolled in the clock the terminal will prompt for an Administrative PIN and Password. Please enter the employee ID of an administrator for both the PIN and Password. If there are no users in the clock the menu will simply be displayed as shown below.

b. Press the down arrow until you see Sys Info. Ensure the arrow points to Sys Info and press OK to open the System Information menu.

c. The Sys Info menu will be displayed. Press the down arrow until you see Dev Info. Ensure the arrow points to Dev Info and press OK to open the Device Information Menu.
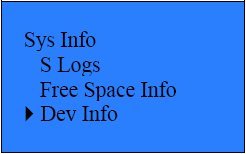
d. The Dev Info menu will be displayed. Press the down arrow until you see Device Name. Ensure the arrow points to Dev Info and press OK to show the Device Name.
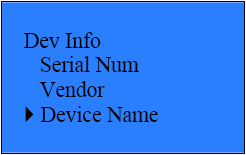
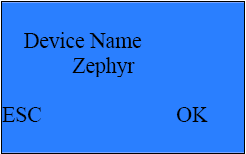
e. The device name should be displayed. The device name should be Zephyr as shown below. Press ESC to return to the Device Info Menu and proceed to step 2.
2. Check Bios
a. Verify you are in the Device Info Menu. Follow step 1 to access the device info menu. Press down until you see Firmware Ver. Ensure the arrow points to Firmware Ver and press OK to show the BIOS version.
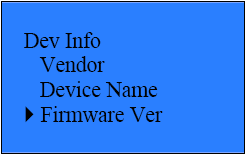
b. The firmware version should be displayed. Please note the BIOS version your clock is on.
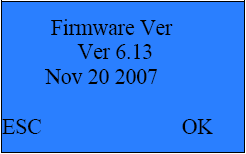
c. Press escape until you are at the main menu as shown below.
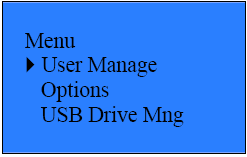
3. Clear All Data
a. Enter into the Setup Menu and scroll down to select Options and Press OK
(F4)
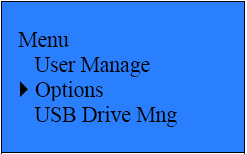
b. In the Options Menu select System Opt and Press OK (F4)
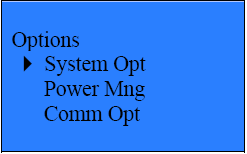
c. In the System Opt Menu scroll down until you get to the Adv Option and select it by pressing OK (F4)
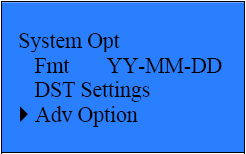
d. In the Adv Option Menu scroll down until you get to Clear All Data and select it by pressing OK (F4)

e. Confirm your choice by pressing OK (F4)

f. The clock will return to the Adv Option Menu. Proceed to Step 4.

4. Clear All ATT Logs
a. Scroll up to Delete AttLogs and select it by pressing OK (F4)

b. Confirm your choice by pressing OK (F4)

c. The clock will return to the Adv Option Menu. Proceed to Step 5.

5. Clear All Options
a. The clock will return to the Adv Option Menu. Scroll down up to Reset Opts. and select it by pressing OK (F4)

b. The clock will display a confirmation after the communication options are reset to default.

c. Press escape until you are at the main menu as shown below.

6. Set Comm. Options / IP Address
a. Scroll down to select Options and Press OK (F4)

b. In the Options Menu scroll down and select Comm Opt and Press OK (F4)

c. In the Comm Opt Menu scroll down until you get to the IP Addr option and select it by pressing OK (F4)
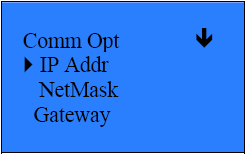
d. In the IP Addr menu insert the correct IP Address for the reader and press OK (F4) to save it.
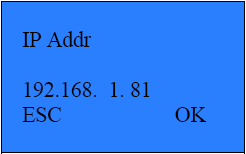
e. Now scroll down to the NetMask to set the network Subnet Mask, select it by pressing OK (F4)
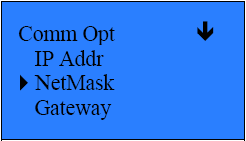
f. In the NetMask menu insert the correct Network Subnet Mask Address for the reader and press OK (F4) to save it.
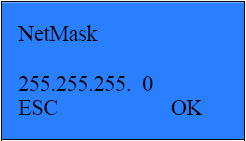
g. Now scroll down to the Gateway to set the network gateway, select it by pressing OK (F4)
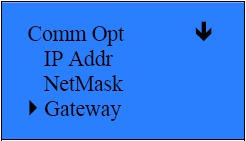
h. In the Gateway menu insert the correct Network gateway address for the reader and press OK (F4) to save it.
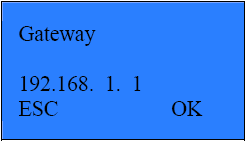
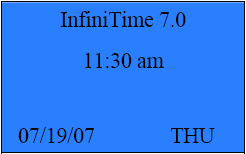
i. To exit press ESC (F1) several times to go back to the main display.
7. Unplug the clock from the power outlet. The display will turn off.
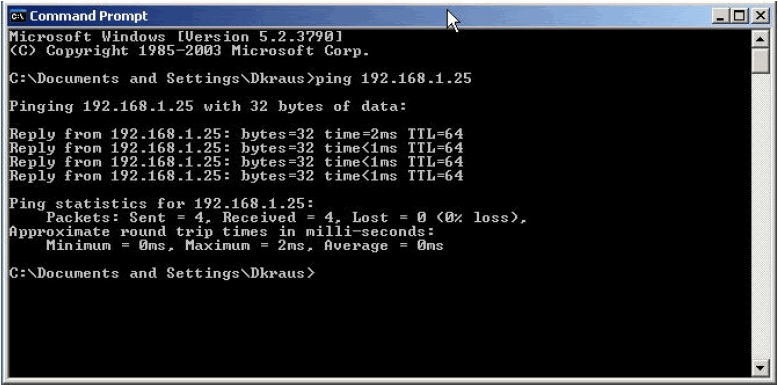
8. Attempt to ping the IP address that has been assigned to the clock from a computer on the network. All ping attempts should fail. If this is successful another computer on the network is assigned the IP address that has been configured within the Zepyhr Reader. Select a static IP address that is not in use and repeat Step 6.
To Ping the Zephyr Terminal from a Windows Machine:
a. Click on Start.
![]()
b. Click on Run.

c. Type cmd.
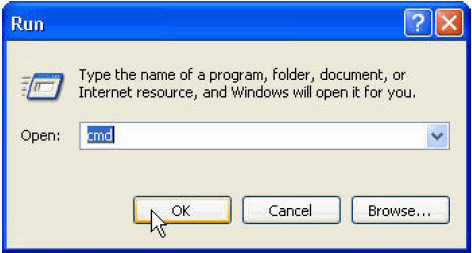
d. Click OK.
e. Type ping ###.###.###.### Fill in the # fields with the IP Address of your clock. An example is shown below.
9. Plug the clock into a power outlet.
10. Attempt to ping the IP address that has been assigned to the clock from a computer on the network. All ping attempts should be successful. If this is unsuccessful there is most likely a physical issue with the connection the clock. Check the cable and the connectors. Be sure a straight through Ethernet cable is being used to connect the clock to a switch or other network device that is connected on your network. Contact your network administrator if you are unable to ping the clock from a computer within your network.
Technical Note: Most ethernet devices automatically sense the speed of the local area network and adjust themselves automatically. In some cases devices may have difficulties automatically sensing the speed of the network. This can lead to communication difficulties. If you are unable to communicate with your zephyr after following the above procedures please set the network speed on the Zephyr Clock to 10Mb per second and repeat the above procedures starting at step 8.
To Set the Network Communication Speed & Type Manually:
1.) Press the menu button on the clock to access the main menu of the Zephyr Reader.

2.) Use the down arrow to move the cursor to Options. Press OK.

3.) Use the down arrow to move the cursor to Comm Opt. Press OK.

4.) Use the down arrow to move the cursor to Net Speed. Press OK.
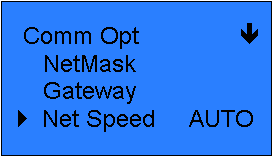
5.) Use the up and down arrows to select from the available options. Each available option is listed and described in the table below.
|
Net Speed Setting |
Description |
|
10M-H |
10Mb/s Half Duplex |
|
100M-H |
100Mb/s Half Duplex |
|
10M-F |
10Mb/s Full Duplex |
|
100M-F |
100Mb/s Full Duplex |
Half Duplex refers to one way communication between computers or devices on a network while Full Duplex refers to two way simultaneous communication between computers or devices on a network. It may be necessary to contact your Network Administrator in order to identify the communication type and speed of your local area network. Generally if you are having difficulties communicating with your Zephyr terminal it is best to set the network speed to a lower amount, either 10Mb/s Half Duplex (10M-H) or 10Mb/s Full Duplex (10M-F.)
To Ping the clock refer to the procedure outlined in Step 8.
11. If a Zephyr Terminal is to be used in a remote location the clock must be accessible from the internet. To accomplish this a public IP address can be mapped directly to the clock using Network Address Translation (NAT) or all traffic inbound to your router on a specific port can be directed to the Zephyr terminal using Port Forwarding. When configuring port forwarding ensure all inbound traffic on port 4370 for UDP is directed to the internal IP address of the Zephyr Terminal.
12. To ensure the configuration of NAT, ping the public IP address that is associated with the Zephyr Reader. To ensure the configuration of Port forwarding use Telnet at the command prompt to access the Zephyr Terminal Mode Login Prompt. If you are unable to communicate with the Zephyr Terminal from an external computer verify the configuration of NAT or Port Forwarding as appropriate and repeat this step.
Note: In order to verify communication using telnet inbound traffic on port 23 must also be forwarded to the clock. Port 23 is not required for normal communication and should only be left open while attempting to test communication to the clock using telnet.
13. Follow the instructions in the Zephyr Manual to configure your Zephyr Reader within Infinitime. Attempt to poll and update the clock from within InfiniTime. If the clock is configured correctly and communication is successful errors will not occur when polling or updating the clock.
14. To verify the update was successful repeat Step 2 to check the BIOS version on the Zephyr Terminal. The Zephyr Terminal should be on the newest version of the bios. As of 7.04 the most recent version of the BIOS is 6.13. If the BIOS version displayed on the Zephyr Terminal is not the newest version repeat Step 13 and 14. If you continue to have difficulties updating the BIOS on your Zephyr Terminal please contact your authorized Infinitime Dealer.
15. Ensure employees are configured with Login Ids, Passwords, and badges (if applicable) within the InfiniTime Software. Follow the instructions within the Zephyr manual to update the clock with the employee information. Ensure the employees can clock in and out on the Zephyr Reader.
16. Ensure punches can be polled from the Zephyr Terminal. If you are able to poll punches from the Zephyr Terminal your clock has been successfully configured. If punches will not poll from the terminal ensure employee configuration is correct (Step 15) and verify the clock is communicating successfully both on the Internal Network and Externally (Step 10 and Step 12)
17. General Troubleshooting
a. If your Zephyr Terminal should fail to update or poll after the initial configuration please check the following items:
Verify Communication by pinging the clock. If the clock does not ping from a computer on the external network the clock may be turned off or unplugged at the remote site. Contact the appropriate personnel to verify the clock is turned on and plugged into the network. Ensure the clock can be pinged from the internal network and attempt to verify communication from the external network again.
If multiple (More than Five) clocks are to be configured on a single InfiniTime System each clock should be set to inactivate
after a certain number of errors has occurred. This will stop communication to a clock that has dropped off the network and allow the Housekeeping service, which is responsible for communicating with the readers, to continue operation. If this is
not configured appropriately the InfiniTime Housekeeping service will continue to attempt communication with the inoperable reader.
Note: This is a common issue with some Internet Service Providers as their Internet service may go down during the late evening or early morning hours. InfiniTime polls clocks during all hours of the day unless configured to do otherwise. This will cause communication errors on clocks that are unavailable.