The Juno can be connected directly to a USB Port on the InfiniTime server through use of a USB to Serial Converter, which is included with the purchase of a Juno Reader. The included three foot USB to Serial cable permits placement of the Juno within close proximity of the server. If the Juno must be placed farther from the server, a USB Extension cable can be purchased from your local electronics and computer supply store. Standard, or passive, USB Cables are available up to 16.5 Feet while active cables which boost signal strength to allow for longer distances are available in longer lengths.
Benefits of connecting the Juno directly to the InfiniTime Server via USB include fast data transfer, and simplified setup. Follow the steps below to prepare the Juno for connection to the InfiniTime Server via USB:
1. Connect the Juno to the InfiniTime Server using the included USB to Serial Converter.
2. No additional drivers or software is required, the USB Driver is installed during InfiniTime Installation.
3. Follow the steps below to enter the Juno Setup Menu and ready the Juno for Direct Communication.
4. Determine the COM Port assigned to the USB to Serial Converter. Refer to the Determine COM Port for Juno Direct Communication section of this document.
5. Configure the Juno within the InfiniTime Software. Refer to the Juno Reader Setup - USB Direct Connect section of this document.
Entering Setup Menu
The setup menu can be entered by pressing the MENU button and swiping a badge that has administrative rights if prompted.
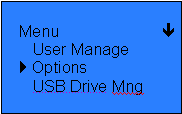
Scrolling between options is done by pressing the Up Arrow (F2) key and Down Arrow (F3) key, to select an option press on the OK (F4) key. To exit the Setup Menu press ESC (F1) key. Entrance to the Setup Menu enables configuration for the following options:
User Manage
Options
Usb Drive Mng
Sys Info
Configuring the Juno for USB Direct Connection
Enter into the Setup Menu and scroll down to select Options and Press OK (F4)

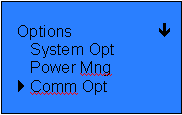
In the Options Menu scroll down and select Comm Opt and Press OK (F4)

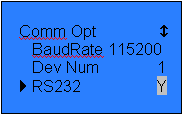
In the Comm Opt Menu scroll down until you get to the RS232 option and select it by pressing OK (F4) an changing it to Y using the up arrow (F2) or down arrow (F3) and press OK (F4) to set it.

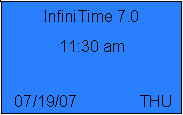
To exit press ESC (F1) several times to go back to the main display.
