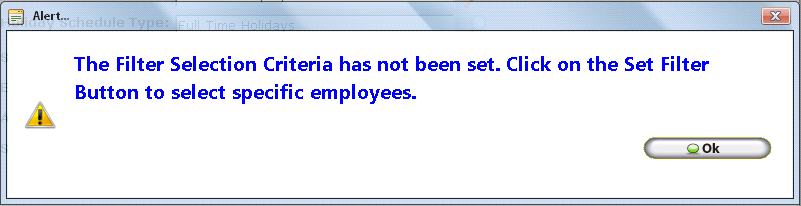
InfiniTime provides a unique and powerful interface tool that can be used to configure and assign basic settings to multiple employees, as specified using the Employee Filter. In this way InfiniTime Administrators can quickly assign policies, holiday types, shifts, etc to ten, twenty, or even hundreds of employees. Before attempting to use Quick Assign users should be familiar with use and operation of the Employee Filter. Refer to the Security section of this document for more information on the Employee Filter before continuing. It is important to note that Quick Assign requires a specific filter to be set, even if the user wishes to perform a given quick assign action for all employees. The warning below will be displayed if a filter is not set and the user attempts to Click OK on the Quick Assign Update Form.
Accessing Quick Assign:
Click on Tools
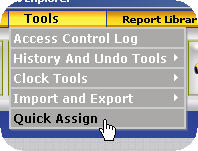
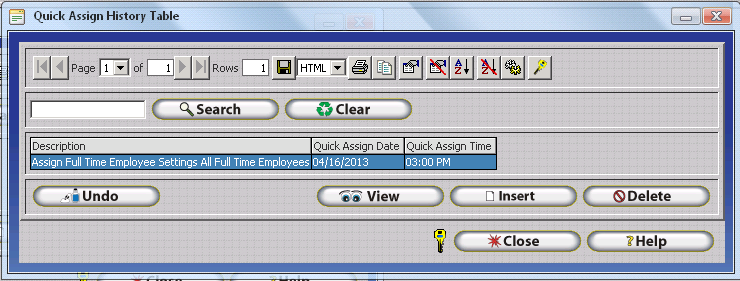
Click on Quick Assign. The Quick Assign History window will be displayed as shown below.
The Quick Assign History Table displays a history of all Quick Assign Actions performed. These actions can be undone by clicking on the Undo Button. This helps prevent time consuming troubleshooting in the event of a mistake while using Quick Assign. For example, if you were to assign a policy to all of the employees in a specific department and later notice that you assigned the wrong policy, the Quick Assign History window can be used to undo those changes.
Undo - Reverts all employees affected by the selected Quick Assign Action to their original settings. To use the Undo Feature, select the Quick Assign action you wish to Undo, then click on the Undo Button.
Technical Note: The Undo Feature takes a snapshot of current settings. Using the Undo Button simply instructs the software to restore the settings that were saved in this snapshot. The snapshot is taken before the changes specified by the quick assign are applied. It is important to note that any manual changes made after the Quick Assign will be lost. For example, lets say all of the employees in your company are on the their respective departments. Employees are split amongst the following departments: Shipping, Sales, Technical Support, and Programming, Trainees. A quick assign is used to move a group of employees from the Trainees department into the Technical Support Department. The department for Jacque, one of the former trainees, is then manually changed to Sales. If undo were used at this point all of the employees that were moved from the Trainees Department to the Technical Support Department, including Jacque, would be reset to the Technical Support Department. The manual change made to Jacque's department is lost.
View - Displays the Quick Assign Update Form populated with details of the selected Quick Assign Action. View is often useful for reviewing Quick Assign Actions prior to utilizing the Undo Feature.
Insert - Opens the Quick Assign Update Form. The InfiniTime System Administrator may then set specific settings and options and select specific employees to assign the settings to. The Quick Assign too.l
Delete - Deletes the Selected Quick Assign Action from the Quick Assign Table. It is important to note that once a Quick Assign Action is deleted, it will no longer be possible to undo the Quick Assign Action using the Undo Feature.
Click insert on the Quick Assign Table to open the Quick Assign Update Form as shown below. The Quick Assign Tool allows users to assign items from departments to schedules for multiple employees at the same time. Quick Assign will assign all specified items to employees that have been selected with the Employee Filter, which can be accessed from the bottom of the Quick Assign window. Be sure to verify that only the employees whom you wish to configure are selected. There are a few general steps which must be followed in order to successfully perform a Quick Assign Action:
1. Enter a description for the Quick Assign Action. This description will be displayed in the Quick Assign History Table and should describe the action you are performing.
2. Choose the employees you wish to configure using the Employee Filter button, located at the bottom of the Quick Assign Form.
3. Choose the items you wish to assign to employees and enter them into the quick assign as appropriate.
The items below can be assigned using the Quick Assign Tool, if nothing is specified for a field then that item will not be altered for the selected employees. Keep in mind that any alterations will be made for all employees that are specified by the Employee Filter.
If settings are not configured in the software then they will not be shown in the Quick Assign Update Form. for example: If you are not using Access Control, then the Access control group will not show in the list, if you do not have any accruals set or holiday schedules, those two items will not show in the list to be assigned.
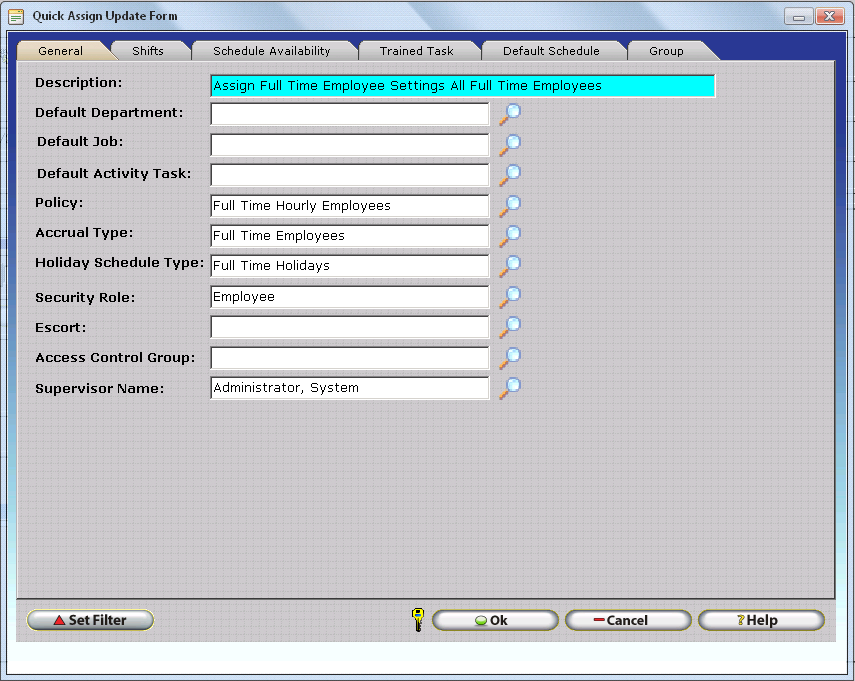
General Tab
The general
tab is used to assign general employee settings to employees specified
by the employee filter. The Lookup button ![]() can be used to choose from available
items for each setting or you can simply type the item directly into the
field. Refer to Data Entry and Navigation Assistance for more information
on the operation of Lookups and Auto Fill.
can be used to choose from available
items for each setting or you can simply type the item directly into the
field. Refer to Data Entry and Navigation Assistance for more information
on the operation of Lookups and Auto Fill.
Description - Enter a description for the Quick Assign Action. This description will be displayed in the Quick Assign History Table after the Quick Assign action is performed.
Default Department - Assigns the selected department as the default department for all employees specified by the filter.
Default Job - Assigns the selected job as the default job for all employees specified by the filter.
Default Activity Task - Assigns the selected activity task as the default activity task for all employees specified by the filter.
Policy - Assigns the selected policy to all employees specified by the filter.
Accrual Type - Assigns the selected accrual type to all employees specified by the filter.
Holiday Schedule Type - Assigns the selected Holiday Schedule type to all employees specified by the filter.
Security Role - Assigns the selected security role to all employees specified by the filter.
Escort - Assigns the selected escort to all employees specified by the filter.
Access Control Group - Assigns the selected Access Control Group to all employees specified by the filter.
Supervisor Name - Assigns the selected employee as Supervisor for all employees specified by the filter.
Shifts Tab
The Shifts Tab can be used to assign shifts to employees. Two Options are available for assigning shifts to employees using the quick assign tool. Shifts can either be reset to only those specified by the quick assign, or shifts specified by the Quick Assign can be appended to the settings previously configured for employees.
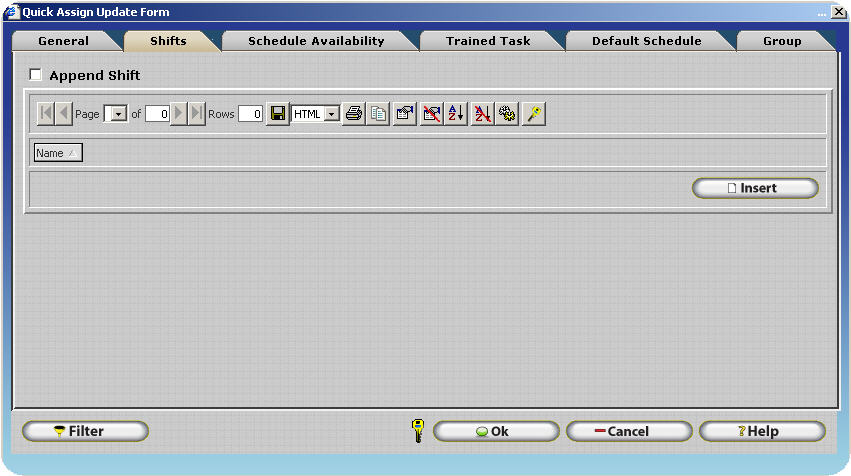
To Set Employee Shifts
Ensure the Append Shift check box is unchecked and use the insert button to specify shifts that will be assigned to the specified employees. Ensure a description is specified on the General Tab and check to make sure the Employee Filter is set appropriately. Click OK to Set Employee shifts.
All employees specified by the employee filter will have any shifts currently assigned to them removed and the shifts specified by the Quick Assign will be assigned.
To Append Shifts to an Employee
Ensure the Append Shift check box is checked and use the insert button to specify shifts that will be assigned to the specified employees. Ensure a description is specified on the General Tab and check to make sure the Employee Filter is set appropriately. Click OK to Assign the specified shifts.
All employees specified by the employee filter will be assigned the shifts specified by the Quick Assign. Any shifts currently assigned to employees will remain.
Schedule Availability Tab
The Schedule Availability Tab can be used to assign schedule availability types to employees. Two Options are available for assigning Schedule Availability Types to employees using the quick assign tool. Schedule Availability Types can either be reset to only those specified by the quick assign, or Schedule Availability Types specified by the Quick Assign can be appended to the settings previously configured for employees.
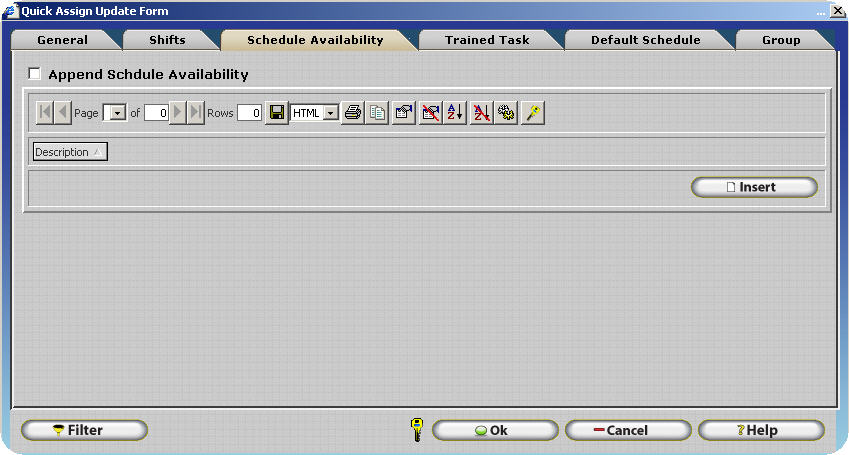
To Set Schedule Availability Types
Ensure the Append Schedule Availability check box is unchecked and use the insert button to specify Schedule Availability Types that will be assigned to the specified employees. Ensure a description is specified on the General Tab and check to make sure the Employee Filter is set appropriately. Click OK to Set Employee shifts.
All employees specified by the employee filter will have any Schedule Availability Types currently assigned to them removed and the Schedule Availability Types specified by the Quick Assign will be assigned.
To Append Schedule Availability Types to an Employee
Ensure the Append Schedule Availability check box is checked and use the insert button to specify Schedule Availability Types that will be assigned to the specified employees. Ensure a description is specified on the General Tab and check to make sure the Employee Filter is set appropriately. Click OK to Set Employee shifts.
All employees specified by the employee filter will be assigned the Schedule Availability Types specified by the Quick Assign. Any Schedule Availability Types currently assigned to employees will remain.
Trained Task Tab
The Trained Task Tab can be used to assign shifts to employees. Two Options are available for assigning shifts to employees using the quick assign tool. Trained Task can either be reset to only those specified by the quick assign, or shifts specified by the Quick Assign can be appended to the settings previously configured for employees.
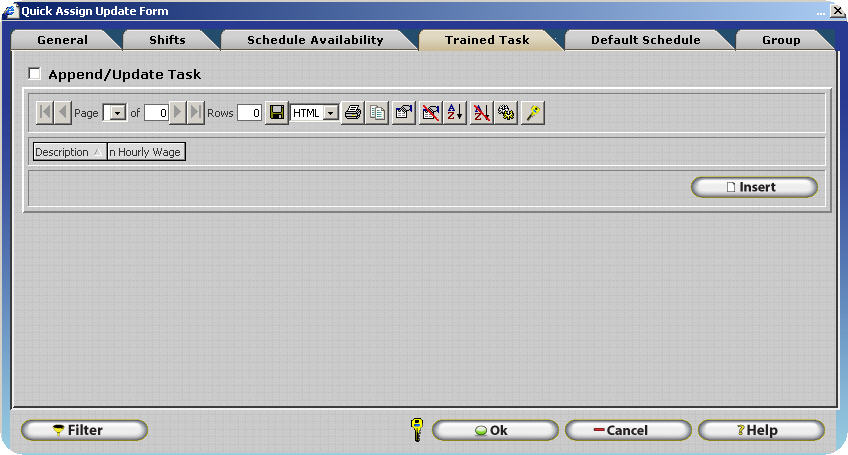
To Set Employee Trained Tasks
Ensure the Append Trained Task check box is unchecked and use the insert button to specify Trained Tasks that will be assigned to the specified employees. Ensure a description is specified on the General Tab and check to make sure the Employee Filter is set appropriately. Click OK to Set Employee Trained Tasks.
All employees specified by the employee filter will have any Trained Tasks currently assigned to them removed and the Trained Tasks specified by the Quick Assign will be assigned.
To Append Trained Tasks to an Employee
Ensure the Append Trained Task check box is checked and use the insert button to specify Trained Tasks that will be assigned to the specified employees. Ensure a description is specified on the General Tab and check to make sure the Employee Filter is set appropriately. Click OK to Assign the specified Trained Tasks.
All employees specified by the employee filter will be assigned the Trained Tasks specified by the Quick Assign. Any Trained Tasks currently assigned to employees will remain.
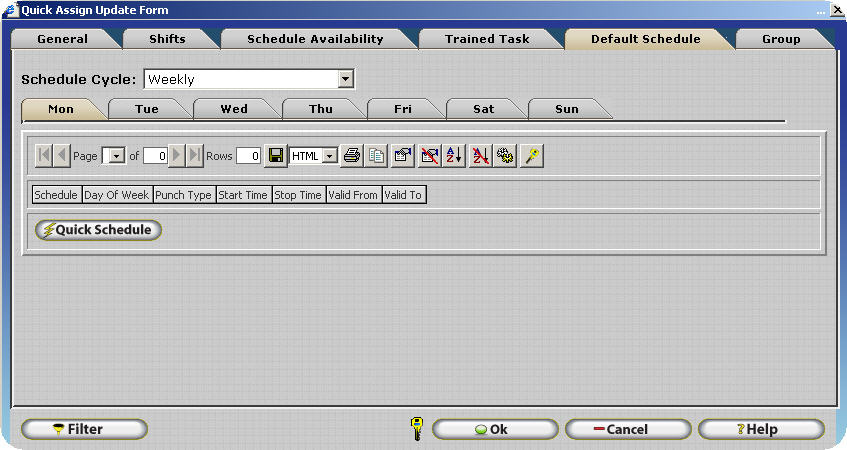
Default Schedule Tab
The Default Schedule Tab can be used to configure the Default Schedule for multiple employees at a time. This is especially useful when multiple employees in different departments have the same schedule. Simply use the Employee Filter to specify the employees whose Default Schedule will be updated and use the Quick Schedule button to define a schedule. Clicking OK will assign the specified schedule to all employees designated by the Employee Filter.
Group Tab
The Group Tab can be used to configure Groups for multiple employees at a time. Simply use the Employee Filter to specify the employees whose Groups will be updated and use the Change button to select a group from each group level. Clicking OK will assign the specified schedule to all employees designated by the Employee Filter. Refer to Chapter 5 Employee Setup - Employee Update Form - Groups for more information on the use and configuration of groups.
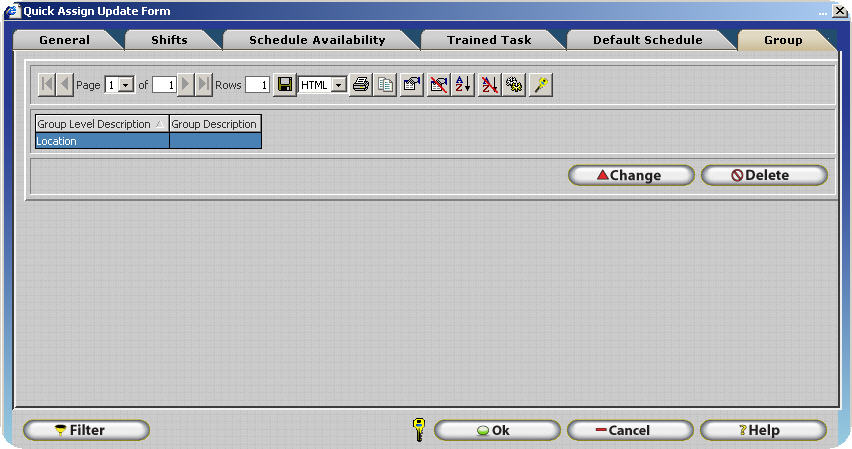
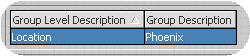
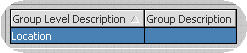
Note: A group description must be specified in order for the group assigned to the employee to be altered.
For Example:
The image below shows a blank group description. In this case, a group description has not yet been specified.
The Image below shows a filled group description. In this case, a group description has been specified and the Phoenix group will be assigned to all employees specified by the Employee Filter.