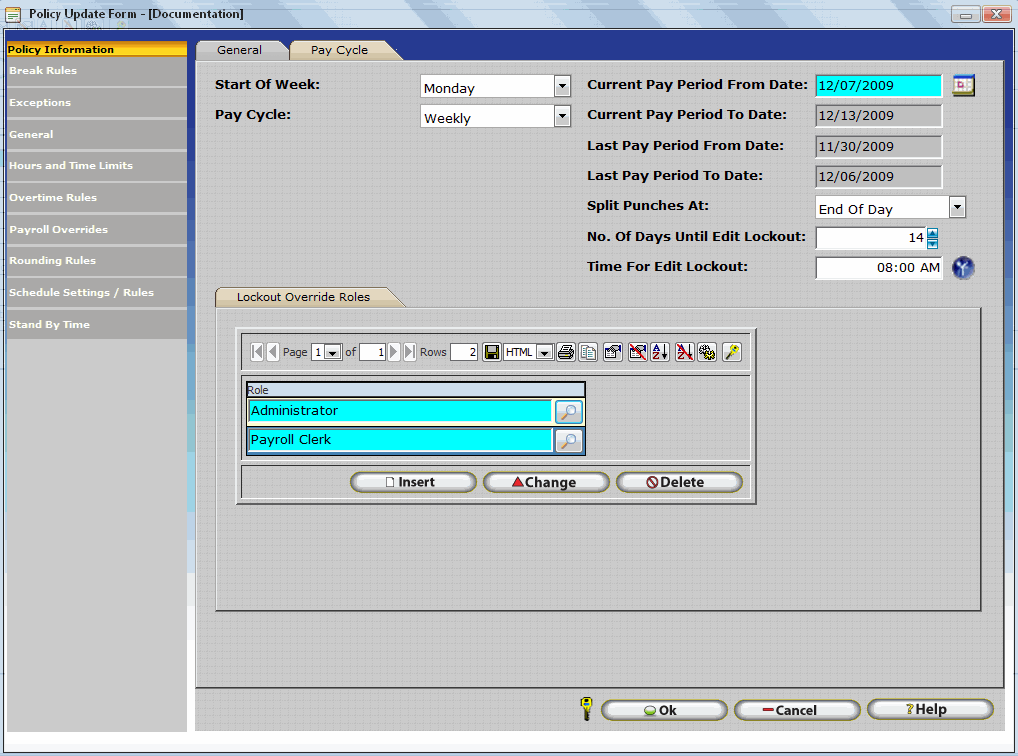
The employee Pay Cycle is used to define how often employees assigned to the policy are paid. Additional options related to the Payroll Cycle, such as punch splitting and edit lockout, are also available on the Pay Cycle Tab.

Ok – Exits the window and saves any changes to the database.
Cancel – Exit the window without saving changes.
Help – View Help documentation for the current screen.
Start Of Week - Defines the starting day of the week. Think of the start of week day as the day Weekly Overtime Hours are reset. For example, many companies use Monday as the start of week. In this case, weekly overtime hours are calculated from Monday to Sunday. The start of week day also affects Date Range Selections such as 'This Week' and 'Last Week' throughout the InfiniTime Software.
Pay Cycle - Describes the date ranges for which employees are paid. It is important to note that the Pay Cycle is independent of the dates employee's receive their paychecks. InfiniTime is a Time and Attendance Application and focuses primarily on dates worked by employees rather than cutting paychecks. Paychecks can be, and often are, given to employees independently of the actual pay cycle. For example, many companies choose to hold employee paychecks back for one pay period. Pay Cycle dates describe only the dates employees are working from one pay period to the next. With this in mind, select the Pay Cycle that best describes the group of employees that will be assigned to the policy. InfiniTime™ offers 6 pay cycle options:
Weekly: If you pay your employees weekly simply select weekly from the drop down menu and enter the beginning date of your pay period on the Current Pay Period From Date box. Once you have entered the date check and confirm the reference date below that window.
Bi-Weekly: If you pay your employees bi-weekly simply select Bi-Weekly from the drop down menu and enter the beginning date of your pay period on the Current Pay Period From Date box. Once you have entered the date check and confirm the reference date below that window.
Monthly: If you pay your employees monthly simply select Monthly from the drop down menu. A window appears with a date, enter your pay period starting day. Confirm the Pay Period From Date. If it is not correct make any necessary modifications. Once you have entered these dates check and confirm the reference dates.
Semi-Monthly: If you pay your employees semi monthly simply select Semi Monthly from the drop down menu. Two windows appear with a date, enter the appropriate date for the first and second pay period. Confirm the Pay Period From Date. If it is not correct make any necessary modifications. Once you have entered these dates check and confirm the reference dates.
Custom: If your pay cycle is a specific number of days in length and does not start or end in respect to the work week or specific days of the month a Custom Pay Cycle can be used. Select Custom from the drop down menu and enter the length of your pay period, in days, in the Custom Interval Amount field. Set the Current Pay Period From Date to the start date of the current pay period and confirm the Current Pay Period To Date and the Last Pay Period Dates are set correctly.
Manual: If your pay cycle does not adhere to other Pay Cycle Methods available from within InfiniTime the Manual Pay Cycle can be used. A manual pay cycle requires the user to manually set the Pay Period Start and End Dates for both the Current and Last Pay Period on a regular basis. It is suggested that Pay Cycle dates for the next pay period be set on the last day of the current pay period after or just before close of business.
Current Pay Period From Date - The Starting Date of the current pay period.
Current Pay Period To Date - The Ending Date of the current pay period.
Last Pay Period From Date - The Starting Date of the last pay period.
Last Pay Period To Date - The Ending Date of the last pay period.
Split Punches at - Split Punches includes options for splitting employee hours between each day, each week, or each pay period. Each option is described below with examples for clarity.
End of Day: If this option is selected employee working hours will be split at the end of day. By default, midnight is considered the end of day though this can be changed by setting the 'Clock In Missed Punch Day Change Time' and 'Clock Out Missed Punch Day Change Time' settings on the General Tab of the Overtime Rules section of the policy to the same time. For example, the settings below will change the end of day to 11:00 PM.

When employees work over the end of day their hours will automatically be split between the day their working period started and the day on which it ended. Examples are shown below.
End of Day at 11:00 PM

Note: The example above shows an end of day at 11:00 PM. Hours from 11/7/09 11:00 PM to 11/08/09 at 11:00 PM are considered as worked on 11/08/09 as illustrated by the report below.

End of Day at 12:00 AM


End of Week: If this option is selected employee working hours will be split at the end of the work week. Remember, the End of the Work week is determined by the Start Of Week Setting. For example, if Monday is the Start of the Week then End of Day Sunday is considered the End of the Week. With this in mind the End of Day setting is important when splitting Punches at the End of Week aswell. By default, midnight is considered the end of day though this can be changed by setting the 'Clock In Missed Punch Day Change Time' and 'Clock Out Missed Punch Day Change Time' settings on the General Tab of the Overtime Rules section of the policy to the same time. It should be noted that punches will only be split at the end of the week. Employees who work across the end of day at other times during the week will show missing punches on their timecard.
Split Punches at End of Week: End of Day at 11:00 PM
The example below depicts a Weekly Pay Period with Monday as the Start of Week. The End of Day Time is configured as 11:00 PM.


Split Punches at End of Week: End of Day at 12:00 AM
The example below depicts a BiWeekly Pay Period with Monday as the Start of Week. The End of Day Time is 12:00 AM.


End of Pay Period: If this option is selected employee working hours will be split at the end of the pay period. Remember, the End of the Pay Period is determined by the Pay Cycle and the time at which the day ends. End of Day on the Last day in the pay cycle is considered the end of the pay period. With this in mind the End of Day setting is important when splitting Punches at the End of the Pay Period. By default, midnight is considered the end of day though this can be changed by setting the 'Clock In Missed Punch Day Change Time' and 'Clock Out Missed Punch Day Change Time' settings on the General Tab of the Overtime Rules section of the policy to the same time. It should be noted that punches will only be split at the end of the pay period. Employees who work across the end of day at other times during the pay period will show missing punches on their timecard.
For example: An employee working on the last day of the pay period on a midnight shift starts at 8:00pm and clocks out at 6:00am the following morning on the new pay period. For the last pay period he will receive hours worked as 8:00pm to 11:59pm and begin the new pay period with 12:00am to 6:00am.
Number Of Days After Pay Period Until Edit Lockout - This option sets the number of days after the pay period ends that the administrator can edit any time card activity. After that amount the administrator cannot make any more changes to the time card activity.
Time For Edit Lockout - This option sets the time when the administrator will not be allowed to make any changes to the time card activity.
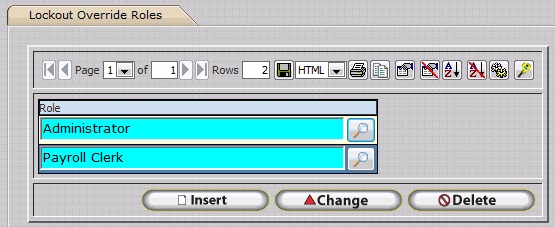
Lockout Override Roles - By default, edit lockout is applied to all employees within the InfiniTime Application. This prevents users from editing employee timecards after a certain period of time has elapsed. Lockout override can be used to exclude specific security roles from Edit Lockout. For example, inserting the Administrator and Payroll Clerk Security roles as shown below ensures that Administrators and Payroll Clerks can always edit employee timecards even after the Edit Lockout period has elapsed. Employees assigned to security roles not present in the Lockout Override list will be unable to edit timecards after the Edit Lockout period has elapsed.
