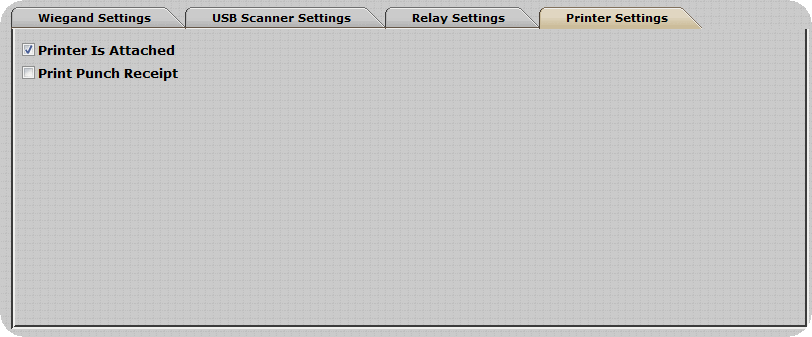
The Thor Terminal is equipped for use with the TM-T88IV Thermal Printer. The software and the Thor allows you to print several reports straight from the terminal if you have the thermal printer attached.

For the printer to work the option Printer Is Attached must be checked, if unchecked the printer will not function. No reports will be sent to the printer.
Settings:
Printer Is Attached: if this setting is checked then the printer will able to print the reports, if unchecked then all menus on the reader that have options to print will no longer have that option. To see which menus have the print options please see bellow for the individual reports available from the Thor.
Print Punch Receipt: if this option is checked, a receipt will print every time a successful time and attendance punch is recorded.
Reports available from the Thor
Total Hours Report - Prints all records displayed on the View Total Hours Screen for an individual employee.
To View the View Total Hours Screen:
Ensure the Hours Function is assigned to a function key and record(s) are present in the “Employee Activity Totals Table” for an employee.
Enter the Hours Function Menu from the main menu.
Enter the ID and Password for an employee with records in the “Employee Activity Totals Table”
Select the View Hour Totals option by pressing F1.
Records in the “Employee Activity Totals Table” for the employee are displayed on this screen.
Press the Menu Key.
A Print Option is displayed. Pressing OK should print the report below. All records on the screen for the authenticated employee should be printed on the report.
Accrual Totals Report - Prints all records displayed on the Accrual Totals Screen for an individual employee
To View the Accrual Totals Screen:
Ensure the Hours Function is assigned to a function key and record(s) are present in the “Employee Accrual Totals Table” for an employee.
Enter the Hours Function Menu from the main menu.
Enter the ID and Password for an employee with records in the “Employee Accrual Totals Table”
Select the View Accr. Totals option by pressing F2.
Records in the “Employee Accrual Totals Table” for the employee are displayed on this screen.
Press the Menu Key.
A Print Option is displayed. Pressing OK should print the report below. All records on the screen for the authenticated employee should be printed on the report.
In & Out Board Report - Prints all records as displayed on the In / Out Board.
To View the In / Out Board:
Ensure multiple employee records are present on the Thor.
Ensure the In / Out Function has been assigned to a Function Key.
Enter the In / Out Board by pressing the appropriate Function Key while at the main menu.
Press the Menu Key. A Print Option is displayed. Pressing OK should print the report below. All records on the screen for the authenticated employee should be printed on the report.
Timecard Report - This report prints all employee timecard table records for an individual as displayed by the ‘View Timecards’ screen.
To access the “View Timecards” Screen:
Ensure the Employee Info Function is assigned to a function key and records are present in the “Employee Timecard Table” for an employee.
Enter the Employee Info Function Menu from the main menu.
Enter the ID and Password for an employee with records in the “Employee Timecards Table”
Select the Timecards option by pressing F1.
Records in the “Employee Timecards Table” are displayed on this screen.
Press the Menu Key.
A Print Option is displayed. Pressing OK should print the report below. All records on the screen for the authenticated employee should be printed on the report.
Schedule Report - Prints all records displayed on the Schedule Screen for the authenticated employee.
To View the Schedule Window:
Ensure the Employee Info Function is assigned to a function key and records are present in the “Employee Schedule Table” for an employee.
Enter the Employee Info Function Menu from the main menu.
Enter the ID and Password for an employee with records in the “Employee Schedules Table”
Select the Schedule option by pressing F3.
Records in the “Employee Schedule Table” are displayed on this screen.
Press the Menu Key.
A Print Option is displayed. Pressing OK should print the report below. All records on the screen for the authenticated employee should be printed on the report.
Messages - Prints all relevant information for the message highlighted on the Thor Terminal.
This report is printed from the Print Option which can be accessed as follows:
Ensure the Employee Info Function is assigned to a function key and records are present in the “Employee Messages Table” for an employee.
Enter the Employee Info Function Menu from the main menu.
Enter the ID and Password for an employee with records in the “Employee Messages Table”
Select the Read Message option by pressing F2.
Records in the “Employee Messages Table” are displayed on this screen.
Select a message with the directional buttons and press the Menu Key.
A Print Option is displayed. Pressing OK should print the report below for the selected message.
Punch Receipt - Prints after successful verification for punch transactions via PIN Entry, Fingerprint Identification, or Badge Swipes. The report is modeled after the ‘Last Punch’ Screen.
To View the Last Punch Screen:
Ensure an employee is present in the clock.
Enter the Employee’s ID at the main menu and Press OK.
Enter the Employee’s Password and Press OK.
Ensure the Last Punch Function is assigned to a function key.
Enter the Last Punch Function by pressing the corresponding function key.
Enter the ID of the employee you punched in for and Press OK.
Enter the Password of the employee you punched in for and Press OK.
The Last Punch Screen will be displayed. The same fields used to populate this screen should be used for the Punch Receipt Report below.