
Job Costing makes it possible for the user to track employee hours under various levels. Job Costing is generally used in businesses where employee labor costs are of special interest when compared to the cost of finished goods such as manufacturing or production related organizations. Even though Job Costing adds a great deal of functionality to the InfiniTime Application it is not used by all companies and as such is disabled by default. Job Costing related fields such as Job and Task will not be displayed within the application if Job Costing is disabled.
In general Job Costing involves the tracking of three types of information - Internal Departments, Job / Customer, and Task as outlined below.
Internal Departments may refer to separate categories of activity within an organization. Tracking Internal Departments with Job Costing makes it possible for an organization to identify how labor costs are distributed throughout various categories within the company. Example Activity Categories are Administration, Installation, Construction, Electrical etc.
Job / Customer refer to individual Job Numbers or Customer accounts under which specific tasks are performed. Tracking Jobs / Customers with Job Costing makes it possible for an organization to clearly identify all labor related costs for a specific Customer or Job. Jobs / Customers are generally assigned an Invoice or Job Number which can be used within the organization to refer to the Job.
Tasks refer to actions performed by employees under a specific Activity Category or Job / Customer. Tracking Tasks makes it possible for an organization to clearly identify the amount of time generally required to perform a specific task. Once this is understood employees who take exceptionally long to perform a given task are easily identified. Tasks vary based upon the working environment. Example tasks for a Custom Cabinet Shop might include Framing, Sanding, Staining, Painting, and Installation.
Premium Pay can be used to define Premiums, or bonuses in the form of an increased wage, which are paid to employees based upon the Shift, Department, Job, or Task the employee works on. Refer to the Pay Premium Introduction for more information.
While there are various benefits for tracking these items they may not be of interest to all companies. Customers may choose to track one, two, or all of these items.
Single Level: If only one of the above information types is of interest to your company Job Costing is not required. Simply configure Departments to represent the appropriate Internal Departments, Jobs / Customers, and Tasks within your organization. It is important to note employee activity can only be associated with one Department at a time.
Two Levels: If two of the above information types are of interest to your company both Departments and Jobs must be configured within the InfiniTime Application. It should be noted that InfiniTime Departments are required. All employee activity will be associated with a department. In a two level system the first level generally corresponds to Internal Departments or Jobs / Customers while the second level corresponds to Jobs. Departments are considered the first Job Costing Level within InfiniTime and should be configured with the appropriate information. For example, if Internal Departments such as Administration, Construction, Installation etc. are to be your first Job Costing Level then these items should be configured as Departments within the InfiniTime System. Alternatively Jobs / Customers may be used as your first Job Costing level. In this case Job Numbers or Customer Names should be configured as Departments within InfiniTime. Jobs are considered the second Job Costing Level within InfiniTime and should be configured with any Tasks that apply to your company such as Welding or Painting.
NOTE: In some scenarios only Jobs / Customers and Tasks or Internal Departments and Tasks are of interest to a specific company. However the company may use two levels of tasks. In this scenario three job costing levels are used for only two items of information. Jobs / Customers or Internal Departments would correspond to Departments within InfiniTime. The first task level would refer to Jobs within InfiniTime and the second task level would refer to Tasks within InfiniTime. The chart below shows an example of this configuration.
Job / Customer (Configured As InfiniTime Departments) |
Task 1 (Configured as InfiniTime Jobs) |
Task 2 (Configured as InfiniTime Tasks) |
Invoice 1160072 |
Installation |
Old Cabinet Removal |
Invoice 1160072 |
Installation |
Hang Wall Cabinets |
Invoice 1160072 |
Installation |
Install Base Cabinets |
Three Levels: If all three of the above information types are of interest to your company Departments, Jobs, and Tasks must be configured within the InfiniTime Application however the type of information configured within Departments, Jobs, and Tasks differs from company to company. It is important to recognize Departments are required within InfiniTime. All employee activity is associated with a department. For this reason most companies choose to configure Internal Departments as Departments within InfiniTime. Example job costing configurations using Three Levels with Internal Departments, Job / Customers, and Tasks are provided below.
Internal Department (Configured As InfiniTime Departments) |
Customer (Configured as InfiniTime Jobs) |
Task (Configured as InfiniTime Tasks) |
Frame Construction |
Gilbert's Crab Boats |
Welding |
Hull Construction |
Gilbert's Crab Boats |
Sanding |
Assembly |
Gilbert's Crab Boats |
Assembly |
Internal Department (Configured As InfiniTime Departments) |
Job Number (Configured as InfiniTime Jobs) |
Task (Configured as InfiniTime Tasks) |
Frame Construction |
17251 |
Welding |
Hull Construction |
17251 |
Sanding |
Assembly |
17251 |
Assembly |
Three Levels w/ Internal Departments, Customers, & Jobs: In some scenarios Tasks are not of interest while both Customers and individual Jobs must be tracked. With this configuration the first level generally corresponds to Internal Departments while the second and third levels correspond to Customers and Jobs respectively. Remember all activity is associated with a department within InfiniTime. An example of this configuration is shown below.
Internal Department (Configured As InfiniTime Departments) |
Customer (Configured as InfiniTime Jobs) |
Job Number (Configured as InfiniTime Tasks) |
Custom Programming |
Jan's Software |
100235 |
Custom Reports |
Wellington School District |
200257 |
Technical Support |
Wellington School District |
300987 |
Three levels w/ Two Levels as Tasks: In some scenarios Customers / Jobs are not of interest while Internal Departments and multiple task levels must be tracked. With this configuration the first level generally corresponds to Internal Department while the second and third levels correspond to tasks. An example of this configuration is shown below.
Internal Department (Configured As InfiniTime Departments) |
Task 1 (Configured InfiniTime Jobs) |
Task 2 (Configured as InfiniTimeTasks) |
Cabinets |
Installation |
Old Cabinet Removal |
Cabinets |
Installation |
Hang Wall Cabinets |
Cabinets |
Installation |
Install Base Cabinets |
Administration |
Auditing |
Taxes |
Ultimately the type of information tracked using Departments, Jobs, and Tasks is up to the user. Simply because they are referred to as 'Departments' or 'Jobs' does not mean they must be used for internal departments and job numbers. When configuring Job Costing users must first identify what types of information will be tracked by job costing. Once the information to be tracked has been identified a hierarchy is generally evident when looking at how the items relate to each other. This hierarchy can then be used to organize the items into three levels. The highest level should be configured as departments within InfiniTime, the next as Jobs, and the last as Tasks. While a maximum of three levels are available it is not necessary to use all three levels. For two level systems InfiniTime Departments correspond to the first Job Costing Level while Jobs correspond to the second Job Costing Level.
Three methods are available for transferring between Departments, Jobs, and Tasks depending on the chosen solution for gathering employee activity. Two methods are available for choosing from Departments, Jobs, and Tasks using a hardware terminal. The method used for selecting a specific Department, Job, or Task differs depending on terminal model. A list of the method supported by each terminal is provided below. The first method for selecting Departments, Jobs, and Tasks is a simple list format. All available Departments, Jobs, or Tasks are displayed in a list. Employees can scroll up and down the list using buttons on the reader to select the desired item. The second method for selecting Departments, Jobs, and Tasks is by Item Number. In this case an item refers to a specific Department, Job, or Task. The item number corresponds to the Department Number for Departments, the Job Number for Jobs, and the Task Number for Tasks. When employees press the Labor Switching or Transfer Button they will be prompted to enter the Department Number to select the Department they wish to work under followed by the Job and Task number if applicable. When many items are available Transferring by Item Number is the most efficient transfer method though steps must be taken to ensure it is configured appropriately.
1.) Identify the number of Departments, Jobs, and or Tasks which will be tracked for Job Costing Purposes. This information is invaluable when designing a numbering system for Departments, Tasks and Jobs.
2.) Determine item number length. Item Numbers for Departments and Tasks generally range between 2 and 4 digits while Job numbers range from 4 to 8 digits. The number of Departments, Jobs, or Tasks to be tracked can be used to determine item number length requirements. for example a one digit Department number has a maximum of ten values. (0 to 9) It would not be possible to track 12 departments with a one digit department number as the department number must be unique. Future growth should also be accounted for when designing a numbering system. A company with 8 departments would do well to use a two digit department number to allow for a maximum of 100 departments. (0 to 99)
3.) List all active Departments, Jobs, and Tasks and assign each an Item Number with the chosen length. Refer to this list when configuring Departments, Jobs, and Tasks within InfiniTime. Ensure each item has a unique item number. Note: All Department Numbers, Job Numbers, and Task Numbers must be unique though they are independent of each other. For example a Department, Job, and Task with an item number of 10 can be created. In this example the Department Number, Job Number, and Task Number would simply all be set to 10.
Example Item List: ABC Carpentry & Contractors
Item |
Type |
Item Number |
Construction |
Department |
10 |
Electrical |
Department |
20 |
Philly Mae Pizzeria |
Job |
10000 |
Suzzies Pizzeria |
Job |
10001 |
Framing |
Task |
1001 |
Drywall |
Task |
1002 |
Wiring |
Task |
2010 |
Engineering |
Task |
2011 |
The above example shows a subset of all Tasks, Departments, and Customers currently active at ABC Carpentry & Contractors. From the examples the chosen item number lengths are evident:
Department Numbers - 2 Digits
Job Numbers - 5 Digits
Task Numbers - 4 Digits
A pattern also exists in the Task Numbers for readability and ease of use. This is an optional design concept which may be useful in some organizations. ABC Carpentry and Contractors employees a variety of employees from Electrical Engineers and Contractors to Carpenters. Some tasks are specific to a particular department and include the department number inside of the task number to show this relationship. IE: Wiring, #2010 is related to the Electrical Department #20. Overall, the most important idea when designing a numbering system for Departments, Jobs, and Tasks is to ensure numbering remains consistent.
Item Lookup, the third method for transferring between Departments, Jobs, and Tasks, is only available within the InfiniTime Employee and Punch Modules. Employees can type the first few letters of the Department, Job, or Task name and the remaining characters will be automatically filled. They also have the option of using the Lookup Tool which displays all available Departments, Jobs, or Tasks in a searchable list.
Data Collection Terminal |
Supported Labor Transfer Method |
Athena |
Item List |
Juno |
Item List |
Luna |
Item List |
Scout |
Transfer by Item Number |
Thor |
Transfer by Item Number |
Zephyr |
Item List |
InfiniTime Employee & Punch Modules |
Item Lookup |
Note: Allow PC Punch Labor Switching must be checked before employees will be able to choose their Department, Task, or Job from the InfiniTime Employee & Punch Modules
For information regarding what types of information can be entered into Departments, Jobs, and Tasks for Job Costing purposes please refer to the Job Costing Introduction. Remember any combination of Internal Departments, Jobs / Customers, and Tasks can generally be used within these areas of InfiniTime.
Departments within InfiniTime are used as the first Job Costing Level. It should be noted that departments are a required field within the application and as such all employee activity will be associated with a Department. It is important to keep this information in mind when using Departments for Job Costing purposes. Since all employee activity will be associated with a Department steps should be taken to ensure InfiniTime Departments correspond to the highest level of Job Costing information.
For example many office companies consider Internal Departments the highest Job Costing Level in order to ensure all employee activity is related to a specific category of work such as Payroll, Shipping, Technical Support, and Programming. Manufacturing may prefer to use Customers or Job Numbers as the highest level in order to ensure all employee activity is related to a Customer or Job.
To Configure Departments within InfiniTime for use with Job Costing:
1.) Identify the type of information which will be tracked in InfiniTime Departments.
2.) It often helps to create a list all current items under the chosen type of information. For example if Job Numbers are to be used as the first Job Costing Level list all current Job Numbers and any related information. Depending on the information being tracked within InfiniTime the list should contain the following:
Information Type |
Department Description Field |
Department Cost Center Field |
Department Number Field |
Internal Departments |
Department Name |
Alphanumeric Code or other Payroll Identifier |
Department Number |
Customers / Jobs |
Customer or Job Name |
Alphanumeric Code or other Payroll Identifier |
Customer / Job Number |
Tasks |
Task Name |
Alphanumeric Code or other Payroll Identifier |
Task Number |
3.) Create one department for each listed item. Ensure the Cost Center and Department Numbers are configured appropriately.
The Department Table displays a list of all Departments configured in the software. Departments are used to separate employee hours performed under different disciplines and / or types of activity. Employees can punch into and out of departments in order to track hours worked under separate departments such as Programming, Technical Support, or Shipping or separate tasks such as Welding, Painting, or Finish Work. Initially, it is important to understand the following concepts regarding InfiniTime Departments and Job Costing:
Insert - Clicking the Insert button opens the Department Update Form to create a new department. Add as many departments as needed.
Change - Displays the Department Update Form for the selected the Department. The InfiniTime Administrator may then make changes as desired.
Delete - Clicking the Delete button will remove the highlighted department from the list.
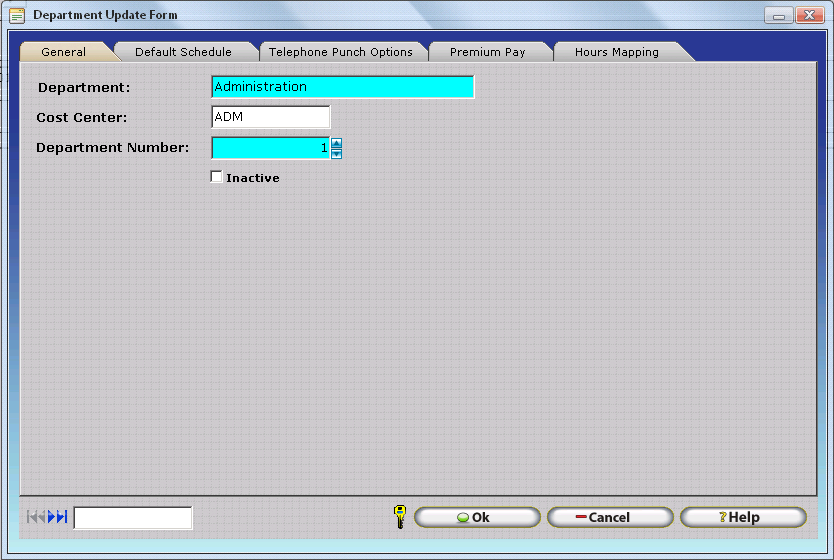
Department - Enter the given name of a department within the organization.
Cost Center - Some Accounting Packages and Payroll Services require this field in order to import InfiniTime data. If it is not required, this field may be left blank. Your Inception Technologies Implementation Specialist can help you determine if the Department Cost Center field is required for any specific payroll export. Using the same cost center for multiple departments will cause activity from both departments to be lumped together into a single cost center or pay code when the activity is exported to payroll.
Department Number - Assign a department number as an additional identifier for Departments. No two departments may have the same department number.
Inactive - Selecting this check box will cause the department not to appear as a selection in InfiniTime nor will any hours worked within this department show up on reports.
Default - InfiniTime permits one department to be set as the Default Department. The default department will automatically be assigned to new employees when they are created..
The default schedule within a department record is used to enter a schedule that is used for all employees assigned to the department. It is important to note that this schedule is not required, but may be used for scheduling purposes and is subject to the schedule hierarchy. Schedule entries assigned to employees take precedence over each other depending on their place in the schedule hierarchy as outlined below. The hierarchy is arranged by schedule priority from top to bottom.
For example, the default schedule defined on an employee’s policy would be ignored if a default schedule was configured for the employee in their employee or department record.
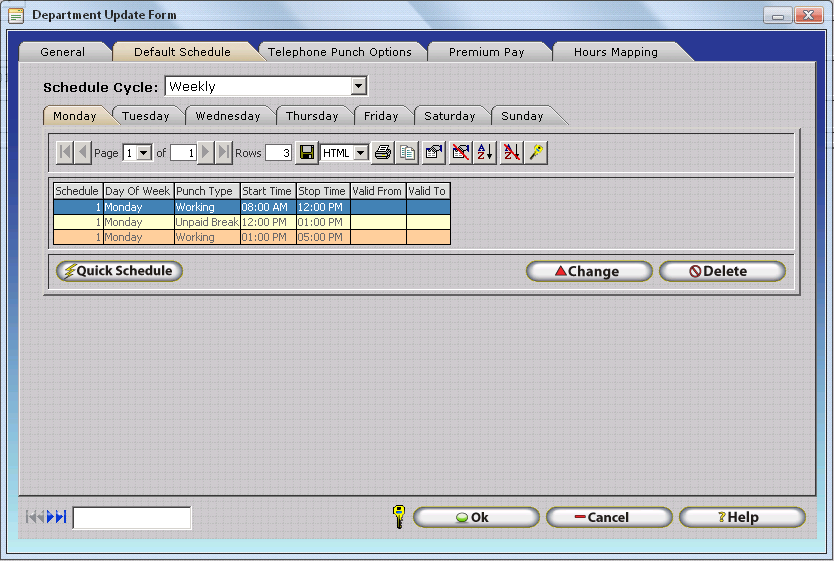
Quick Schedule - Opens the Quick Default Schedule Tool which permits InfiniTime Administrators to define a default schedule for all employees assigned to the respective department. Additional details on use of the Quick Default Schedule Tool can be found in the Scheduling Section of this document.
The Telephone Punch Options Tab of the Department Update Form permits entry of specific phone numbers which are permitted to perform a Department Transfer into the respective department. In this way, the InfiniTime Administrator can control which departments employees are permitted to transfer to. This feature is especially useful for organizations who use Department Pay Premiums. The Telephone Punch Options tab will only be displayed on the Department Update Form if the customer's InfiniTime Software License includes the Telephone Punch Module.
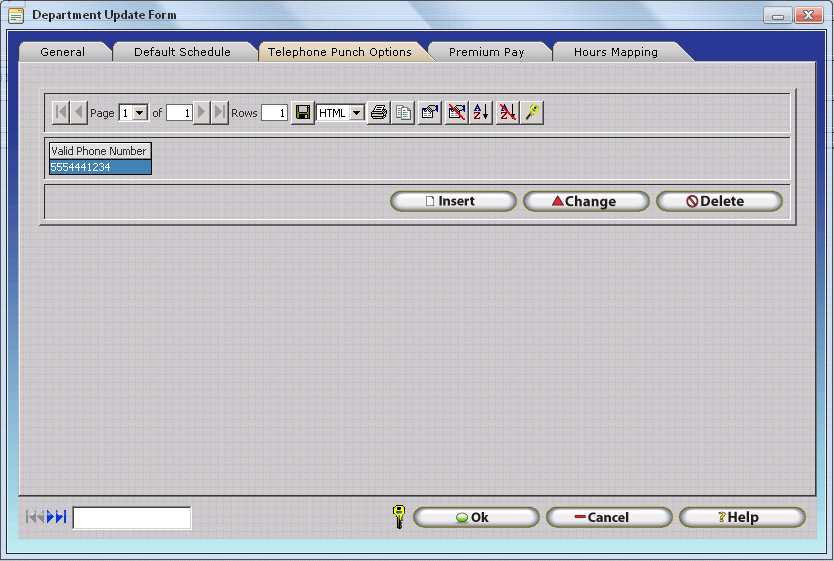
Insert - Opens the Department Valid Telephone Number Update Form which can be used to add individual Valid Telephone Numbers to the Department Update Form. Valid Telephone Numbers should be entered in a 10 digit format including the area code without dashes.
Change - Opens the Department Valid Telephone Number Update Form for the selected Valid Telephone Number. The InfiniTime Administrator may then make changes to the Valid Telephone Number as desired.
Delete - Deletes the selected Valid Telephone Number from the Valid Telephone Number Tab. Keep in mind, employees will be permitted to transfer to the respective department only if the phone number they are calling from is present in the list.
Note: If no Valid Telephone Numbers are defined for a given department, employees may transfer to the department from any telephone number.
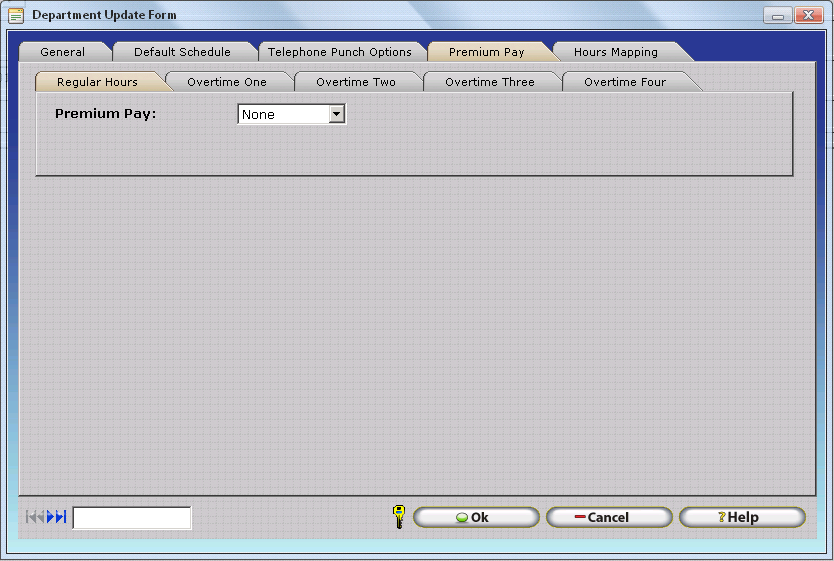
Premium Pay makes it possible to define Premiums, or bonuses in the form of an increased wage. Department premiums are paid when employees work in a given department which has premiums configured. Premiums can be configured separately for the Regular, Overtime One, Overtime Two, Overtime Three, and Overtime Four hour types. This flexibility makes it possible to meet the needs of a variety of special payment premiums. Refer to the Pay Premium Introduction section of this document for more information on how Pay Premiums are calculated and how to configure them.
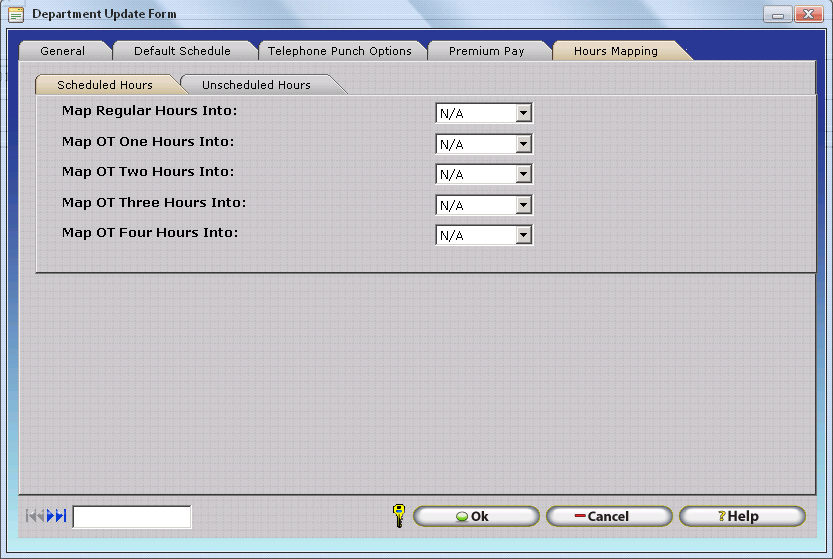
Hours Mapping permits employee hours worked in a given hours type to be mapped to a different hours type based on specific conditions such as:
Scheduled Hours worked on a specific Department
Scheduled Hours worked on a specific Job
Scheduled Hours worked on a specific Task
Scheduled Hours worked on a specific Other Activity Type
Unscheduled Hours worked on a specific Department
Unscheduled Hours worked on a specific Job
Unscheduled Hours worked on a specific Task
Unscheduled Hours worked on a specific Other Activity Type
The Hours Mapping Tab of the Department Update Form defines Hours Mapping settings for the respective department. Hours mapping settings configured for a department will be applied to employee scheduled and unscheduled hours. Hours Mapping is considered an advanced feature and is only required by approximately 30% of production InfiniTime Installations. Organizations with Labor Unions and specific hours costing or pay premium rules for scheduled vs unscheduled hours often find Hours Mapping to be required. Additional details on configuring and utilizing Hours Mapping can be found in the Hours Mapping Section of this document.
Configuring Jobs - Introduction
Jobs within InfiniTime are used as the second Job Costing Level. Jobs commonly relate to individual Jobs or Invoices under which tasks are performed though they may also be used for other types of information.
To Configure Jobs within InfiniTime for use with Job Costing:
1.) Identify the type of information which will be tracked in InfiniTime Jobs.
2.) It often helps to create a list all current items under the chosen type of information. For example if customers are to be used as the second Job Costing Level list all current customers and any related information. Depending on the information being tracked within InfiniTime the list should contain the following:
Information Type |
Job Description Field |
Job Cost Center Field |
Job Number Field |
Internal Departments |
Department Name |
Alphanumeric Code or other Payroll Identifier |
Department Number |
Customers / Jobs |
Customer or Job Name |
Alphanumeric Code or other Payroll Identifier |
Customer / Job Number |
Tasks |
Task Name |
Alphanumeric Code or other Payroll Identifier |
Task Number |
3.) Create one job for each listed item. Ensure the Cost Center and Department Numbers are configured appropriately.
The Activity Job Table displays a list of all jobs configured in the software. Jobs are used alongside InfiniTime Departments to further categorize employee hours for job costing purposes. Employees can punch into and out of jobs in order to track hours worked for separate Jobs such as Philly Mae Pizzeria, Jose's Sandwich Shop, etc. Initially, it is important to understand the following concepts regarding InfiniTime Departments and Job Costing:
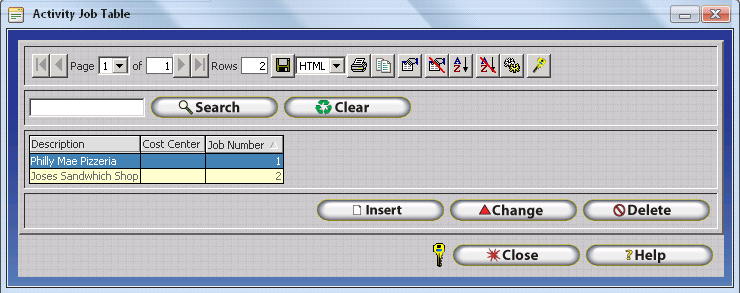
Insert - Clicking the Insert button opens the Activity Job Update Form to create a new Job. Add as many jobs as needed.
Change - Displays the Activity Job Update Form for the selected job. The InfiniTime Administrator may then make changes as desired.
Delete - Clicking the Delete button will remove the highlighted job from the list.
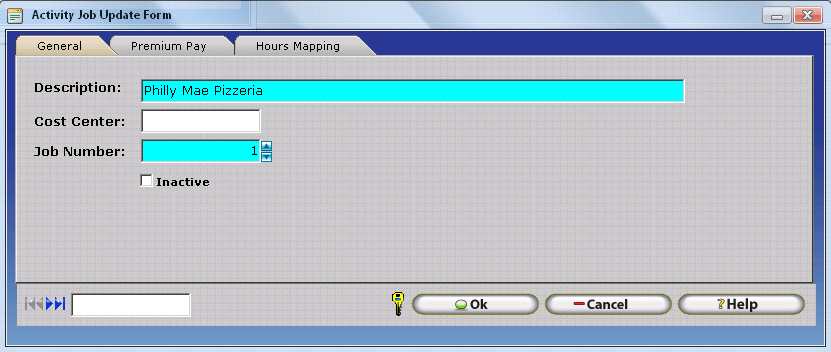
Description - Enter the given name of a Job within the organization.
Cost Center - Some Accounting Packages and Payroll Services require this field in order to import InfiniTime data. If it is not required, this field may be left blank. Your Inception Technologies Implementation Specialist can help you determine if the Job Cost Center field is required for any specific payroll export. Using the same cost center for multiple jobs will cause employee hours from all jobs with the same Job Cost Center to be lumped together into a single cost center when the hours are exported to payroll.
Job Number - Assign a job number as an additional identifier for jobs. No two jobs may have the same job number.
Inactive - Selecting this check box will cause the job not to appear as a selection in InfiniTime. Additionally, Inactive Jobs will not be sent to hardware terminals. Employees will no longer be able to transfer into or out of inactive jobs.
Premium Pay makes it possible to define Premiums, or bonuses in the form of an increased wage. Job pay premiums are paid when employees work in a given job which has premiums configured. Premiums can be configured separately for the Regular, Overtime One, Overtime Two, Overtime Three, and Overtime Four hour types. This flexibility makes it possible to meet the needs of a variety of special payment premiums. Refer to the Pay Premium Introduction section of this document for more information on how Pay Premiums are calculated and how to configure them.
Hours Mapping permits employee hours worked in a given hours type to be mapped to a different hours type based on specific conditions such as:
Scheduled Hours worked on a specific Department
Scheduled Hours worked on a specific Job
Scheduled Hours worked on a specific Task
Scheduled Hours worked on a specific Other Activity Type
Unscheduled Hours worked on a specific Department
Unscheduled Hours worked on a specific Job
Unscheduled Hours worked on a specific Task
Unscheduled Hours worked on a specific Other Activity Type
The Hours Mapping Tab of the Job Update Form defines Hours Mapping settings for the respective job. Hours mapping settings configured for a job will be applied to employee scheduled and unscheduled hours. Hours Mapping is considered an advanced feature and is only required by approximately 30% of production InfiniTime Installations. Organizations with Labor Unions and specific hours costing or pay premium rules for scheduled vs unscheduled hours often find Hours Mapping to be required. Additional details on configuring and utilizing Hours Mapping can be found in the Hours Mapping Section of this document.
Configuring Tasks - Introduction
Tasks within InfiniTime are used as the third Job Costing Level. It should be noted that Jobs must exist within the InfiniTimeSoftware before Tasks can be configured. Attempting to insert a Task before configuring at least one job will result in a warning. At least one Job must be created before Tasks can be created. Tasks are the lowest Job Costing Level available in the InfiniTime software and are generally used to track various activities performed by employees though they may also be used for other types of information.
To Configure Tasks within InfiniTime for use with Job Costing:
1.) Identify the type of information which will be tracked in InfiniTime Tasks.
2.) It often helps to create a list all current items under the chosen type of information. For example if employees perform ten tasks on a regular basis for any given task then list all current tasks and any related information. Depending on the information being tracked within InfiniTime the list should contain the following:
Information Type |
Task Description Field |
Task Cost Center Field |
Task Number Field |
Internal Departments |
Department Name |
Alphanumeric Code or other Payroll Identifier |
Department Number |
Customers / Jobs |
Customer or Job Name |
Alphanumeric Code or other Payroll Identifier |
Customer / Job Number |
Tasks |
Task Name |
Alphanumeric Code or other Payroll Identifier |
Task Number |
3.) Create one task for each listed item. Ensure the Cost Center and Department Numbers are configured appropriately.
The Activity Task Table displays a list of all tasks configured in the software. Tasks are used alongside InfiniTime Departments and InfiniTime Jobs to further categorize employee hours for job costing purposes. Employees can punch into and out of activity tasks in order to track hours worked for separate tasks such as Framing, Painting, Sanding etc. Initially, it is important to understand the following concepts regarding InfiniTime Tasks and Job Costing:
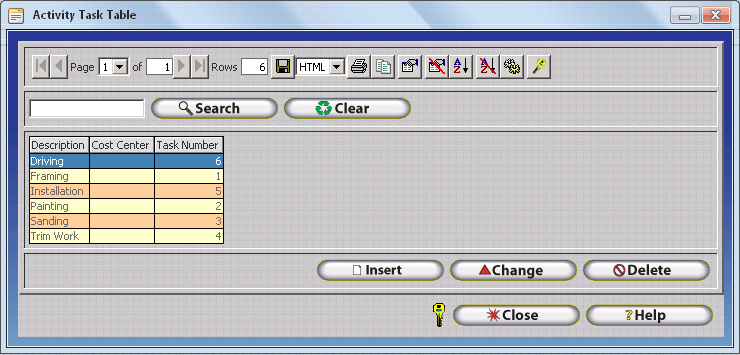
Insert - Clicking the Insert button opens the Activity Task Update Form to create a new Task. Add as many tasks as needed.
Change - Displays the Activity Task Update Form for the selected task. The InfiniTime Administrator may then make changes as desired.
Delete - Clicking the Delete button will remove the highlighted task from the list.
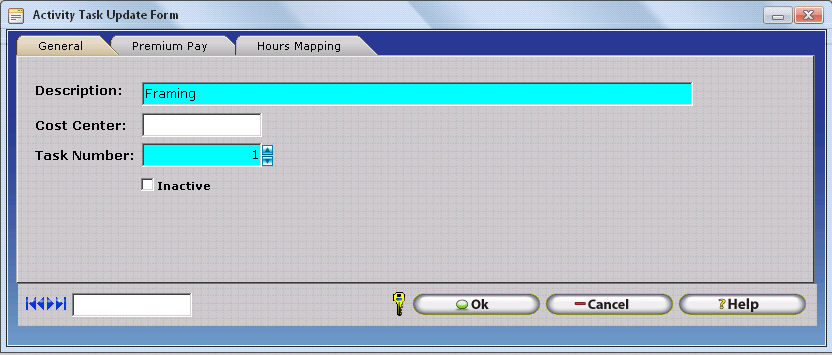
Description - Enter the given name of a Task within the organization.
Cost Center - Some Accounting Packages and Payroll Services require this field in order to import InfiniTime data. If it is not required, this field may be left blank. Your Inception Technologies Implementation Specialist can help you determine if the Task Cost Center field is required for any specific payroll export. Using the same cost center for multiple tasks will cause employee hours from all tasks with the same Task Cost Center to be lumped together into a single cost center when the hours are exported to payroll.
Task Number - Assign a task number as an additional identifier for jobs. No two tasks may have the same job number.
Inactive - Selecting this check box will cause the task not to appear as a selection in InfiniTime. Additionally, Inactive Tasks will not be sent to hardware terminals. Employees will no longer be able to transfer into or out of inactive tasks.
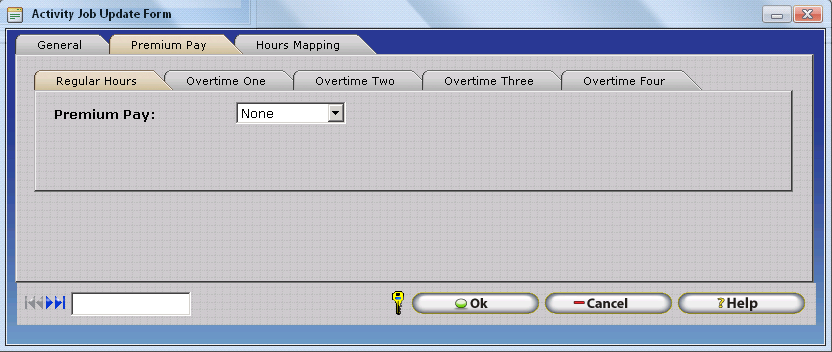
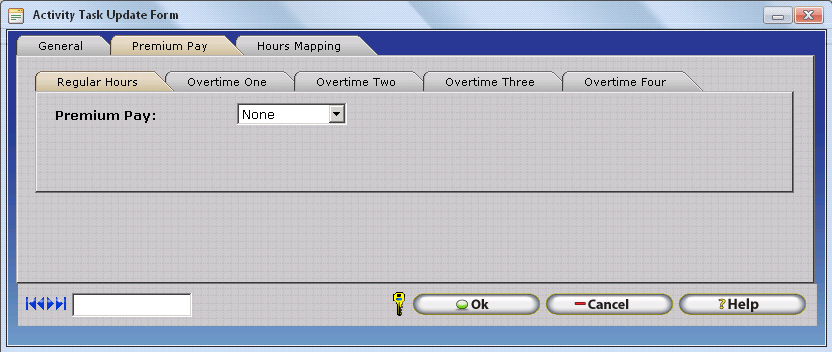
Premium Pay makes it possible to define Premiums, or bonuses in the form of an increased wage. Task pay premiums are paid when employees work in a given task which has premiums configured. Premiums can be configured separately for the Regular, Overtime One, Overtime Two, Overtime Three, and Overtime Four hour types. This flexibility makes it possible to meet the needs of a variety of special payment premiums. Refer to the Pay Premium Introduction section of this document for more information on how Pay Premiums are calculated and how to configure them.
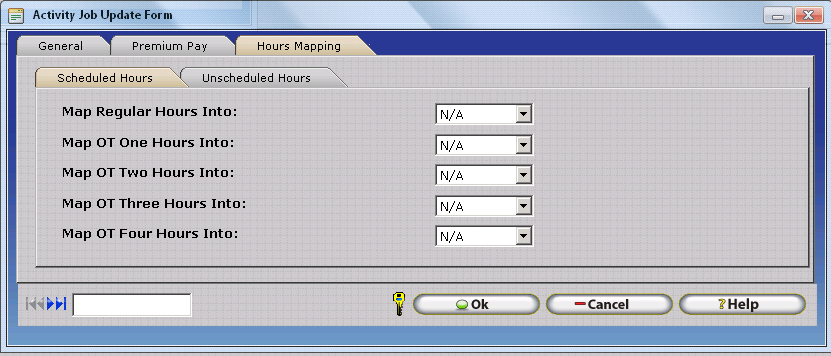
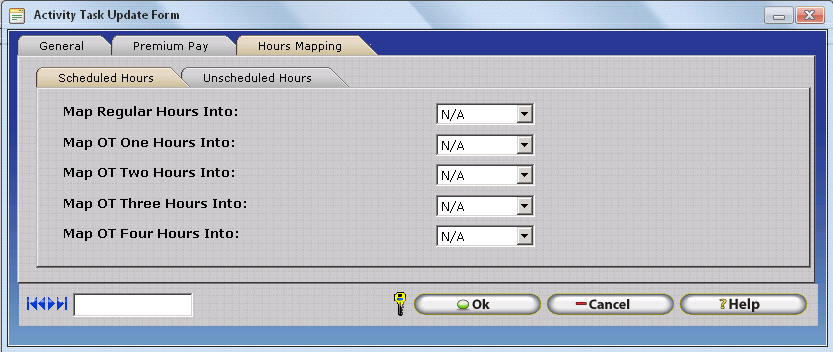
Hours Mapping permits employee hours worked in a given hours type to be mapped to a different hours type based on specific conditions such as:
Scheduled Hours worked on a specific Department
Scheduled Hours worked on a specific Job
Scheduled Hours worked on a specific Task
Scheduled Hours worked on a specific Other Activity Type
Unscheduled Hours worked on a specific Department
Unscheduled Hours worked on a specific Job
Unscheduled Hours worked on a specific Task
Unscheduled Hours worked on a specific Other Activity Type
The Hours Mapping Tab of the Task Update Form defines Hours Mapping settings for the respective task. Hours mapping settings configured for a task will be applied to employee scheduled and unscheduled hours. Hours Mapping is considered an advanced feature and is only required by approximately 30% of production InfiniTime Installations. Organizations with Labor Unions and specific hours costing or pay premium rules for scheduled vs unscheduled hours often find Hours Mapping to be required. Additional details on configuring and utilizing Hours Mapping can be found in the Hours Mapping Section of this document.
Employee's can be assigned to a Default Department, Job, and Task. In this way employee activity will be automatically associated with a specific Department, Job, and/or Task when they punch in. Employees can also use the Transfer Button or the Employee and Punch Modules to switch between Departments, Jobs and Tasks throughout the day. The transfer button varies in location and use for each hardware terminal. Please refer to the appropriate manual for your Hardware Device in the Hardware section of this document for additional information.
To Assign a Default Department, Job, or Task to an employee:
1.) Click on the Employee Button on the main toolbar to open the employee table.

2.) Select the employee you wish to configure Job Costing Settings for from the list and click change.
3.) Click on the Settings Tab.

4.) Select the Department, Job, or Task you would like to assign as the employee's default. It should be noted the Job and Task fields will not be displayed until at least one Job or Task is configured within InfiniTime. This simplifies the display of the Settings Tab for companies who do not utilize Job Costing.
Note: Only the Default Department is required. The Default Job and Default Task fields are not required as some companies may not wish all employees to have their activity associated with a Job or Task by default. In this way Office workers who simply work in a department.
Displaying Job Costing information within the Company and Employee Specific Timecard Tables
Job Costing is disabled by default within the InfiniTime Application. As such Job Costing related fields such as Task and Job must be added to the grid in the Company Timecard Table and Employee Specific Timecard Table. It is only necessary to configure these settings once. The software will save any alterations made to the grid. It should be noted the grid configuration is a global setting which effects all users. Additional information on Grid Configuration can be found in the Customizing InfiniTime section of this document.
To add the Task and Job Fields to the Company Timecard Table:
1.) Click on the Timecard Button in the main toolbar to open the Company Timecard Table

2.) Click on the 'Select Grid Columns' button.
( ![]() )
)
3.) Locate the Task and Job Fields on the
'Available' list and click on ![]() to move them to the 'Selected' list.
to move them to the 'Selected' list.

4.) Use the ![]() and
and ![]() buttons to move the Task and Job Fields
up and down in the list to alter order columns will be displayed in.
buttons to move the Task and Job Fields
up and down in the list to alter order columns will be displayed in.
5.) Click Apply to confirm and save your changes.
6.) The Job and Task fields will be displayed in the Timecard Table.
It is not uncommon for employee wages to vary based upon the task, job, or department, where employees are working. Wages within InfiniTime can be allocated to a specific Job, Task, Department, or any combination thereof. Additional information on how to use wages with Job Costing can be found in the Job Costing - Wages section of this document.
To Configure Wages for use with Job Costing:
1.) Click on the Employee Button on the main toolbar to open the employee table.
2.) Select the employee you wish to configure Wages for from the list and click change.
3.) Click on the Wages Category.
4.) Click on Insert
5.) Choose a combination of Department, Job, or Task for which the wage will apply.
6.) Click OK to save the record.

Additional details on Job Costing and Wages can be found in the Job Costing and Employee Wages section of this document.
InfiniTime supports multiple sources for Employee Job Costing Activity. When choosing a time source for Employee Job Costing Activity it is important to understand any restrictions and configuration options associated with the solution in order to make the most of InfiniTime's Job Costing System. Each supported source and its Job Costing Properties are listed below.
Supported Levels - From 1 to 3 Levels
The InfiniTime Employee and Punch Modules support all three available Job Costing levels: Departments, Jobs, and Tasks.
Benefits
Omnipresence: The InfiniTime Employee and Punch Modules are available from anywhere the InfiniTime Application can be accessed. Employees can clock in and out for different Departments, Jobs, and Tasks from any computer with access to the InfiniTime application using their Login ID and Password. If the InfiniTime Software has been published to the Internet employees can access the software worldwide from any computer with internet access using their login credentials.
Customization: Through use of security roles and configuration the Employee and Punch Modules can be customized to permit or deny employees the ability to choose which Department, Job, or Tasks they are working in. In this way employees can be configured with a default Department and/or Job in such a way that they are only permitted to change the task they are punching into and out of.
Optional: The InfiniTime Employee and Punch Modules can also be made available to employees as an alternate method for punching in even if hardware terminals such as the Thor are available. Some companies may wish to disable the ability to use the InfiniTime Employee and Punch modules for punching in and out if hardware terminals are available. This can be accomplished by configuring security for the Employee Punch Information window and disabling access for the employee security role. Refer to the Security Roles Section of this document for more information.
Supported Levels - From 1 to 2 Levels
The Luna, Zephyr, Athena, and Juno support two of the three available Job Costing levels: Departments and Jobs.
Benefits
Mobility: Employees can punch in and out without access to a computer using hardware terminals.
Job Costing: Permits employees to choose between available Departments and Jobs assigned to the reader when punching in and out. Employees can also switch between departments and jobs as needed.
Available Departments & Jobs: A maximum of 100 Departments and 100 Jobs can be assigned to these readers. In this way the supervisor can configure multiple departments and jobs within the InfiniTime Application and only provide employees with the ability to punch into or out of a subset of Departments and Jobs. This feature is most suited for manufacturing or construction environments where specific jobs are performed in the area where the clock is located.
Supported Levels - From 1 to 3 Levels
The Thor supports all three available Job Costing levels: Departments, Jobs, and Tasks.
Benefits
Mobility: Employees can punch in and out without access to a computer using hardware terminals.
Job Costing: Permits employees to choose between available Department, Jobs and Tasks assigned to the reader when punching in and out. Employees can also switch between departments, jobs and tasks as needed.
Available Departments, Jobs, and Tasks: A maximum of 100 Departments, 100 Jobs, and 100 tasks can be assigned to these readers simultaneously. In this way the supervisor can configure multiple departments, jobs, and tasks within the InfiniTime Application and only provide employees with the ability to punch into or out of a subset of Departments, Jobs, and Tasks. This feature is most suited for manufacturing or construction environments where specific jobs and tasks are performed in the area where the clock is located.
Intelligent Transfer: If only a single Department, Job, or Task is assigned to the clock using the Available Departments, Jobs, or Tasks features the Thor will not ask for the employee to enter that item when using the Transfer Button. In this way employees will only be prompted to choose the Task they wish to work under when using the Transfer Button if a single Department and Job are assigned to the reader. This concept can be applied to Departments, Jobs, or Tasks - whereby employees will only have to choose one item be it Department, Job, or Task when using the Transfer Button.
Alternative Transfer - If only a single Department, Job, and Task is assigned to the clock using the Available Departments, Jobs, and Tasks features the Thor will not prompt the employee to enter their Department, Job, or Task when using the Transfer Button. The Thor will simply use the single department, job, and task that have been assigned to the clock. In this way two scenarios can easily be configured for the clock using the Default Department, Job, and Task Settings and the Transfer Button. When employees punch in their activity will automatically be associated with their default Department, Job, and Task. When using the transfer button their activity will be associated with the Department, Job, and Task assigned to the Thor through the Available Departments, Jobs, and Tasks feature.
External Wand: An external reader can be attached to the Thor which reads barcode badges for the purpose of Job Costing. InfiniTime can be configured to parse the number encoded on the badge to find Department, Job, and Task information. In this way employees can quickly swipe a badge to transfer between Departments, Jobs, or Tasks.
Transfer By Item Number: Both the Thor and Scout Terminals support Department, Job, and Task switching through use of item numbers. Each item has a unique numeric identifier which is sent to the clock. Employees can enter this unique identifier in order to select the Department, Job, or Task when punching in. Unique Identifiers for each Job Costing level are displayed below. Refer to the Job Costing Introduction: Job Transfer section of this document for more information.
Supported Levels - From 1 to 3 Levels
The Scout Terminals support all three available Job Costing levels: Departments, Jobs, and Tasks.
Benefits
Mobility: Employees can punch in and out without access to a computer using hardware terminals.
Job Costing: Permits employees to choose between available Department, Jobs and Tasks assigned to the reader when punching in and out. Employees can also switch between departments, jobs and tasks as needed.
Available Departments, Jobs, and Tasks: A maximum of 100 Departments, 100 Jobs, and 100 tasks can be assigned to these readers simultaneously. In this way the supervisor can configure multiple departments, jobs, and tasks within the InfiniTime Application and only provide employees with the ability to punch into or out of a subset of Departments, Jobs, and Tasks. This feature is most suited for manufacturing or construction environments where specific jobs and tasks are performed in the area where the clock is located.
Transfer By Item Number: Both the Thor and Scout Terminals support Department, Job, and Task switching through use of item numbers. Each item has a unique numeric identifier which is sent to the clock. Employees can enter this unique identifier in order to select the Department, Job, or Task when punching in. Unique Identifiers for each Job Costing level are displayed below. Refer to the Job Costing Introduction: Job Transfer section of this document for more information.
Item |
Unique Identifier |
Departments |
Department Number |
Jobs |
Job Number |
Tasks |
Task Number |
Note: The hardware terminals and software modules listed above are the only supported methods for tracking multi-level Job Costing information. A table listing supported Job Costing Levels for all InfiniTime Readers is provided below for quick reference.
Clock Model |
Supported Job Costing Levels |
Supported Information Types |
Apollo SY715 |
1 |
Department |
Athena |
2 |
Department, Job |
Atlas SY777 |
1 |
Department |
Juno |
2 |
Department, Job |
Luna |
2 |
Department, Job |
Omega SY755 |
1 |
Department |
Orion SY760 |
1 |
Department |
Odyssey SY780 |
1 |
Department |
Scout |
3 |
Department, Job, Task |
Thor |
3 |
Department, Job, Task |
Zephyr |
2 |
Department, Job |
It is not uncommon for employee wages to vary based upon the task, job, or department, where employees are working. Wages within InfiniTime can be allocated to a specific Job, Task, Department, or any combination thereof. This makes it possible to calculate gross totals based upon which Department, Job, or Task employees are working in. When using wages with Job Costing it is important to understand how InfiniTime identifies which wage to use for an employee. InfiniTime searches wage records for an employee attempting to match items between the wage record and where the employee is actively working according to the wage hierarchy below. Employees will be paid using the wage corresponding to the first match.
Wage Hierarchy
1.) Department, Job, and Task
2.) Department, Job
3.) Department, Task
4.) Job, Task
5.) Department
6.) Job
7.) Task
For example if an employee worked in the West Coast Marina Department, Job Number 117852, and the Painting Task InfiniTime would first search for a wage record matching all three items - West Coast Marina, 117852, and Painting. If a record was not found for this combination the software would search for a wage record matching Department and Job which in this example is West Coast Marina and 117852. If a wage record was not found for this combination the software would continue down the wage hierarchy searching for a matching wage record. If no match is found the employee's default wage is used.
Configuring a Wage for a specific combination of three items
A wage associated with a specific combination of Department, Job, and Task will take precedence over all other wages. For example if wages are configured as shown below the employee will receive the wage associated with the exact Department, Job, and Task combination worked by the employee rather than the wage associated with the Task the employee is working in. Referring to the Wage Hierarchy this occurs because InfiniTime will match a wage associated with Department, Job, and Task before a wage associated with just the Task. Additional examples are below. The highlighted wage record is the wage the employee will be paid.
Example 1
Working Department (Customer) |
Working Job (Job Number) |
Working Task (Task) |
West Coast Marina |
117852 |
Painting |

Example 2
Working Department (Customer) |
Working Job (Job Number) |
Working Task (Task) |
West Coast Marina |
117852 |
Painting |
The above examples illustrate how employees will receive the wage associated with the particular Department, Job, and Task they are working on even if another wage is defined for each individual item or a combination thereof.
Configuring a Wage for a specific combination of two items
A wage associated with a specific combination of two items should be used if employees receive a specific wage when working under two items such as a specific Department and Task or a specific Job and Task. For example if an employee receives $8 when working in the West Coast Marina Department and performing the Painting Task regardless of what Job they are working on a wage should be created and associated with the West Coast Marina Department and Painting Task as shown below. It is important to keep the Wage Hierarchy in mind when associating a wage with a combination of two items. In example 2 the employee would be paid $8 per hour rather than $10 because a wage matching the exact working Department, Job, and Task is present. This will be matched before the combination of Department and Task.
Example 1
Working Department (Customer) |
Working Job (Job Number) |
Working Task (Task) |
West Coast Marina |
117852 |
Painting |

Example 2
Working Department (Customer) |
Working Job (Job Number) |
Working Task (Task) |
West Coast Marina |
117876 |
Painting |

The above examples illustrate how the employee will receive the wage associated with their particular Task and Department regardless of what job they are working on unless a wage record exists that matches the Department, Job, and Task worked by the employee.
Configuring a Wage for a specific item
Wages should be configured for a specific item such as a Department, Job, or Task when employees have a set wage for the item. For example, if an employee was paid $10 per hour when painting regardless of what job or department he was painting under a wage should be created and associated with the Painting task only as shown below. In this way it would not matter what department or job the employee was working under as long as he was performing the painting task he would receive $10 per hour. It is important to keep the Wage Hierarchy in mind when associating a wage with a single item. In example 2 the employee would be paid $8 per hour rather than $10 because a wage matching the exact working Department, Job, and Task is present.
Example 1
Working Department (Customer) |
Working Job (Job Number) |
Working Task (Task) |
Ahbor Harbor |
117852 |
Painting |

In the example above even though there is a wage record for each item where the employee is working the Department record takes precedence as it is matched first due to the Wage Hierarchy.
Example 2
Working Department (Customer) |
Working Job (Job Number) |
Working Task (Task) |
West Coast Marina |
117876 |
Painting |
The above examples illustrate how the employee will receive the wage associated with a single item unless a different record is matched due to the Wage Hierarchy as in Example 2.
Other Activity Types permit InfiniTime administrators to define 'non-working' hours and earning types for items such as Paid Leave, Unpaid Leave, Tips, Commissions, and Bonuses. InfiniTime provides support for an unlimited number of Other Activity Types. Other Activity entries can be entered in hours, currency, or units depending on the requirements and capabilities of your payroll application. The Other Activity Table, as shown below, is used to Insert, Modify, and Delete Other Activity Types within InfiniTime. As part of the initial configuration of InfiniTime, one Other Activity Type should be created for each 'non-working' Hours / Earning Type tracked by your organization. Examples of typical Other Activity Types are provided in the Other Activity usage section below.
Accessing the Other Activity Types Table
.gif)
.gif)
Insert – Inserts a new record into the Other Activity Type Table. Opens the Other Activity Update Form.
Change – Opens the Other Activity Type Update form and permits editing of the selected record.
Delete – Removes the highlighted record from the Other Activity Table.
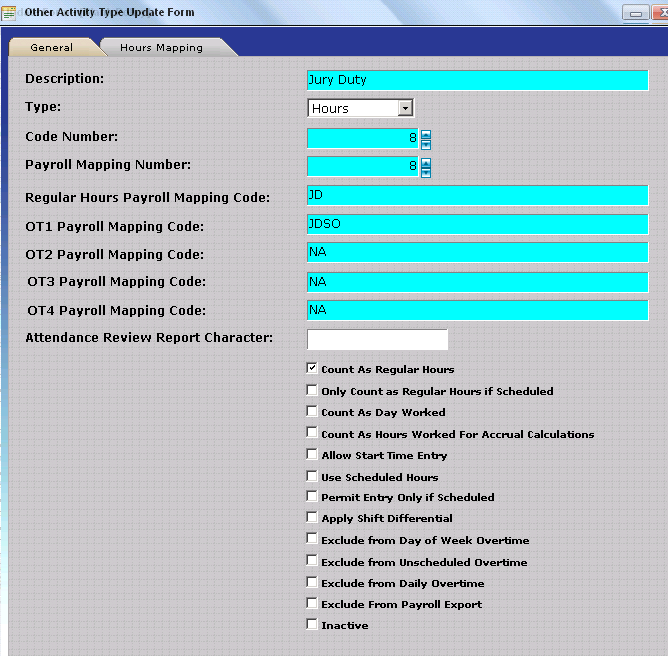
The Other Activity Update Form includes all options and settings related to Other Activity Types. Each option is outlined below.
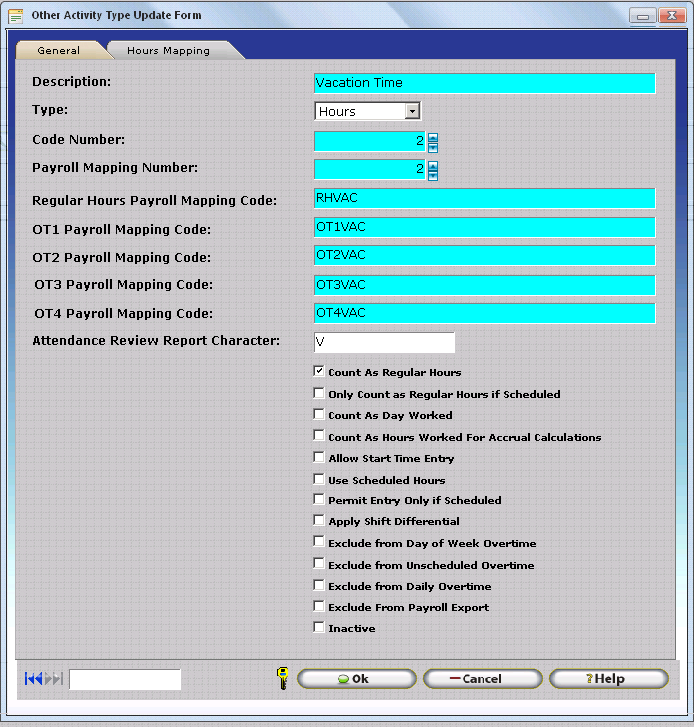
Description – Type the name of the Other Activity Type.
Type – Specify whether the Other Activity Type will track a dollar amount or hour amount.
Code Number – The Code Number is a unique identifier within the InfiniTime Database. Each other activity type must have a unique code number in order to set them apart. This code number is used on many hardware terminals to input other activity directly at the clock without accessing the software. All hardware terminals offered by Inception Technologies support this feature except for the Plus Scanner.
Payroll Mapping Number – Enter a mapping number. The payroll mapping number can be the same for multiple other activity types. This number specifies a column in a payroll export file where hours or amounts for the other activity type will be totaled. If more than one other activity type has the same payroll mapping number their values will be added together and totaled in the same column. Mapped Payroll Interfaces provide the customer with the ability to add additional other activity types and move their position within the payroll export on the fly.
The Compupay – Mapped Interface Format is one such payroll interface. An outline of the Compupay - Mapped interface format is provided below. The outline shows a row of headers which represent information that would be exported when performing a payroll export. The resulting export file can then be imported directly into the Compupay application. It is important to understand how Other Activity Types are automatically exported to the appropriate column according to their Payroll Mapping Number. Other Activity Types with Payroll Mapping Number 1 will be totaled in the column labeled Mapped Amount 1. Other Activity Types with Payroll Mapping Number 2 will be totaled in the column labeled Mapped Amount 2.
Employee ID |
Activity Dept Number |
Regular Hours |
Overtime Hours |
Mapped Amnt. 1 |
Mapped Amnt. 2 |
Mapped Amnt. 3 |
Payroll Mapping Codes are agreed upon by each company and the firm responsible for their payroll. With this in mind it is not surprising that Payroll Mapping Codes often vary from company to company. These codes are generally known to payroll personnel or the company responsible for your payroll. Additional details on the use of Payroll Codes and Payroll Mapping Codes can be found in the following sections of this document:
Payroll Export User Interface Overview - Payroll Codes Tab
Payroll Export - Payroll Interface Features & Related Configuration
Payroll Interface Layout Report
Regular Hours Payroll Mapping Code - Enter a Payroll Mapping Code to be used for Regular Hours and / or Other Hours on the respective Other Activity Type. Much like the Payroll Mapping Number, the Regular Hours Payroll Mapping Code can be the same for multiple other activity types, however it is generally used as a unique code to identify an Hours / Earnings Type.
OT1 Payroll Mapping Code - Enter a Payroll Mapping Code to be used for OT1 Hours on the respective Other Activity Type. This field is disabled unless 'Count as Regular Hours' or 'Only Count as Regular Hours if Scheduled' is checked for the respective other activity type. Much like the Payroll Mapping Number, the OT1 Payroll Mapping Code can be the same for multiple other activity types, however it is generally used as a unique code to identify an Hours / Earnings Type.
OT2 Payroll Mapping Code - Enter a Payroll Mapping Code to be used for OT2 Hours on the respective Other Activity Type. This field is disabled unless 'Count as Regular Hours' or 'Only Count as Regular Hours if Scheduled' is checked for the respective other activity type. Much like the Payroll Mapping Number, the OT2 Payroll Mapping Code can be the same for multiple other activity types, however it is generally used as a unique code to identify an Hours / Earnings Type.
OT3 Payroll Mapping Code - Enter a Payroll Mapping Code to be used for OT3 Hours on the respective Other Activity Type. This field is disabled unless 'Count as Regular Hours' or 'Only Count as Regular Hours if Scheduled' is checked for the respective other activity type. Much like the Payroll Mapping Number, the OT3 Payroll Mapping Code can be the same for multiple other activity types, however it is generally used as a unique code to identify an Hours / Earnings Type.
OT4 Payroll Mapping Code - Enter a Payroll Mapping Code to be used for OT4 Hours on the respective Other Activity Type. This field is disabled unless 'Count as Regular Hours' or 'Only Count as Regular Hours if Scheduled' is checked for the respective other activity type. Much like the Payroll Mapping Number, the OT4 Payroll Mapping Code can be the same for multiple other activity types, however it is generally used as a unique code to identify an Hours / Earnings Type.
Other Activity Type |
Example Payroll Mapping Codes |
Holiday Hours |
HOL, HOLIDAY |
Vacation Hours |
VAC, VACATION |
Sick Time Hours |
SICK, SIC, SIK |
Personal Time Hours |
PER, PERS, PERSONAL |
Attendance Review Report Character - Enter a single character to be displayed on the Attendance Review Report for dates with Hours and / or Other Amounts for the respective Other Activity Type. Refer to the Attendance Review Report section of the Report Library for additional details.
Count As Regular Hours - When this option is checked hours entered under this other activity type will count as regular hours and will be counted toward both daily, weekly, Day Of Week, and Unscheduled Overtime as configured within an employee's assigned policy. InfiniTime Administrators may choose to specifically exclude the respective Other Activity Type from certain types of Overtime by checking additional options as outlined below.
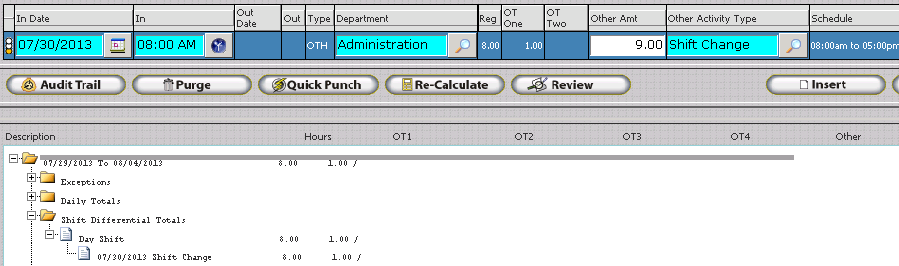
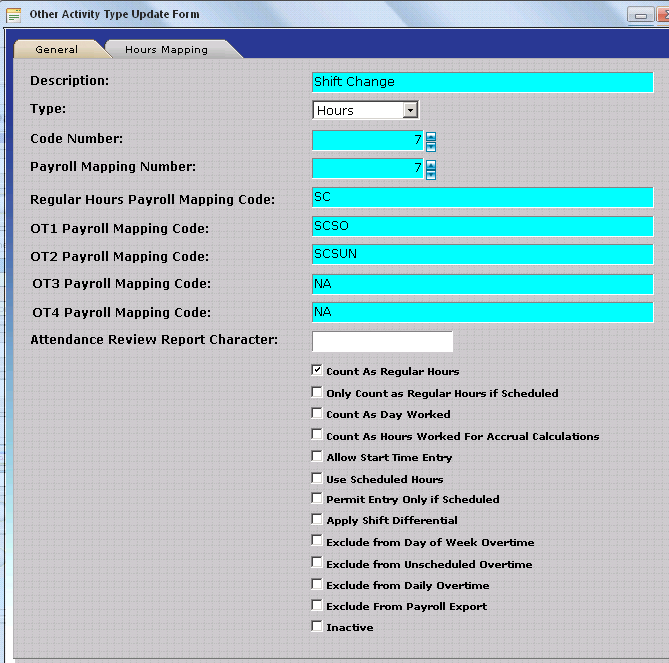
Only Count as Regular Hours if Scheduled - When this option is checked, hours entered under the respective Other Activity Type will only be counted as regular hours // totaled toward Daily, Weekly, Day Of Week, and Unscheduled Overtime on dates which an employee is scheduled. If the respective Other Activity Type should be inserted on a date where the employee is not scheduled, the hours will simply be paid as Other Hours under the Regular Hours Payroll Mapping Code. This concept is illustrated below. Notice how Other Hours for the Shift Change Other Activity Type are totaled in the regular column only on 7/30/13 where the employee was scheduled to work.

Count As Day Worked – When this check box is checked, the date on which the respective Other Activity Type is inserted will be counted as a Worked Day. This option is used for two purposes:
Count As Hours Worked for Accrual Calculations - When this option is checked, Other Activity Hours for the Other Activity Type will be counted toward the Accrue X Hours for Y Hour(s) Accrual Calculation. This makes it possible for employees to earn accrual hours based on Worked Hours (Regular, Overtime 1, Overtime 2, Overtime 3, Overtime 4) and Other Activity Types such as Vacation, Personal Time, Jury Duty, etc.
Allow Start Time Entry - When this option is checked, InfiniTime will prompt the user to enter the Start Time when inserting Other Hours for the respective Other Activity Type. In this way, the Other Activity Hours can be properly mapped according to Unscheduled Hours Mapping rules and Shift Differential Rules configured on an employee's policy. Allow Start Time Entry must be checked in order to check 'Apply Shift Differential' for a given Other Activity Type. Allow Start Time Entry is only available for Other Activity Types set to 'Count as Regular Hours' or 'Only Count as Regular Hours if Scheduled'.
Use Scheduled Hours - If this option is checked, InfiniTime will automatically set the Other Hours to match the duration of the employee's schedule on the respective date. When 'Use Scheduled Hours' is enabled, users may not directly enter or edit the Other Hours for a given date for the respective Activity Type. Additionally, the respective activity type cannot be inserted for an employee with no scheduled hours on a given date.

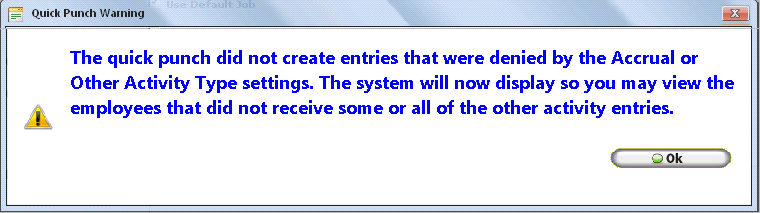
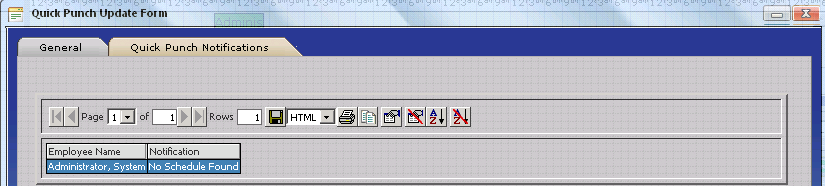
Permit Entry Only If Scheduled - If this option is checked, InfiniTime will only permit the respective Other Activity Type to be inserted on days where an employee has a Schedule. If an Other Activity Type with this option is entered via Other Activity Entry from a Hardware Terminal on a date where an employee does not have a schedule the Other Activity Entry will be ignored by the InfiniTime Software during the polling process and the Other Activity Hours will not be posted to the employee's timecard. The warnings below are displayed if a user should attempt to insert an Other Activity Type with 'Permit Entry Only if Scheduled' Checked on a date where an employee is not scheduled.
Apply Shift Differential - If this option is checked, Other Hours for the respective Other Activity Type will be counted toward Shift Differential Hours in accordance with the Shift Differential Pay Method and Shifts assigned to the employee's policy. 'Apply Shift Differential' is only available if 'Allow Start Time Entry' and 'Count as Regular Hours' or Only Count as Regular Hours if Scheduled' are checked. The example below shows Other Hours for the Other Activity Type Shift Change applied toward the Day Shift Differential from 8:00 AM to 5:00 PM.
Exclude From Day Of Week Overtime - If this option is checked, Hours for the respective Other Activity Type will not count toward Day of Week Overtime. 'Exclude from Day of Week Overtime' is only available for Other Activity Types with 'Count as Regular Hours' or Only Count as Regular Hours if Scheduled' checked. For example, if an employee were to have Vacation Time, which is set to Count as Regular Hours, on a Sunday where they would usually get Day of Week Overtime for worked hours and 'Exclude From Day Of Week Overtime' is checked, the employee would simply be paid their regular base rate for Vacation Time Hours on Sundays instead of the Day Of Week Overtime Rate.
Example: Company XYZ Excludes Vacation Time from Day of Week Overtime. Employees who are normally scheduled to work on Sunday must use their vacation time to take a day off. Vacation Time Hours are counted toward Weekly Overtime Hours and as such the Vacation Time Other Activity Type is set to count as regular hours. However, XYZ Company only pays Sunday Day Of Week Overtime on worked hours. Benefits such as Vacation Time are paid at base rate. The screenshots below show how Exclude from Day Of Week Overtime can be used to properly exclude Vacation Time from Day of Week Overtime.
Related Settings:
OT1 = Daily > 8 Hours
Sunday Day of Week Regular Hours -> OT2
Sunday Day of Week OT1 Hours -> OT2
Exclude From Day Of Week Overtime Unchecked:

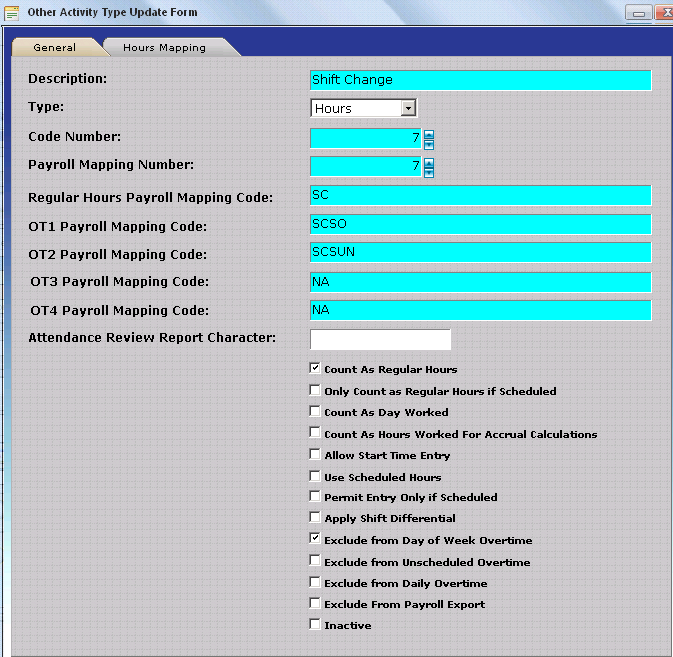
With 'Exclude From Day of Week Overtime' unchecked, hours for an other activity type set to Count as Regular Hours are subject to Day of Week Overtime Rules. Notice how all hours are posted to Overtime 2 in accordance with Sunday Day of Week Overtime settings. The Configuration for the Shift Change Other Activity Type in this scenario is shown below.
Exclude From Day of Week Overtime Checked:

With 'Exclude From Day of Week Overtime' unchecked, hours for an other activity type set to Count as Regular Hours are excluded from Day of Week Overtime Rules. Notice how all hours for the Shift Change Other Activity Type are paid as Regular Hours even though they fall on a Sunday. The Configuration for the Shift Change Other Activity Type in this scenario is shown below.
Exclude From Unscheduled Overtime - If this option is checked, Hours for the respective Other Activity Type will not count toward Unscheduled Overtime. 'Exclude from Unscheduled Overtime' is only available for Other Activity Types with 'Count as Regular Hours' or 'Only Count as Regular Hours if Scheduled' checked. For organizations who track Unscheduled Hours via Unscheduled Hours Mapping settings on the Schedule Settings / Rules Section of the Policy it is common for most Other Activity Types, especially Other Activity Types for Paid Time Off such as Vacation Time or Holiday Pay, to be excluded from Unscheduled Overtime.
Example: Company XYZ Excludes Holiday Pay from Unscheduled Overtime. If a Company Observed Holiday Date falls on a day the employee is not scheduled to work, XYZ Company pays the employee their base rate for the day. Employees not scheduled to work on a Holiday Date do not receive Unscheduled Overtime.
Related Settings:
OT1 = Daily > 8 Hours
Unscheduled Regular Hours -> OT2
Unscheduled OT1 Hours -> OT2
Exclude From Unscheduled Overtime Unchecked:
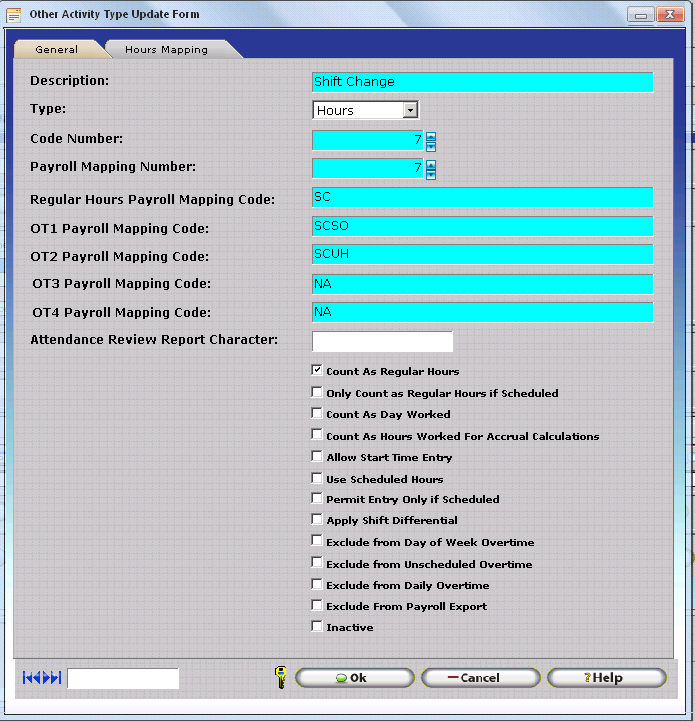
With 'Exclude From Unscheduled Overtime' unchecked, hours for an other activity type set to Count as Regular Hours are subject to Unscheduled Hours Mapping. Notice how all hours are posted to Overtime 2 in accordance with Unscheduled Hours Mapping settings. The Configuration for the Shift Change Other Activity Type in this scenario is shown below.
Exclude From Unscheduled Overtime Checked:
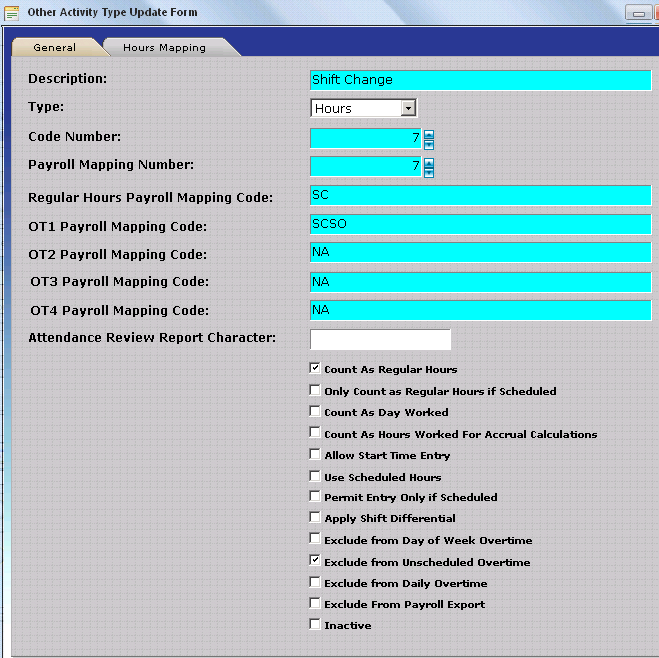
With 'Exclude From Unscheduled Overtime' checked, hours for an other activity type set to Count as Regular Hours are excluded from Unscheduled Hours Mapping. Notice how all hours for Shift Change are paid as regular hours even though the employee does not have a schedule on 7/28/2013. The Configuration for the Shift Change Other Activity Type in this scenario is shown below.
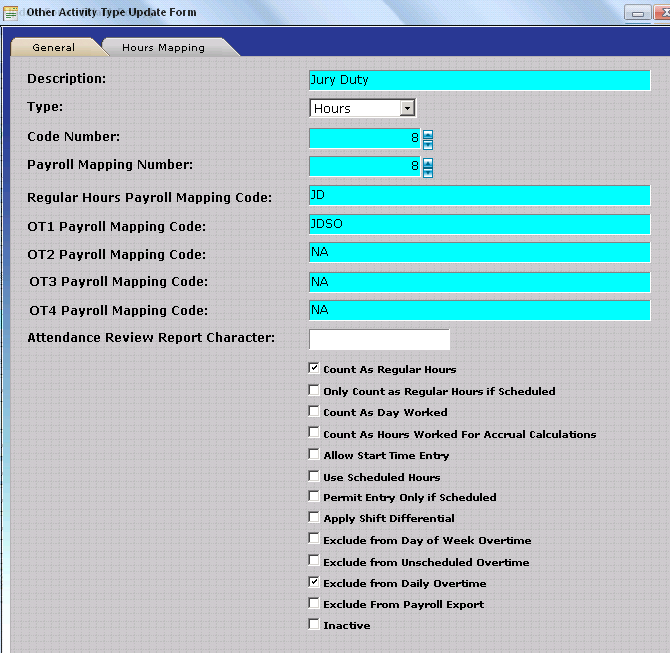
Exclude From Daily Overtime - If this option is checked, Hours for the respective Other Activity Type will not count toward Daily Overtime. 'Exclude from Daily Overtime' is only available for Other Activity Types with 'Count as Regular Hours' or 'Only Count as Regular Hours if Scheduled' checked.
Example: Company XYZ counts Jury Duty Hours toward Weekly Overtime but excludes Jury Duty Hours from Daily Overtime. If an employee is out of the office for Jury Duty, and they report to work on the same day for a different shift, the employee will not be eligible for Overtime Unless they work more than 8 hours on the respective date or if they have worked in excess of 40 Hours for the work week.
Related Settings:
OT1 = Daily > 8 Hours, Weekly > 40 Hours
Deduct Daily OT From Weekly OT = Checked
Exclude From Daily Overtime Unchecked:

With 'Exclude From Unscheduled Overtime' unchecked, hours for an other activity type set to Count as Regular Hours are subject to Daily Overtime Rules. Notice how worked hours from 4:00 PM to 8:00 PM on 7/29/13 are counted toward OT1. The Configuration for the Jury Duty Other Activity Type in this scenario is shown below.
Exclude From Unscheduled Overtime Checked:

With 'Exclude From Unscheduled Overtime' checked, hours for an other activity type set to Count as Regular Hours are excluded from Daily Overtime Rules. Notice how worked hours on 7/29/13 from 4:00 PM to 8:00 PM resulting in a total of 12 Regular Hours on 7/29/2013. The employee then does not qualify for Overtime Hours until they work beyond the 40 Hours in the Work Week on 8/2/13. The Configuration for the Shift Change Other Activity Type in this scenario is shown below.
Exclude From Payroll Export – Placing a check in this box will allow the other activity to be excluded from the payroll export. This option should be checked for any Other Activity Types which are intended for use within the Time and Attendance System for tracking purposes only. Other Activity Records on Employee Timecards for Other Activity Types with this option checked will not be exported by the Payroll Export, though they will be displayed on reports within InfiniTime.
Inactive – Placing a check in this box will make the respective Other Activity Type Inactive. The respective Other Activity Type will no longer be available for selection when inserting an Other Activity via Quick Punch, Time Off Requests, or from Hardware Terminals such as the Thor.
The Hours Mapping Tab of the Other Activity Update Form is only displayed if 'Count as Regular Hours' or 'Only Count as Regular Hours if Scheduled' are checked for an Other Activity Type. Hours Mapping permits employee hours worked in a given hours type to be mapped to a different hours type based on specific conditions such as:
Scheduled Hours worked on a specific Department
Scheduled Hours worked on a specific Job
Scheduled Hours worked on a specific Task
Scheduled Hours worked on a specific Other Activity Type
Unscheduled Hours worked on a specific Department
Unscheduled Hours worked on a specific Job
Unscheduled Hours worked on a specific Task
Unscheduled Hours worked on a specific Other Activity Type
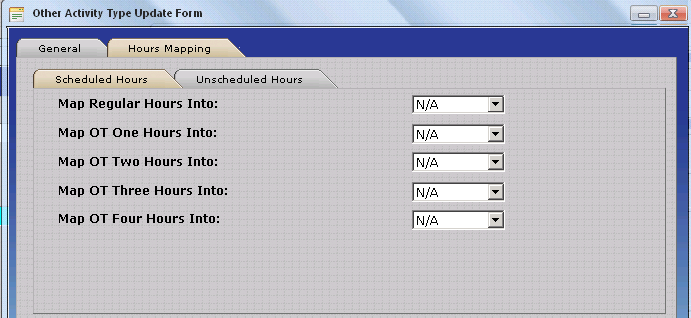
The Hours Mapping Tab of the Other Activity Update Form defines Hours Mapping settings for the respective Other Activity Type. Hours mapping settings configured for an Other Activity Type will be applied to scheduled and unscheduled hours for the respective Other Activity Type. Hours Mapping is considered an advanced feature and is only required by approximately 30% of production InfiniTime Installations. Organizations with Labor Unions and specific hours costing or pay premium rules for scheduled vs unscheduled hours often find Hours Mapping to be required. Additional details on configuring and utilizing Hours Mapping can be found in the Hours Mapping Section of this document.
Other Activity Types are a highly versatile part of the InfiniTime Time and Attendance application. Other Activity Types can be configured to meet time and attendance and Human Resources policies for companies ranging in size with tens of employees and basic Time and Attendance Requirements to companies with thousands of employees and complex Union Based Labor Contracts. To meet the diverse needs of both small business and enterprise customers, InfiniTime offers several methods for entering Other Hours and / or Dollar Amounts for specific Other Activity Types. Additionally, Other Activity Types can be configured to track a variety of Hours and Earnings Types for specific usage purposes.
Other Activity Types are used within InfiniTime to track Hours and Earnings Types which such as Paid Leave, Unpaid Leave, Commissions, Bonuses, and Tips. With this in mind, inserting hours and / or Dollars for specific Other Activity Types as appropriate to show the benefits used and / or earned by an employee is an integral part of the recurring Employee Timecard Review and Editing process. Other Hours and Other Amount entries can be inserted in multiple ways as outlined in the table below.
Method of Entry |
Overview |
| Manually via Quick Punch | Other Activity Hours and / or Dollar Amounts can be entered manually using the Quick Punch Feature from the Company Timecard or Employee Timecard. This method is commonly used to insert hours for Other Activity Types whose occurrence cannot be anticipated such as Sick Time or Personal Time. |
| Manually via Approval of a Time Off Request | Other Activity Hours are inserted by InfiniTime
upon approval of a Time Off Request sent by an employee. This
feature is regularly used by organizations who do one or more
of the following:
|
| Manually via Function Keys at a Hardware Terminal (IE: Thor, Zephyr, Scout) | Other Activity Hours and / or Dollar Amounts can be entered manually via Function Keys at Hardware Terminals configured to communicate with the InfiniTime Software. This provides a convenient interface for entering Other Activity Hours immediately while at the Job Site and / or Work Area without accessing the InfiniTime Manager Module. |
| Manually via Telephone Punch Menu Prompts using Telephone Punch | Other Activity Hours and / or Dollar Amounts can be entered manually via Telephone Punch Menu Prompts by calling into the Telephone Punch Menu and selecting the appropriate menu options. This provides a convenient interface for entering Other Activity Hours and / or Dollars immediately while in the field without accessing the InfiniTime Manager Module. InfiniTime Telephone Punch is ideal for organizations with a high transaction volume. (IE: Thousands of Employees Punching multiple times per day over a wide geographic area). |
| Automatically via Holiday Dates for a Non-Working Holiday | InfiniTime Holiday Types permit specific Dates to be defined as Holidays. InfiniTime can then automatically insert Other Activity Hours, such as 'Holiday Time', for employees eligible for Paid Holidays. |
| Automatically via Holiday Dates for a Working Holiday | InfiniTime Holiday
Types permit specific Dates to be defined as Holidays. For organizations
with employees who receive different pay rates for working on
a Holiday Date, InfiniTime
can be configured to automatically separate and track hours paid
at different rates for eligible employees through use of one or
more of the following features as appropriate based on your organization's
rules:
|
| Automatically via Stand By Time | Stand by time is intended for use with on call employees. When Stand By Time is configured on a given policy, Other Hours are automatically inserted for a specific Other Activity Type for each Day Of Week configured for Stand By Time for all employees assigned to the policy. |
InfiniTime permits entry of both positive and negative values for Other Activity Types making it possible to enter adjustments to specific Hours and Earning Types. Specific purposes for Other Activity Types and common uses for each are listed below.
| Usage Purpose | Example(s) |
| Add Other Hours to be Paid to Employees | Add Jury Duty Hours |
Adjust Other Hours to be Paid to Employees |
Negate System Holiday Record |
| Add Other Amounts to be Paid to Employees | Add additional pretax earnings such as Sales Commission to an employee's timecard |
Adjust Other Amounts to be Paid to Employees |
Subtract additional pretax earnings such as Sales Commissions from an employee's timecard |
Add Taxable Earnings |
Add Tips to an Employee's Timecard |
Adjust Taxable Earnings |
Subtract Tips from an Employee's Timecard |
Add to Units Tracked |
Add Piece Counts to an Employee's Timecard |
Adjust Units Tracked |
Subtract Piece Counts from an Employee's Timecard |
Deduct Used Benefits from an Accrual Type |
Deduct Other Hours inserted for One or More Other Activity Types from an employee's Available Accrued Balance for an Accrual Type |
Other Hours are inserted for Other Activity Types to track hours for various categories of Paid and Unpaid Leave. Several examples of common types of Paid and Unpaid Leave tracked by InfiniTime Customers are provided below.
| Vacation Time | Sick Time | Personal Time |
| Jury Duty | Bereavement | Marriage |
Maternity Leave |
Paternity Leave | Family Leave |
Adding Other Hours to be paid to an employee with a Positive Entry
1. Ensure an Other Activity Type exists for each type of Other Hours tracked by your organization.
2. Other Activity Options, as outlined above, must be configured for each Other Activity Type as appropriate based on your organization's Time and Attendance & HR Rules.For Other Hours, the Other Activity Type must be set to the Hours Type as shown below.

3. Open the Company Timecard Table
4. Search for the employee you wish to insert Other Hours for.
5. Set the Date Range to include the date(s) you wish to insert Other Hours For.
6. Click on Quick Punch.
7. Set the Type to Other Activity.
8. Specify the previously created Other Activity Type for which you wish to insert Other Hours by typing the first several characters of the Other Activity Type's description or use the Lookup Button.
9. Enter the desired number of Other Activity Hours. Be sure to enter a positive value without a minus (-) sign. InfiniTime permits values of -24.00 Hours to 24.00 Hours to be inserted for Other Activity Types of the Hours Type.
10. Click OK. The example below shows 8.00 Jury Duty Hours to be paid to an employee.

Adjusting Other Hours with a Negative Entry using the Same Other Activity Type
1. Ensure an Other Activity Type exists for each type of Other Hours tracked by your organization.
2. Other Activity Options, as outlined above, must be configured for each Other Activity Type as appropriate based on your organization's Time and Attendance & HR Rules. For Other Hours, the Other Activity Type must be set to the Hours Type as shown below.
3. Open the Company Timecard Table
4. Search for the employee you wish to Adjust Other Hours for.
5. Set the Date Range to include the date(s) you wish to Adjust Other Hours For.
6. Click on Quick Punch.
7. Set the Type to Other Activity.
8. Select the previously created Other Activity Type for which you wish to adjust Other Hours by typing the first several characters of the Other Activity Type's description or use the Lookup Button.
9. Enter the desired number of Other Activity Hours. Enter a negative value with a minus (-) sign.
10. Click OK. The example below shows a Negative Other Activity Entry used to offset an overpayment of an Other Activity Type from a prior period. The negative value on 8/5/13 will be transferred to payroll and deducted from the employee's final gross pay.

Adjusting Other Hours with a Negative Entry using a Different Other Activity Type
1. This method for adjusting Other Hours is specifically required to adjust a System Holiday Record created by InfiniTime for a Holiday Date, though it may also be used to adjust hours in other scenarios if desired. By creating a separate Other Activity Type for Adjustment Purposes Administrators can run reports with the Deduct Other Activity Type tagged to see only Adjustment Entries.
2. Create a second Other Activity Type with the same options, Payroll Mapping Number, and Payroll Mapping Codes as the original Other Activity Type you wish to adjust. For clarity, the Description of the new other Activity Type should be unique and should include 'Adjust' or 'Deduct' to clearly show the Other Activity Type is intended for adjustment purposes.
3. Open the Company Timecard Table
4. Search for the employee you wish to Adjust Other Hours for.
5. Set the Date Range to include the date(s) you wish to Adjust Other Hours For.
6. Click on Quick Punch.
7. Set the Type to Other Activity.
8. Select the previously created Other Activity Type by typing the first several characters of the Other Activity Type's description or use the Lookup Button.
9. Enter the desired number of Other Activity Hours. Enter a negative value with a minus (-) sign.
10. Click OK. The example below shows a Negative Other Activity Entry used to negate a system holiday record.

Other Amounts are inserted for Other Activity Types to track payable currency amounts for various categories of earnings. Several examples of common types of earnings tracked by InfiniTime Customers are provided below.
| Sales Commissions | Misc. Earnings |
Expense Reimbursements |
|
1. Ensure an Other Activity Type exists for each Other Amount // Earnings Type tracked by your organization.
2. Other Activity Options, as outlined above, must be configured for each Other Activity Type as appropriate based on your organization's Time and Attendance & HR Rules. For Other Amounts, the Other Activity Type must be set to the Amount Type as shown below.

3. Open the Company Timecard Table
4. Search for the employee you wish to insert an Other Amount for.
5. Set the Date Range to include the date(s) you wish to insert an Other Amount For.
6. Click on Quick Punch.
7. Set the Type to Other Activity.
8. Select the previously created Other Activity Type for which you wish to insert an Other Amount by typing the first several characters of the Other Activity Type's description or use the Lookup Button.
9. Enter the desired Other Amount Value to be paid to employees. This value may be entered in any currency, with up to two decimal places. For clarity, It is recommended that the same currency be used for all Other Amount entries within InfiniTime. Be sure to enter a positive value without a minus (-) sign.
10. Click OK. The example below shows a currency amount of 257.89 in Sales Commissions paid to an employee. Any currency can be used with InfiniTime Other Amounts, though it is recommended that all Other Amounts be tracked in the same currency. InfiniTime does not perform any currency conversions - Other Amount values are exported to payroll and displayed on reports within InfiniTime exactly as they are entered.

1. Ensure an Other Activity Type exists for each type of Other Hours tracked by your organization.
2. Other Activity Options, as outlined above, must be configured for each Other Activity Type as appropriate based on your organization's Time and Attendance & HR Rules. For Other Amounts, the Other Activity Type must be set to the Amount Type as shown below.
3. Open the Company Timecard Table
4. Search for the employee you wish to insert Other Hours for.
5. Set the Date Range to include the date(s) you wish to insert Other Hours For.
6. Click on Quick Punch.
7. Set the Type to Other Activity.
8. Select the previously created Other Activity Type for which you wish to insert an Other Amount by typing the first several characters of the Other Activity Type's description or use the Lookup Button.
9. Enter the desired number of Other Activity Hours. Be sure to enter a positive value without a minus (-) sign. InfiniTime supports Other Amount entries of -99999.99 to 99999.99
10. Click OK. The example below shows a Negative Other Activity Entry used to offset an overpayment of an Other Amount from a prior period. The negative value on 8/5/13 will be transferred to payroll and deducted from the employee's final gross pay.

Taxable Earnings, or amounts received by employees but not paid directly by the employer such as Tips or Employee Meals, can be tracked using Other Activity Types of the Amount Type. Once entered, Taxable Earnings can be transferred to payroll for tracking purposes.
| Tips | Meals |
1. Ensure an Other Activity Type exists for each Taxable Earning tracked by your organization.
2. Other Activity Options, as outlined above, must be configured for each Other Activity Type as appropriate based on your organization's Time and Attendance & HR Rules. For Taxable Earnings, the Other Activity Type must be set to the Amount Type as shown below.
3. Open the Company Timecard Table
4. Search for the employee you wish to insert a Taxable Earning for.
5. Set the Date Range to include the date(s) you wish to insert a Taxable Earning For.
6. Click on Quick Punch.
7. Set the Type to Other Activity.
8. Select the previously created Other Activity Type for which you wish to insert Taxable Earnings by typing the first several characters of the Other Activity Type's description or use the Lookup Button.
9. Enter the desired Taxable Earning amount received by the employee in the Other Amount Field. This value may be entered in any currency, with up to two decimal places. For clarity, it is recommended that the same currency be used for all Other Amount entries within InfiniTime. Be sure to enter a positive value without a minus (-) sign.
10. Click OK. The example below shows a currency amount of 257.89 in Tips received by an employee. Any currency can be used with InfiniTime Taxable Earnings, though it is recommended that all Other Amounts be tracked in the same currency. InfiniTime does not perform any currency conversions - Taxable Earning values are exported to payroll and displayed on reports within InfiniTime exactly as they are entered.

1. Ensure an Other Activity Type exists for each type of Other Hours tracked by your organization.
2. Other Activity Options, as outlined above, must be configured for each Other Activity Type as appropriate based on your organization's Time and Attendance & HR Rules. For Other Amounts, the Other Activity Type must be set to the Amount Type as shown below.
3. Open the Company Timecard Table
4. Search for the employee you wish to insert Other Hours for.
5. Set the Date Range to include the date(s) you wish to insert Other Hours For.
6. Click on Quick Punch.
7. Set the Type to Other Activity.
8. Select the previously created Other Activity Type for which you wish to insert Other Hours by typing the first several characters of the Other Activity Type's description or use the Lookup Button.
9. Enter the desired number of Other Activity Hours. Be sure to enter a positive value without a minus (-) sign. InfiniTime supports Other Amount entries of -99999.99 to 99999.99
10. Click OK. The example below shows a Negative Other Activity Entry used to offset an overpayment of a Taxable Earning from a prior pay period. The negative value on 8/5/13 will be transferred to payroll and deducted from the employee's final gross pay.

Units, or the number of times a significant task or action is completed such as Piece Count, can be tracked using Other Activity Types of the Amount Type. When inserting the Other Activity Entry, simply enter a whole number value to show the number of times the respective task or action was completed for a given date. In this way, the total number of times the task or action was completed will be transferred to payroll where the Total Piece Count can be used to calculate a Piece rate, or a per unit premium can be paid to the employee at a set currency amount per unit.
Piece Count |
Per Unit Premiums Paid at a Flat Dollar Amount for each Unit (IE: A Per Client Premium for Diving Instructors Leading a Night Dive) |
1. Ensure an Other Activity Type exists for each Per Unit Premium or Piece Count Type tracked by your organization.
2. Other Activity Options, as outlined above, must be configured for each Other Activity Type as appropriate based on your organization's Time and Attendance & HR Rules. For Per Unit Premiums and Piece Counts, the Other Activity Type must be set to the Amount Type as shown below.
3. Open the Company Timecard Table
4. Search for the employee you wish to insert a Taxable Earning for.
5. Set the Date Range to include the date(s) you wish to insert a Per Unit Entry For.
6. Click on Quick Punch.
7. Set the Type to Other Activity.
8. Select the previously created Other Activity Type for which you wish to insert a Per Unit Entry by typing the first several characters of the Other Activity Type's description or use the Lookup Button.
9. Enter the number of times the respective action or task was completed for the date(s) specified in the Other Amount Field. Be sure to enter a positive value without a minus (-) sign. Whole numbers are recommended for use with Per Unit Entries.
10. Click OK. The example below shows a Per Unit Entry of 8 Night Diving Passengers led on a Night Dive by a Diving Instructor. In this instance, the customer's payroll application is configured to pay employees an additional premium of $8.38 per night dive passenger.

1. Ensure an Other Activity Type exists for each Per Unit Premium or Piece Count Type tracked by your organization.
2. Other Activity Options, as outlined above, must be configured for each Other Activity Type as appropriate based on your organization's Time and Attendance & HR Rules. For Per Unit Premiums and Piece Counts, the Other Activity Type must be set to the Amount Type as shown below.
3. Open the Company Timecard Table
4. Search for the employee you wish to insert a Taxable Earning for.
5. Set the Date Range to include the date(s) you wish to insert a Per Unit Entry For.
6. Click on Quick Punch.
7. Set the Type to Other Activity.
8. Select the previously created Other Activity Type for which you wish to insert a Per Unit Entry by typing the first several characters of the Other Activity Type's description or use the Lookup Button.
9. Enter the number of times the respective action or task was completed for the date(s) specified in the Other Amount Field. Be sure to enter a positive value without a minus (-) sign. Whole numbers are recommended for use with Per Unit Entries.
10. Click OK. The example below shows a negative Per Unit Entry used to offset an overpayment of a Per Unit Entry from a prior pay period. The negative value on 8/8/13 will be transferred to payroll and deducted from the employee's final gross pay.

Deduct Used Benefits from Accrual Balances
As part of the InfiniTime Accruals functionality, Other Hours can be deducted from specific Accrual Buckets when hours are inserted for employees. Supervisors, Payroll Clerks, and InfiniTime Administrators may then run reports to show the exact dates employee's accrued hours in addition to the exact dates employee's used hours along with the final available balance. Additional details can be found regarding configuring Other Activity Types that Deduct in the Accrual Overview Section of this document. Related topics are provided below.
| Vacation Time | Sick Time |
| Personal Time | Comp. Time |
Related Topics:
Basic Accruals Module Overview
Other Activities That Deduct Tab
Holidays make it possible to automatically pay employees on holidays based upon certain conditions such as requiring the employee to work the day before or the day after or both in order to receive the holiday. Similar to the method used for configuring Policies, employee groups eligible for different holidays must be identified before attempting to configure holidays within the InfiniTime Application. The most common reasons for different holiday requirements include the following:
Employee Pay Type: Salary and Full Time employees generally receive pay for all holidays recognized by the company. However Part Time employees are generally not eligible for benefits in the form of holiday pay. In this scenario two holiday schedule types are required. One entitled ‘Employee Holidays’ and another entitled ‘No Holiday Benefits.’ Salary and Full Time employees would be assigned to the ‘Employee Holidays’ Schedule Type where as Part Time Employees would be assigned to the ‘No Holiday Benefits’ type.
Personal / Religious Holidays: Some employees may negotiate special religious or personal holidays as part of their salary or bonus package. A different holiday type will be required for each group or individual eligible for different holiday dates. Alternatively, if a holiday date is employee specific, the Holiday can be defined within an employee's profile. See the Holidays Section of the Employee Profile section of this document for additional details on how to access the Holiday Section of the Employee Update Form to configure employee specific holidays.
All Holiday types configured within the InfiniTime Software are displayed on the Holiday Schedule Types Table, which can be accessed from the Lookups Menu as shown below.
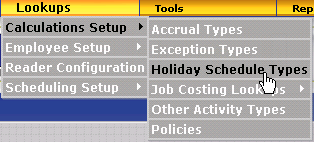
The Holiday Schedule Types Table displays a list of all Holiday Types configured within InfiniTime. Holiday Types are used to define specific holiday dates for which employees are eligible for Holiday Pay. Holiday Schedule Types are also used in conjunction with Employee Policy settings to define specific benefits for employees who work on holiday dates such as time and a half (1.5x Employee Base Rate) or double time (2.x Employee Base Rate).
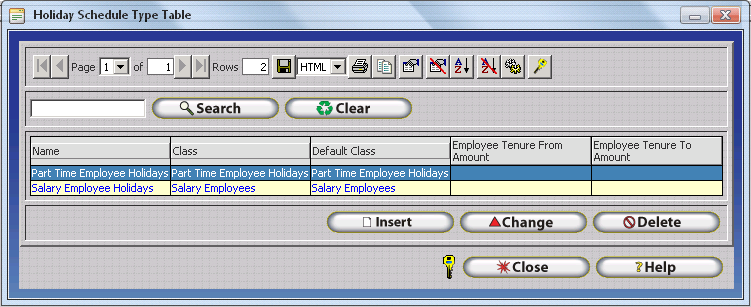
Insert - Opens the Holiday Schedule Type Update Form which can be used to create a new Holiday Type. One Holiday Type should be configured for each group of employees with different holiday settings. Similar to policies, the Class System permits multiple holiday types to be created to define Holiday Settings for employees which receive different holiday benefits based on the number of years they have been employed with your organization. For example part time employees generally receive a limited number of holidays, while full time employees generally receive all federal holidays. A holiday schedule type would be required for each group of employees, one for part time and one for full time. If employee holidays should change based on the amount of time employees have been with the company tenures must be used. A new holiday schedule type entry is required for each period with new holiday settings, though each schedule type will use the same class name because they are in the same group. Employees will automatically be moved between Holiday Schedule Types in the same class when they meet tenure requirements. If employee holiday dates do not change based on the amount of time an individual or group is employed at an organization, only one Holiday Type must be defined for the respective individual and / or group of employees. In this case, the Tenure fields may be left blank as shown in the image above.
Change - Opens the Holiday Schedule Type Update form for the selected Holiday Type. The InfiniTime Administrator may then alter the Holiday Type's configuration or its related Holiday Dates as desired.
Delete - Deletes the selected Holiday Type from the Holiday Schedule Type Table. If a Holiday Type is assigned to an employee, or if a System Holiday Timecard record has been created for one or more of the Holiday Dates assigned to the Holiday Type, InfiniTime will not permit it to be deleted.
Includes settings and options related to the Holiday Type such as Holiday Type Name, Class Settings, and Tenure Settings.
Name – A description of the Holiday Schedule Type. Often describes the group of employees that will be assigned to the holiday schedule type for organizational purposes and ease of recognition.
Class – Classes provide grouping for Holiday Schedule Types. A class can be thought of as a group name for a particular set of Holiday Schedule Types. The class name must be identical for all Holiday Schedule Types in a Group. For clarity, it is recommended that the Class name be configured even if only one holiday type exists within the database.
Default Class - When an employee has exhausted all the policies in the class, the employee will be automatically placed in a different class as specified by the default class. For clarity, it is recommended that the Default Class name be configured even if only one holiday type exists within the database.
Employee Tenure From Amount – Minimum value, in years, that an employee must work before qualifying for the Holiday Schedule Type. The Employee Tenure From Amount can be left blank if only one Holiday Type is required for a group of employees.
Employee Tenure To Amount – Maximum value, in years, that an employee can work while still qualifying for the Holiday Schedule Type. The Employee Tenure From Amount can be left blank if only one Holiday Type is required for a group of employees.
Default Holiday Schedule Type – Check this box to make this Holiday Schedule Type the default. Only one Holiday Schedule Type can be selected as the default, it will be highlighted as blue in the Holiday Schedule Type Table. Employees are assigned to the Default Holiday Schedule Type automatically if all of the following conditions are met:
The Employee does not qualify for the Holiday Schedule Type that has been assigned due to tenure restrictions.
The Employee does not qualify for any Holiday Schedule Types in the class they are currently assigned to.
The Employee does not qualify for any Holiday Schedule Type in the default class they are currently assigned to.
The Dates Tab of the Holiday Schedule Type Update Form displays each Holiday Date configured for the respective Holiday Type.
Insert - Displays the Master Holiday Update form. Used to insert a new holiday type. Each holiday that will be assigned to the specified Holiday type must be configured individually using this option. InfiniTime will automatically add other activity hours for employees who meet requirements for the holiday. A description of each field and feature is provided below.
Change - Opens the Master Holiday Update form for the selected Holiday Date. The InfiniTime Administrator may then alter the Holiday Options and conditions as desired for the respective holiday date. It is important to note that the Holiday Date should not be changed. InfiniTime Holidays must be configured for each individual date on a year to year basis. InfiniTime will prevent the user from changing the holiday date or deleting a holiday date if a System Holiday Timecard record is present in the database for the respective holiday date.
Delete - Deletes the selected Holiday Date from the respective Holiday Type. It should be noted that InfiniTime will prevent the user from deleting a holiday date if a System Holiday Timecard record is present in the database.
The Holiday Master Holiday Update Form is used to define holiday options and conditions for individual holiday dates. A list of all available holiday options and conditions is provided below.

Name: Enter the Name of Holiday.
Date: Enter the Date of Holiday. For a given holiday type, only one holiday may exist on each date. Attempts to insert more than one holiday on a single date will cause a warning to be displayed indicating the Employee Holiday Date must be unique.
Deduction Type: Select the type of deduction. If Accrual is selected an Accrual Name must be selected for posting.

Other Activity Type Specifies the Other Activity Type which will be used to insert hours for the selected date. The same activity type is generally used for all Holiday Hours. IE: Holiday Time
All Worked Hours Are Holiday Pay Determines whether employees will automatically receive pay for the holiday or if they are required to work on the holiday before receiving hours. If this option is set to No employees will automatically receive hours for the holiday if they meet any requirements defined by other Holiday Options. If this option is set to Yes employees must punch in and out on the selected date in order to receive holiday pay.
Other Activity Hours When All Worked Hours Are Holiday Pay is set to No employees will automatically receive the number of hours entered in this field. (IE: 8)
Max Other Activity Hours When All Worked Hours Are Holiday Pay is set to Yes employees will not receive holiday pay for hours worked in excess of the value entered in this field.
Worked Holiday Rate Multiplier Enter a rate for holiday hours in this field. Holiday hours will be calculated at this rate for the purpose of Gross Payroll Reports within the InfiniTime Application.
Day Before Holiday Must Be Worked If this option is set to Yes employees must work the day before the holiday in order to receive holiday hours. If employees do not have a default schedule defined then Day Before is literal if the holiday is on a Monday the employee must work the day before the holiday (Sunday) in order to receive Holiday Hours. If employees have a default scheduled defined then Day Before refers to the first scheduled day prior to the holiday.
*Day After Holiday Must Be Worked If this option is set to Yes employees must work the day after the holiday in order to receive holiday hours. If employees do not have a default schedule defined then Day After is literal if the holiday is on a Monday the employee must work the day after the holiday (Tuesday) in order to receive Holiday Hours. If employees have a default scheduled defined then Day After refers to the first scheduled day after to the holiday.
*Note: The Day Before Holiday Must be Worked and Day After Holiday Must be Worked settings cannot be enabled for two consecutive holidays such as Thanksgiving and The Day After Thanksgiving. In this case enable Day Before Holiday Must be Worked for the first holiday (Thanksgiving) and Day After Holiday Must be Worked for the second holiday (The Day After Thanksgiving.)
++ **Holiday Starts Day Before Setting this option to Yes provides the user with the ability to start holiday pay at a certain time on the day before the holiday. This is commonly used for night shifts.
++ **Holiday Ends on Holiday Setting this option to Yes provides the user with the ability to end holiday pay at a certain time on the day of the holiday.
++ **Holiday Ends Day After Setting this option to Yes provides the user with the ability to end holiday pay at a certain time on the day after the holiday.
++ ** Holiday Based on Employee's Schedule - If this option is set to Yes the holiday start and end times will automatically be adjusted to match the employee's schedule for the date of the holiday. The employee will then receive Holiday Hours for all hours worked between the Start and End times of the holiday, as defined by the employee's schedule. If the employee does not report to work for the holiday date, the employee will receive Holiday Hours according to the number of working hours scheduled on the holiday date. Examples are provided below.
Example: Holiday Based on Employee's Schedule: Employee Reports to Work
Holiday: Friday, December 24, 2010.
Employee's Schedule: Monday to Friday, 8:00 AM to 4:00 PM
In this scenario, the holiday would start at 8:00 AM and end at 4:00 PM on 12/24/2010. The employee would receive holiday hours for any hours worked between 8:00 AM and 4:00 PM on 12/24/2010.
Example: Holiday Based on Employee's Schedule: Employee Has the Day Off and does not report to work
Holiday: Friday, December 24, 2010.
Employee's Schedule: Monday to Friday, 8:00 AM to 4:00 PM
In this scenario, the holiday would start at 8:00 AM and end at 4:00 PM on 12/24/2010. Since the employee did not report to work, they automatically receive Holiday Pay for 8 Hours.
**Note: Settings that alter the starting and ending day of the holiday are disabled when 'All Worked Hours are Holiday Pay is set to No. The start and end of a holiday can only be altered when employees are required to work the only in order to receive Holiday Pay.
++Note: By default, without any changes to settings that alter the starting and ending day of the holiday, all Hours Between 12:00 AM and 11:59 PM on the date of the holiday will be paid as Holiday Time when 'All Worked Hours are Holiday Hours' is set to Yes.
Not a Holiday if Worked - When set to Yes, the Other Activity Holiday Date will not be inserted if the employee reports to work on the Holiday date.
.
^^Employee Required to Work - When set, this option requires employees to work a minimum number of hours over a specified number of days or weeks prior to the holiday in order to receive Holiday Pay. It is important to note that the 'Days' and 'Weeks' settings operate differently. The 'Days' selection totals hours over a specified number of days starting with the day immediately before the date of the holiday. The 'Weeks' selection totals employee hours worked over a specified number of weeks starting with the week before the date of the holiday. Refer to the note below for an illustration of the difference between the 'Day(s)' and 'Week(s)' selections.
^^Average Hours Average hours can be set to calculate average hours over a number of days prior to the holiday or over a number of work weeks prior to the holiday. It is important to note that the 'Days' and 'Weeks' settings operate differently. The 'Days' selection averages hours over a specified number of days starting with the day immediately before the date of the holiday. The 'Weeks' selection averages employee hours worked over a specified number of weeks starting with the week before the date of the holiday. Refer to the note below for an illustration.
^^Note: The images below illustrate the difference between a 3 Week(s) 21 Day(s). Days shaded in yellow represent days which will be included in the calculation. The boxed date indicates the date of the holiday. Notice how the 21 Day Selection includes the days immediately before the date of the holiday that fall during the same week of the holiday while the 3 Week Selection does not.
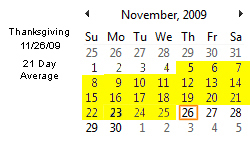

Example: Average Hours by Days
If Average Hours is enabled InfiniTime will average employee working hours for a number of days or weeks prior to the holiday according to the 'Average the Past' Field and the Days or Weeks Drop Down Menu. InfiniTime will then automatically insert the calculated average for the Holiday. The number of hours entered into the Other Activity Hours field will serve as the maximum number of hours an employee can receive. Two Examples are illustrated below with the following settings:
Average Hours |
Yes |
Days to Average |
21 |
Other Activity Hours |
10.00 |
All Hours Worked are Holiday Pay |
No |
Day |
Hours Worked: Scenario 1 |
Hours Worked: Scenario 2 |
11/5 |
8.25 |
11.50 |
11/6 |
8.00 |
11.25 |
11/9 |
8.00 |
12.00 |
11/10 |
6.50 |
12.00 |
11/11 |
6.20 |
8.50 |
11/12 |
7.50 |
11.50 |
11/13 |
8.00 |
12.00 |
11/16 |
8.55 |
12.00 |
11/17 |
9.00 |
12.50 |
11/18 |
8.00 |
11.00 |
11/19 |
8.00 |
11.00 |
11/20 |
8.00 |
12.00 |
11/23 |
8.25 |
12.00 |
11/24 |
7.50 |
8.00 |
11/25 |
8.02 |
8.50 |
Average |
7.85 |
11.05 |
Friday (Holiday) |
7.85 |
10.00 |
Example: Average Hours by Weeks
Average Hours |
Yes |
Weeks to Average |
3 |
Other Activity Hours |
10.00 |
All Hours Worked are Holiday Pay |
No |
Day |
Hours Worked: Scenario 1 |
Hours Worked: Scenario 2 |
11/2 |
8.25 |
11.50 |
11/3 |
8.00 |
11.25 |
11/4 |
8.00 |
12.00 |
11/5 |
6.50 |
12.00 |
11/6 |
6.20 |
8.50 |
11/9 |
7.50 |
11.50 |
11/10 |
8.00 |
12.00 |
11/11 |
8.55 |
12.00 |
11/12 |
9.00 |
12.50 |
11/13 |
8.00 |
11.00 |
11/16 |
8.00 |
11.00 |
11/17 |
8.00 |
12.00 |
11/18 |
8.25 |
12.00 |
11/19 |
7.50 |
8.00 |
11/20 |
8.02 |
8.50 |
Daily Average |
7.85 |
11.05 |
Friday (Holiday) |
7.85 |
10.00 |
The Hours Mapping Tab permits employee scheduled and unscheduled hours worked on a Holiday Date to be mapped to a different hours type, such as Overtime Four. Additional details on the use of Hours Mapping can be found in the Hours Mapping section of this document.
Scheduled Hours Tab
Map Regular Hours Into - When set to a specific hours type, all Scheduled Regular Hours worked on the Holiday Date will be mapped into the selected Hours Type.
Map OT One Hours Into - When set to a specific hours type, all Scheduled OT One Hours worked on the Holiday Date will be mapped into the selected Hours Type.
Map OT Two Hours Into - When set to a specific hours type, all Scheduled OT Two Hours worked on the Holiday Date will be mapped into the selected Hours Type.
Map OT Three Hours Into - When set to a specific hours type, all Scheduled OT Three Hours worked on the Holiday Date will be mapped into the selected Hours Type.
Map OT Four Hours Into - When set to a specific hours type, all Scheduled OT Four Hours worked on the Holiday Date will be mapped into the selected Hours Type.
Scheduled Hours are hours worked which fall within the bounds of an employee's schedule for a given date. For example, if an employee has a schedule of 8:00 AM to 5:00 PM on 4/15/2013, all Regular Hours, Overtime One Hours, Overtime Two Hours, Overtime Three Hours, and Overtime Four Hours worked between 8:00 AM and 5:00 PM on 12/31/2013 will be considered Scheduled Hours and mapped according to Scheduled Hours Mapping settings.
Unscheduled Hours Tab
Map Regular Hours Into - When set to a specific hours type, all Unscheduled Regular Hours worked on the Holiday Date will be mapped into the selected Hours Type.
Map OT One Hours Into - When set to a specific hours type, all Unscheduled OT One Hours worked on the Holiday Date will be mapped into the selected Hours Type.
Map OT Two Hours Into - When set to a specific hours type, all Unscheduled OT Two Hours worked on the Holiday Date will be mapped into the selected Hours Type.
Map OT Three Hours Into - When set to a specific hours type, all Unscheduled OT Three Hours worked on the Holiday Date will be mapped into the selected Hours Type.
Map OT Four Hours Into - When set to a specific hours type, all Unscheduled OT Four Hours worked on the Holiday Date will be mapped into the selected Hours Type.
Unscheduled Hours are hours worked which fall outside the bounds of an employee's schedule for a given date. For example, if an employee has a schedule of 8:00 AM to 5:00 PM on 12/31/2013, all Regular Hours, Overtime One Hours, Overtime Two Hours, Overtime Three Hours, and Overtime Four Hours worked outside of 8:00 AM to 5:00 PM on 12/31/2013 (IE: 12/31/2013 12:00 AM - 8:00 AM and 5:00 PM to 11:59 PM) will be considered Unscheduled Hours and mapped according to Scheduled Hours Mapping settings.
Any Hours Worked Over Holiday Hours go Into OT - Allows you to map hours worked in excess of the Holiday Other Activity Hours amount to an overtime bucket.
Deduct Worked Holiday Hours from Weekly Overtime - When checked, Hours Worked on the Holiday Date will not be counted toward weekly overtime hours.
The Rate Mapping Tab of the Master Holiday Update form permits the InfiniTime Administrator to scale the number of Other Activity Hours awarded on the holiday date according to the number of hours worked by the employee over a number of days prior to the holiday date. This feature is especially useful for organizations who wish to scale Holiday benefits accordingly for Part Time and Full Time employees based on the employee's worked hours.
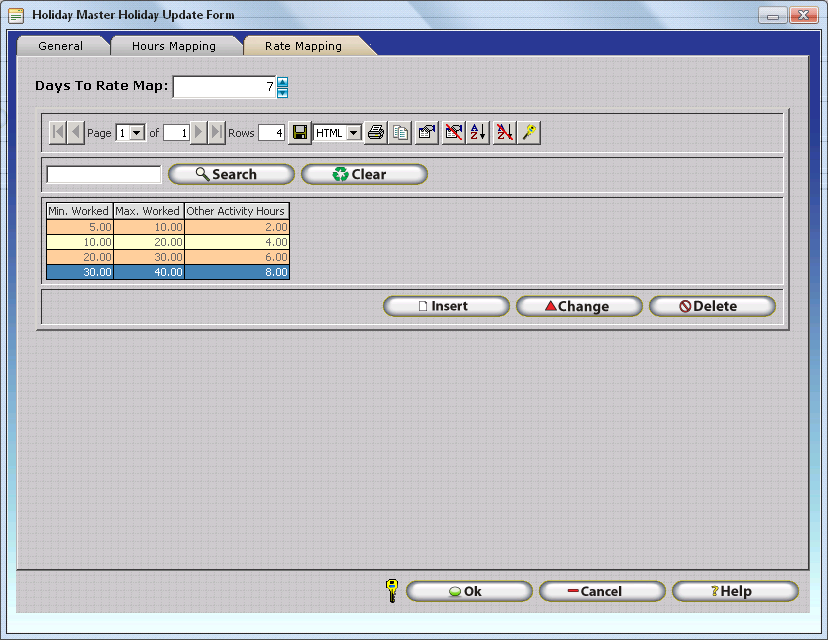
Days to Rate Map - Enter the number of days, prior to the holiday date, for which worked hours will be totaled and compared against Rate Mapping entries to determine how many Other Activity Hours should be awarded for each employee assigned to the respective holiday type.
Insert -
Displays the Holiday Rate Mapping Update Form as shown below which is
used to create new rate mapping entries. One Rate Mapping Entry should
be created for each separate Other Activity Amount to be awarded based
on employee working hours. For example, the image above shows a
simple Holiday Rate Mapping configuration with a break down awarding
two holiday hours for every multiple of ten hours worked. 
Hours Worked: The range of hours that must be worked over the days prior to the holiday as defined by 'Days to Rate Map' to receive the specified number of Other Activity Hours.
Other Activity Hours: The amount of other activity hours given when an employee's total worked hours falls within the specified range of hours.
Change - Opens the Master Holiday Update form for the selected Holiday Date. The InfiniTime Administrator may then alter the Holiday Options and conditions as desired for the respective holiday date. It is important to note that the Holiday Date should not be changed. InfiniTime Holidays must be configured for each individual date on a year to year basis. InfiniTime will prevent the user from changing the holiday date or deleting a holiday date if a System Holiday Timecard record is present in the database for the respective holiday date.
Delete - Deletes the selected Holiday Date from the respective Holiday Type. It should be noted that InfiniTime will prevent the user from deleting a holiday date if a System Holiday Timecard record is present in the database.
Follow the steps below to gather required information and configure holidays:
**NOTE: If only a handful of employees are eligible for specific holidays, as often occurs in the case of some Religious Holidays, Holiday Dates may be configured on an Employee by Employee Basis within the Employee's Profile.
Note: Holidays dates do not automatically move from year to year. Holiday dates records must be created for each individual holiday date on a yearly basis. Holiday records for prior years should not be deleted.
Note: Employee holiday eligibility does not commonly change based upon the amount of time an individual has been with a company, however classes and tenures can be used to provide support for this scenario.
Note: InfiniTime 7.07 permits multiple Holiday Date Entries for a single Calendar Date. This makes it possible to configure different Hours Mapping settings for Worked Hours on a Holiday Date (IE: A Holiday Date with All Worked Hours are Holiday Hours = Yes) and Holiday Pay Hours awarded even when the employee does not report to work (IE: A Holiday Date with All Worked Hours are Holiday Hours = No).
ABC Company has, on an overall basis, three groups of employees with distinct holiday settings:
Note: ABC Company Tracks Regular Hours as <40 / Weekly, OT1 Hours as >40 Weekly and OT2 Hours as Worked Holiday Hours
Additionally, two Full Time employees (Employee ID 202 and 708) observe specific Religious Holidays. While these Holidays are not observed directly by ABC Company – the employee’s in question have been preapproved for Personal Time on these dates and ABC Company would prefer if InfiniTime could handle these holidays automatically. Employees are not required to work the day before or day after in order to receive their Employee Specific Holidays. Employees will not report to work on Employee Specific Holidays.
Holidays would be configured as follows for this scenario:
Log Into the Manager Module
Click on Lookups – Calculations Setup – Holiday Schedule Types
Click Insert to Create a Holiday Type
Set the Holiday Type Description, Class, Default Class, and Tenure as Appropriate
Click on the Dates Tab and Click Insert to Create a Holiday Date
One Holiday Date must be created for each Holiday Observed by ABC Company as listed below. Be sure to configure Holiday Features & Conditions as appropriate for each holiday date.
Employee Specific Holidays can be defined on the Employee Update Form:
Open the Employee Table
Search for the Employee for which the Employee Specific Holiday will be defined. Highlight the employee and click Change.
Click on the Holidays Tab.
Click Insert to Create a Holiday Date for the respective employee. This Holiday Date will only be created for the employee in question. Be sure to configure Holiday Features & Conditions as appropriate for each holiday date.
The tables below depict the details that must be gathered in order to configure holidays for a customer.
Holiday Types:
Holiday Type Description |
Holiday Type Class |
Holiday Type Default Class |
Holiday Type Tenure |
Full Time Production Holidays |
Full Time Production |
Full Time Production |
0 to 99 Years |
Full Time Admin Holidays |
Full Time Admin |
Full Time Admin |
0 to 99 Years |
Part Time Holidays |
Part Time |
Part Time |
0 to 99 Years |
Holiday Date |
Holiday Name |
Holiday Hours / Other Activity Type |
Additional Features & Conditions |
1/1/12 |
New Years Day |
8 Hrs: Holiday |
|
2/20/12 |
Presidents Day |
8 Hrs: Holiday |
|
5/28/12 |
Memorial Day |
8 Hrs: Holiday |
|
7/4/12 |
Independence Day |
8 Hrs: Holiday |
|
9/3/12 |
Labor Day |
8 Hrs: Holiday |
|
11/22/12 |
Thanksgiving Day |
8 Hrs: Holiday |
|
11/23/12 |
Day After Thanksgiving |
8 Hrs: Holiday |
|
12/24/12 |
Christmas Eve |
8 Hrs: Holiday |
|
12/25/12 |
Christmas Day |
8 Hrs: Holiday |
|
12/31/12 |
New Years Eve |
8 Hrs: Holiday |
|
Holiday Date |
Holiday Name |
Holiday Hours / Other Activity Type |
Additional Features & Conditions |
1/1/12 |
New Years Day |
8 Hrs: Holiday |
None |
2/20/12 |
Presidents Day |
8 Hrs: Holiday |
None |
5/28/12 |
Memorial Day |
8 Hrs: Holiday |
None |
7/4/12 |
Independence Day |
8 Hrs: Holiday |
None |
9/3/12 |
Labor Day |
8 Hrs: Holiday |
None |
11/22/12 |
Thanksgiving Day |
8 Hrs: Holiday |
None |
11/23/12 |
Day After Thanksgiving |
8 Hrs: Holiday |
None |
12/24/12 |
Christmas Eve |
8 Hrs: Holiday |
None |
12/25/12 |
Christmas Day |
8 Hrs: Holiday |
None |
12/31/12 |
New Years Eve |
8 Hrs: Holiday |
None |
Holiday Date |
Holiday Name |
Holiday Hours / Other Activity Type |
Additional Features & Conditions |
NONE: · Part Time Employees are not eligible for Holidays. No Holiday Dates should be added to the ‘Part Time Holidays’ Holiday Type. |
|||
Holiday Date |
Holiday Name |
Holiday Hours / Other Activity Type |
Additional Features & Conditions |
2/22/12 |
Ash Wednesday |
8 Hrs: Personal Time |
None |
4/6/12 |
Good Friday |
8 Hrs: Personal Time |
None |
Holiday Date |
Holiday Name |
Holiday Hours / Other Activity Type |
Additional Features & Conditions |
12/9/12 |
Hanukkah |
8 Hrs: Personal Time |
None |
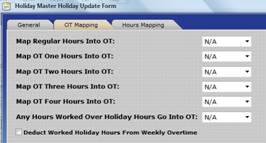
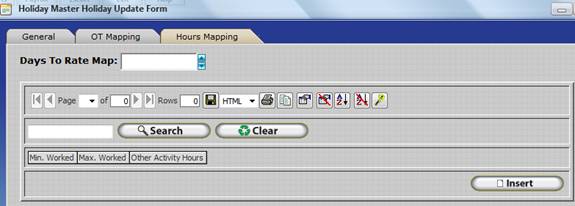
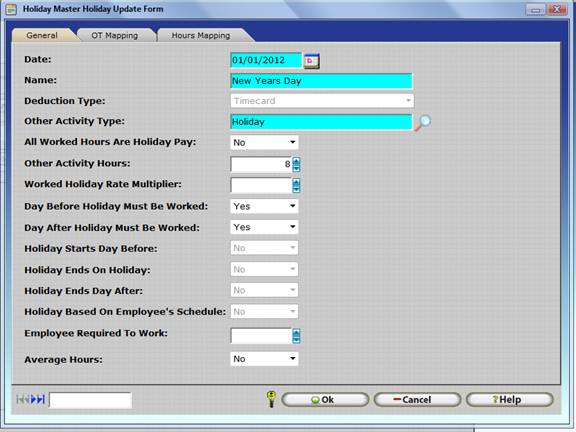
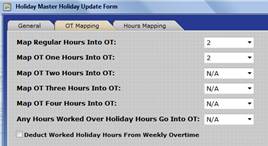
Part Time Employees do not receive holidays. With this in mind, the ‘Part Time Holidays’ Holiday Schedule Type does not have any holiday dates defined.
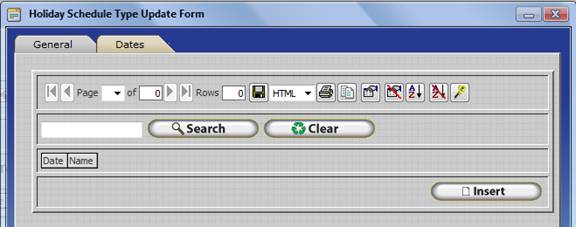
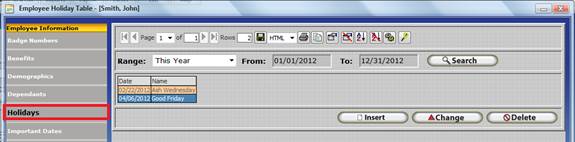
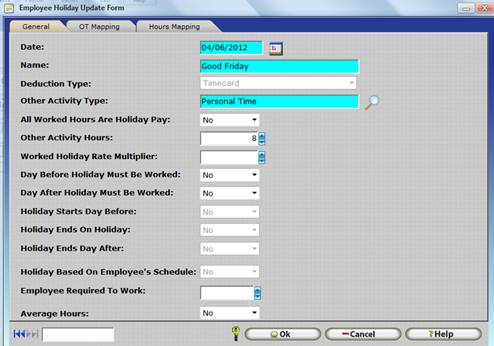
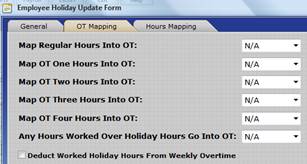

For organizations that differentiate between Scheduled and Unscheduled Hours, employees may receive different rates of pay for Holiday Dates depending on whether they were scheduled to work on the Holiday Date. InfiniTime's flexible Hours Mapping System, Holiday Options, Other Activity Types, and Payroll Export System provide support for a variety of configurations to meet the needs of most organizations. Before we review exactly how to separate Scheduled and Unscheduled Hours worked on Holiday Dates within InfiniTime, let us first discuss common incentives and benefits awarded to employees for Holiday Dates.
| Method | Description |
| Fixed Benefits | Employees receive a preset number of hours at a specific pay rate for each Holiday Date, based on specific conditions as set on the Holiday Date. |
| Premium Pay for Worked Hours | Employees receive a premium pay rate for worked hours (Scheduled, Unscheduled, or Both) on a Holiday Date. |
| Fixed Benefits with Premium Pay for Worked Hours | Employees receive both a preset number of hours at their base rate for each Holiday Date in addition to a premium |
Fixed Benefits, or a preset number of hours paid at a specific pay rate for each Holiday date, are awarded to employees for each holiday date based on specific Holiday Options and Conditions set on the Holiday Date. Fixed Benefits are automatically inserted by InfiniTime as Other Hours for the Other Activity Type selected on the Holiday Date. When differentiating between Scheduled and Unscheduled Hours, a fixed number of scenarios exist for individual employees on a given holiday date as outlined below. Holiday Options and Conditions can be set to award or deny Fixed Benefits for specific scenarios as outlined below.
Schedule Exists on Holiday Date |
Working Status |
Note |
Yes |
Working |
Award:
Deny:
|
Yes |
Not Working // Facility Closed |
Award:
Deny:
|
Yes |
Not Working // Employee Called Out Sick |
Award:
Deny:
|
No |
Working // Employee Called In For Duty |
Award:
Deny:
|
No |
Not Working |
Award:
Deny:
|
Fixed Benefits - Holiday Options and Conditions
To Award Fixed Benefits, a Holiday Date must be configured with 'All Worked Hours are Holiday Pay' = No. For each Holiday Date, the Other Activity Hours field should be set to the number of hours to be awarded to employees. Options and conditions can be used to limit or adjust the total number of Other Hours awarded to employees in specific situations as explained below. Additionally, a single Other Activity Type such as 'Holiday Pay' should be assigned to each Holiday Date. Pay Codes should be set as appropriate for the 'Holiday Pay' Other Activity type to ensure the customer's Payroll Application pays Holiday Pay Hours at the correct rate.
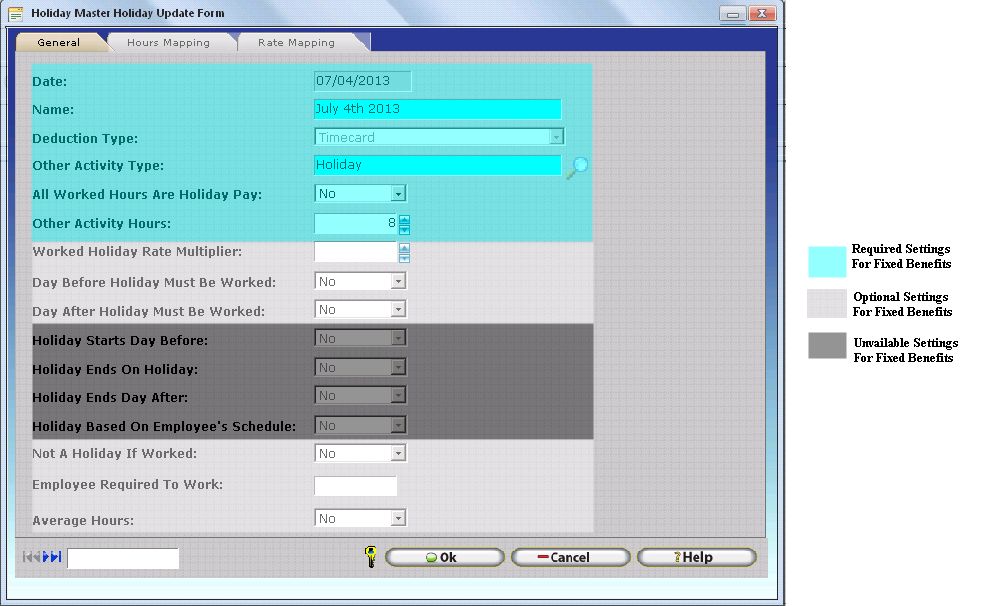
Options and Conditions for Fixed Benefit Holiday Dates
Date - Required. Set the Date Field to the Calendar Date InfiniTime should award Fixed Benefits..
Name - Required. The Holiday Date Name must be unique. For example 'July 4th 2013 Fixed Benefits' or 'July 4th 2013 Holiday Pay'.
Deduction Type - Required. For Fixed Benefit Holiday Dates, the deduction type should be set to Timecard.
Other Activity Type - Required. For Fixed Benefit Holiday Dates, the Other Activity Type should be set to a single Other Activity Type such as 'Holiday Pay' for all Holiday Dates.
Other Activity Hours - Required. For Fixed Benefit Holiday Dates, the Other Activity Hours Field should be set to the number of hours to be awarded to eligible employees on the respective date.
Day Before Holiday Must be Worked - Optional. If this option is set to Yes, Fixed Benefits will only be awarded for the respective Holiday Date if employees work the day before the Holiday Date.
Day After Holiday Must be Worked - Optional. If this option is set to Yes, Fixed Benefits will only be awarded for the respective Holiday Date if employees work the day after the Holiday Date.
Not a Holiday If Worked - Optional. This option can be used to prevent InfiniTime from inserting Fixed Benefits if an employee works on the Holiday Date. If 'Not a Holiday If Worked' is set to Yes, InfiniTime will not insert Other Hours if the employee has worked hours on the Holiday Date.
Employee Required To Work - Optional. This option can be used to require employees to work a minim um number of hours before Fixed Benefits will be awarded. The table below explains different methods for using the 'Employee Required To Work' setting in order to require a minimum number of hours worked On the Holiday Date, over a certain number of days immediately prior to the Holiday Date, or over a certain number of Work Weeks prior to the Holiday Date. Additional details on the difference between the 'Day(s)' and the 'Week(s)' selection can be found above.
Employee must work X Hours... |
Required Configuration |
| ...On the Holiday Date |

Where X is the number of hours the employee must work on the Holiday Date in order to received Fixed Benefits. The Employee Required To Work Unit Field, as highlighted in yellow, should be left blank. |
| ...Over Y days immediately prior to the Holiday Date |

|
| ...Over Y Work Weeks prior to the Work Week of the Holiday Date |

|
Average Hours - Optional. Average hours can be used to calculate average hours over a number of days prior to the holiday or over a number of work weeks prior to the holiday. The final calculated average will then be awarded to the employee, up to a maximum number of hours as controlled by the Other Activity Hours Field. Additional Details on the Average Hours feature can be found above.
Hours Mapping - Optional. Scheduled and Unscheduled Hours Mapping Settings on the Hours Mapping Tab are applied to worked hours on the Holiday Date. Hours Mapping Settings can be used to map specific hours types into different columns on the employee timecard to control the rate at which hours are paid. Additional details can be found in the Hours Mapping Section of this document.
Rate Mapping - Optional. Rate Mapping settings can be used to automatically adjust the number of Other Hours awarded based on the number of hours worked by employees over a give number of days immediately prior to the holiday date. Additional details can be found in the Rate Mapping section above.
Premium Pay for Worked Hours on a Holiday Date refers to paying employees a premium rate above and beyond their normal base wage for worked hours (Scheduled, Unscheduled, or Both) on a Holiday Date. Premium Pay Hours can be automatically tracked by InfiniTime in most scenarios and posted to the Other Activity Type selected on the Holiday Date. When differentiating between Scheduled and Unscheduled Hours, a fixed number of scenarios exist for individual employees on a given holiday date as outlined below. Holiday Options and Conditions can be set to award or deny Premium Pay for Worked Hours for specific scenarios as outlined below.
Schedule Exists on Holiday Date |
Working Status |
Note |
Yes |
Working |
Award:
Deny:
|
Yes |
Not Working // Facility Closed |
Not Applicable:
|
Yes |
Not Working // Employee Called Out Sick |
Not Applicable:
|
No |
Working // Employee Called In For Duty |
Award:
Deny:
|
No |
Not Working |
Not Applicable:
|
Premium Pay For Worked Hours - Holiday Options and Conditions
To Award Premium Pay For Worked Hours, a Holiday Date must be configured with 'All Worked Hours are Holiday Pay' = Yes. A single Other Activity Type such as 'Holiday Worked' should be assigned to each Holiday Date intended for Premium Pay. Pay Codes should be set as appropriate for the 'Holiday Worked' Other Activity type to ensure the customer's Payroll Application pays Holiday Pay Hours at the correct rate.
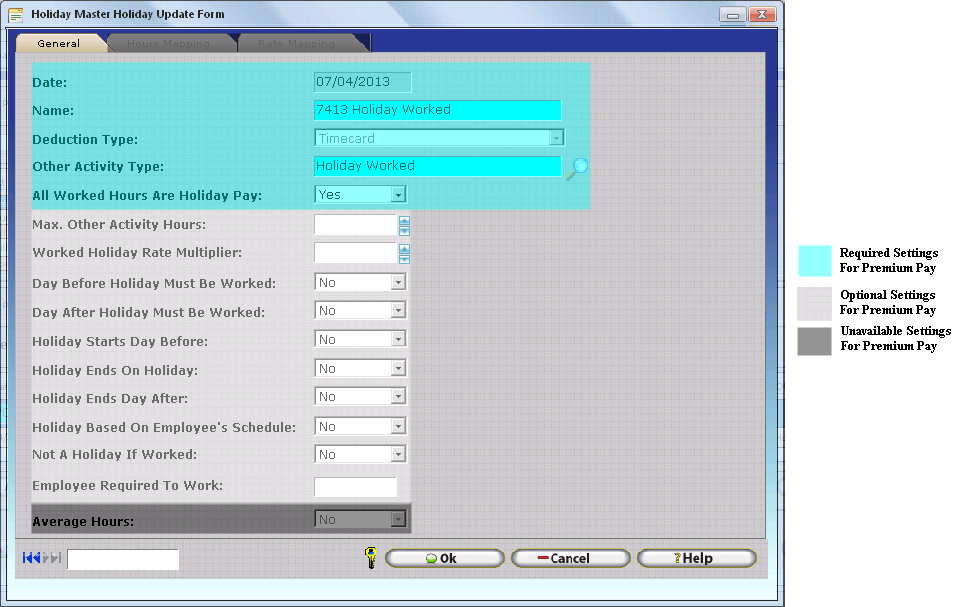
Options and Conditions for Holiday Dates with Premium Pay for Worked Hours
Date - Required. Set the Date Field to the Calendar Date InfiniTime should award Premium Pay for Worked Hours.
Name - Required. The Holiday Date Name must be unique. For example 'July 4th 2013 Premium Pay' or 'July 4th 2013 Holiday Worked'.
Deduction Type - Required. For Premium Pay for Worked Hours Holiday Dates, the deduction type should be set to Timecard.
Other Activity Type - Required. For Premium Pay for Worked Hours Holiday Dates, the Other Activity Type should be set to a single Other Activity Type such as 'Holiday Worked' for all Holiday Dates.
Max. Other Activity Hours - Optional. For Premium Pay for Worked Hours Holiday Dates, the Max Other Activity Hours Field sets a limit to the number of working hours eligible for Premium Pay. If this field is left blank, all worked hours on the holiday date will be posted to the selected Other Activity Type.
Day Before Holiday Must be Worked - Optional. If this option is set to Yes, Premium Pay Benefits for Worked Hours will only be awarded for the respective Holiday Date if employees work the day before the Holiday Date.
Day After Holiday Must be Worked - Optional. If this option is set to Yes, Premium Pay Benefits for Worked Hours will only be awarded for the respective Holiday Date if employees work the day after the Holiday Date.
Holiday Starts Day Before - Optional. Setting this option to Yes will start Premium Pay Benefits for Worked Hours at a user specified time on the day immediately before the holiday. This is commonly used for organizations that operate around the clock.
Holiday Ends on Holiday - Optional. Setting this option to Yes will end Premium Pay Benefits for Worked Hours at a user specified time on the Holiday Date. Hours after this time will be treated as working hours on a normal working day and will not receive Premium Pay Benefits.
Holiday Ends Day After - Optional. Setting this option to Yes will end Premium Pay Benefits for Worked Hours at a user specified time on the day immediately after the Holiday Date. This is commonly used for organizations that operate around the clock.
Holiday Based on Employee's Schedule - Optional. Setting this option to Yes will limit the total number of Worked Hours eligible for Premium Pay Benefits to the total number of hours the employee is scheduled to work on the Holiday Date. Unlike 'Max Other Activity Hours' which sets a fixed cap for all employees assigned to the respective Holiday Type, 'Holiday Based on Employee's Schedule' provides the ability to set a flexible cap on the number of Worked Hours eligible for Premium Pay Benefits based on the total number of scheduled hours for each employee.
Not a Holiday If Worked - Optional. This option can be used to prevent InfiniTime from inserting Premium Pay Benefits for Worked Hours if an employee works on the Holiday Date. If 'Not a Holiday If Worked' is set to Yes, InfiniTime will not post worked hours to the Selected Other Activity Type.
Employee Required To Work - Optional. This option can be used to require employees to work a minimum number of hours in order to receive Premium Pay Benefits for Worked Hours. The table below explains different methods for using the 'Employee Required To Work' setting in order to require a minimum number of hours worked On the Holiday Date, over a certain number of days immediately prior to the Holiday Date, or over a certain number of Work Weeks prior to the Holiday Date. Additional details on the difference between the 'Day(s)' and the 'Week(s)' selection can be found above.
Employee must work X Hours... |
Required Configuration |
| ...On the Holiday Date |
Where X is the number of hours the employee must work on the Holiday Date in order to received Premium Pay Benefits for all worked hours. The Employee Required To Work Unit Field, as highlighted in yellow, should be left blank. |
| ...Over Y days immediately prior to the Holiday Date |
|
| ...Over Y Work Weeks prior to the Work Week of the Holiday Date |
|
For organizations that provide for both Fixed Benefits and Premium Pay Benefits for Worked Hours on Holiday Dates with Scheduled and Unscheduled Hours, two sets of Holiday Dates must be created for each Calendar Date with Holiday Benefits. First, for each Calendar Date on which employees receive Holiday Benefits, configure a Holiday Date as appropriate for Fixed Benefits. Refer to the above section 'Holiday Configuration - Fixed Benefits' for additional details. Second, for each Calendar Date on which employees receive Premium Pay for Worked Hours, configure a Holiday Date as appropriate for Premium Pay for Worked Hours. Refer to the above section 'Holiday Configuration - Premium Pay for Worked Hours' for additional details. InfiniTime will automatically award both Fixed Benefits and Premium Pay for Worked Hours based on the Holiday Options and Conditions set for each individual holiday date. With this in mind, special care should be taken to configure each individual holiday date with appropriate Holiday Options and Conditions to match the needs of your organization.
For clarity, an example is provided below showing complete configuration for a single Calendar Date in order to award both Fixed Benefits and Premium Pay for Worked Hours. Customers wishing to configure holidays for both Fixed Benefits and Premium Pay for Worked Hours w/ Scheduled and Unscheduled hours can follow the procedure below to configure holidays.
Holiday Configuration Procedure: Fixed Benefits + Premium Pay For Worked Hours w/ Scheduled & Unscheduled Hours
Ensure Employee Policies are configured to separate employee worked hours into OT1, OT2, OT3, and OT4 as appropriate to meet your organization's needs.
List each set of Employees Eligible for Holiday Benefits on Different Calendar Dates.
List each Calendar Date for each set of Employees Eligible for Holiday Benefits on Different Calendar Dates.
Create One Holiday Type for each Set of Employees.
Create One Fixed Benefit Holiday Date for each Calendar Date. Configure Holiday Options and Conditions as appropriate to award Fixed Benefits according to your organization's Time and Attendance & Labor Policies.
Create One Premium Pay For Worked Hours Holiday Date for Each Calendar Date. Configure Holiday Options and Conditions as appropriate to award Fixed Benefits according to your organization's Time and Attendance & Labor Policies.
Use Quick Assign to assign employees to the appropriate Holiday Type.
1. Ensure Employee Policies are configured to separate employee worked hours into OT1, OT2, OT3, and OT4 as appropriate to meet your organization's needs.
XYZ Hospitality has two sets of employees, Hourly Operations Employees and Salary Administrative Employees. Hourly Operations Employees receive Daily Overtime after 10 hours in a day. Additionally, all unscheduled hours are paid at 200% of an employee's pay rate. Salary Administrative Employees receive Daily Overtime after 8 hours worked in a day. Additionally, all unscheduled hours on regular working days are paid at 200% of an employee's base rate. For Holiday Dates, XYZ Hospitality pays a specific rate for Scheduled Regular Hours (200%), Scheduled Overtime Hours (250%), Unscheduled Regular Hours (300%), and Unscheduled Overtime Hours (350%). For this reason, due to the Hours Mapping Hierarchy Unscheduled Regular Hours and Unscheduled Overtime Hours must be mapped in to separate Overtime buckets as shown below, even though they are paid at a the same rate on regular working days.
| Policy / Set of Employees | OT1 Hours
(Daily OT) |
OT2 Hours
(Unscheduled Regular Hours) |
OT3 Hours
(Unscheduled OT1 Hours) |
OT4 Hours |
| Hourly Operations Employees | Daily > 10 Hours
Paid at 150% of Base Rate |
Unscheduled Regular Hours
Paid at 200% of Base Rate |
Unscheduled OT1 Hours
Paid at 200% of Base Rate |
N/A |
| Salary Administrative Employees | Daily > 8 Hours
Paid at 150% of Base Rate |
Unscheduled Regular Hours
Paid at 200% of Base Rate |
Unscheduled OT1 Hours
Paid at 200% of Base Rate |
N/A |
XYZ Hospitality pays the same Holiday Benefits for both Hourly Operations Employees and Salary Administrative Employees. Only a single Holiday Type is required for XYZ Hospitality as shown below.
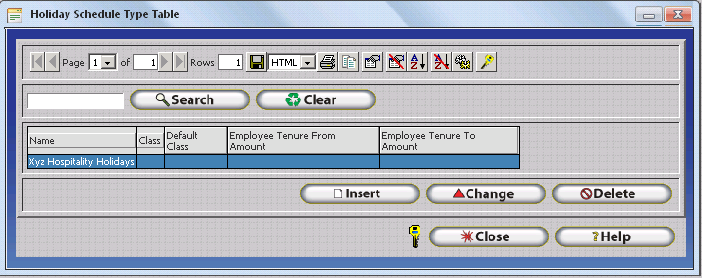
XYZ Hospitality pays both Fixed Benefits and Premium Pay for Worked Hours for the following holiday dates.
Calendar Dates - Hourly Operations Employees and Salary Administrative Employees |
|||
| 1/1/2013 | 2/18/13 | 7/4/13 | 11/28/13 |
| 1/21/13 | 2/27/13 | 9/2/13 | 12/25/13 |
Since all employees at XYZ Hospitality receive the same Holiday Benefits, only one Holiday Type is required.
XYZ Hospitality Holiday Types |
|
Create One Fixed Benefit Holiday Date for each Calendar Date. Configure Holiday Options and Conditions as appropriate to award Fixed Benefits according to your organization's Time and Attendance & Labor Policies.
The table below shows the Pay Code, Pay Rate, and Other Activity Type configuration for Fixed Holiday Dates as used by XYZ Hospitality.
| Other Activity Type
& Other Activity Options |
Regular Hours | OT1 Hours
(Daily OT) |
OT2 Hours
(Unscheduled Regular Hours) |
OT3 Hours
(Unscheduled OT1 Hours) |
OT4 Hours |
Holiday Pay
|
Paid at Base Rate
Payroll Mapping Code 'HP' |
N/A | N/A | N/A | N/A |
An example of a Fixed Holiday Date is shown below.
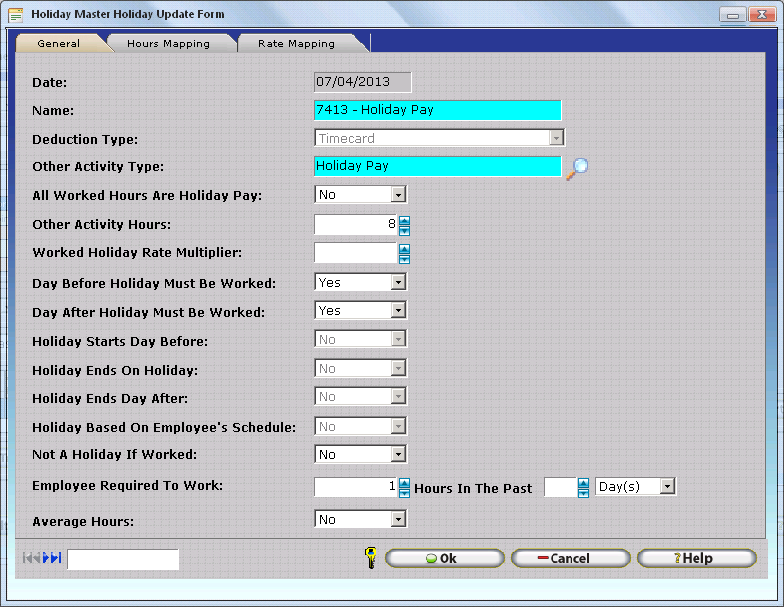
With this configuration, Fixed Holiday Benefits will be inserted automatically and manually in the scenarios shown below. Supervisors at XYZ hospitality will need to insert Fixed Holiday Benefits manually on Scheduled Non Working Days where the office is closed and employees receive Holiday Benefits. XYZ Hospitality specifically chose to enable 'Employee Required To Work' and manually enter Holiday Pay in one scenario in order to ensure employees would not be accidentally overpaid by automatic Holiday Pay entries. With this configuration, if supervisors should neglect to insert employee holiday hours an adjustment can be made to pay additional hours to the employee during the next pay period.
Schedule Exists on Holiday Date |
Working Status |
Fixed Holiday Benefits Awarded? |
Yes |
Working |
Yes - Automatically Inserted by Fixed Benefit Holiday - 8 Holiday Pay Hours. Employees must also work the day before and day after the holiday date in order to receive Holiday Pay. |
Yes |
Not Working // Facility Closed |
Yes - Manually Inserted by Supervisors - 8 Holiday Pay Hours. Employees who work the day before and day after the holiday date are eligible to receive Holiday Pay. Holiday Pay Hours must be manually inserted by XYZ Hospitality Supervisors in this scenario. InfiniTime will not automatically award Holiday Pay Hours in this scenario because the employee did not work at least 1 hour on the holiday date. |
Yes |
Not Working // Employee Called Out Sick |
No - No Supervisor Action Required. InfiniTime will not award Holiday Pay Hours in this scenario because the employee did not work at least 1 hour on the holiday date. |
No |
Working // Employee Called In For Duty |
Yes - Automatically Inserted by Fixed Benefit Holiday - 8 Holiday Pay Hours. Employees must also work the day before and day after the holiday date in order to receive Holiday Pay. |
No |
Not Working |
No - No Supervisor Action Required. InfiniTime will not award Holiday Pay Hours in this scenario because the employee did not work at least 1 hour on the holiday date. In this scenario, the holiday date was a Day Off as part of the employee's normal schedule. XYZ Hospitality does not pay Holiday Benefits on Holiday dates where employees do not report to work and are not scheduled to work. |
Notice how a Fixed Holiday Date is configured for each Calendar Date on which employees at XYZ Hospitality receive Holiday benefits as shown below.
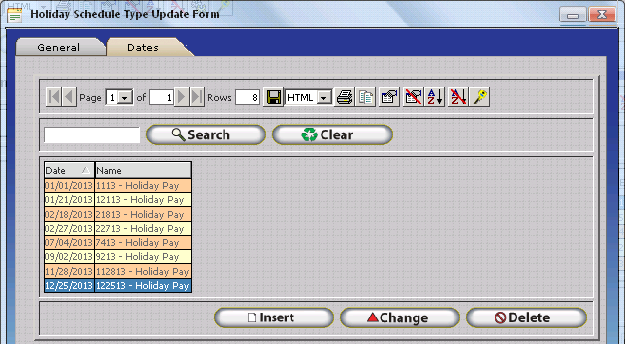
Create One Premium Pay For Worked Hours Holiday Date for Each Calendar Date. Configure Holiday Options and Conditions as appropriate to award Premium Pay for Worked Hours Benefits according to your organization's Time and Attendance & Labor Policies.
The table below shows the Pay Code, Pay Rate, and Other Activity Type configuration for Premium Pay for Worked Hours Holiday Dates as used by XYZ Hospitality.
| Other Activity Type
& Other Activity Options |
Regular Hours | OT1 Hours
(Daily OT) |
OT2 Hours
(Unscheduled Regular Hours) |
OT3 Hours
(Unscheduled OT1 Hours) |
OT4 Hours |
Holiday Worked
|
|
|
|
|
|
An example of a Premium Pay for Worked Hours Holiday Date is shown below.
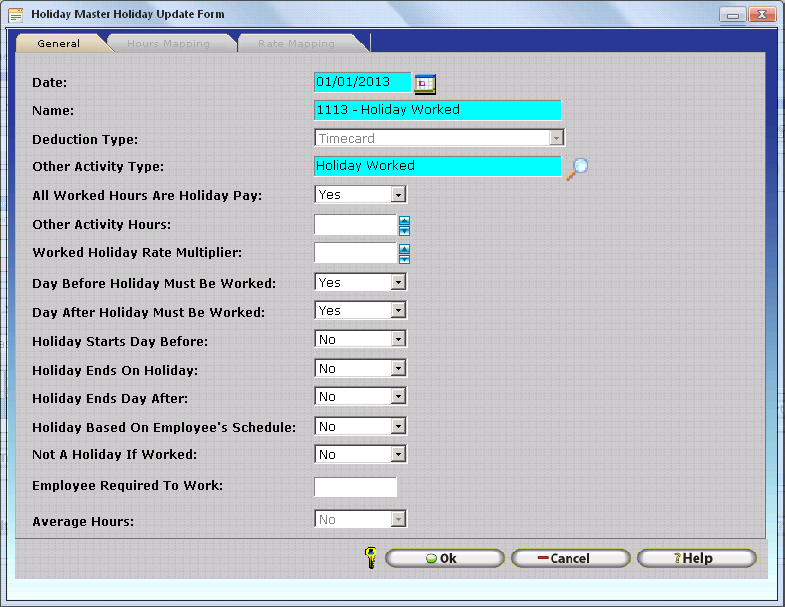
With this configuration, Premium Pay for Worked Hours Holiday Benefits will tracked automatically in the scenarios shown below.
Schedule Exists on Holiday Date |
Working Status |
Fixed Holiday Benefits Awarded? |
Yes |
Working |
Yes - Worked Hours are automatically posted to the Holiday Worked Other Activity Type and separated according to hours type. Employees must also work the day before and day after the holiday date in order to receive Holiday Pay. |
Yes |
Not Working // Facility Closed |
No - No Supervisor Action Required. InfiniTime will not award Premium Pay for Worked Hours Holiday Benefits in this scenario because the employee did not work. |
Yes |
Not Working // Employee Called Out Sick |
No - No Supervisor Action Required. InfiniTime will not award Premium Pay for Worked Hours Holiday Benefits in this scenario because the employee did not work. |
No |
Working // Employee Called In For Duty |
Yes - Worked Hours are automatically posted to the Holiday Worked Other Activity Type and separated according to hours type. Employees must also work the day before and day after the holiday date in order to receive Holiday Pay. |
No |
Not Working |
No - No Supervisor Action Required. InfiniTime will not award Premium Pay for Worked Hours Holiday Benefits in this scenario because the employee did not work. |
Notice how a Premium Pay for Worked Hours Holiday Date is configured for each Calendar Date on which employees at XYZ Hospitality receive Holiday benefits as shown below.
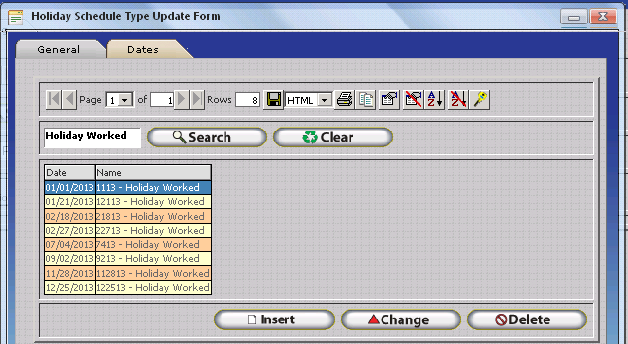
7. Use Quick Assign to assign employees to the appropriate Holiday Type.
Refer to the Quick Assign and Employee Filter sections of this document for complete instructions on use of Quick Assign.
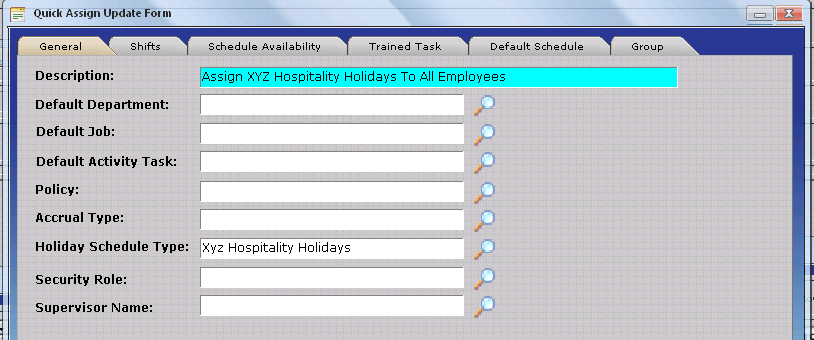
InfiniTime Groups make it possible to organize employees into different organization units such as by building, by sub department or position, by floor, by city or by state. This is accomplished by first creating a group level for each organizational unit and then creating a group description for each possible value for the respective organizational unit. In this way, employees can then be assigned to a specific group description for each group level. There is no limit to the number of groups that may be configured within InfiniTime. When configuring groups one group description per group level must be set as the default. The default group description will automatically be assigned to all employees for each group level. For additional information on using groups with security filters and the default group function refer to the Security Filters Section of this document.
It is important to understand that employees cannot belong to two groups within the same group level. For example, the image below shows two group levels, Location and Division. An employee may belong to any one location and any one division, but they cannot belong to two divisions.
The Group Table displays all Group Levels and Group Descriptions configured within InfiniTime. When configuring groups, it is important to note that the Insert and Change Buttons on the Group Table are context sensitive. If a Group Level is selected, the Insert Button will open the Group Level Update form which can be used to create a new Group Level. If a Group Description is selected, the Insert Button will open the Group Update Form which can be used to create a new Group Description for the respective Group Level. When a Group Level is first created, 'None' will be displayed when the Group Level is expanded. To insert the first group description for a Group Level, expand the Group Level, select the entry titled 'None', then click Insert to open the Group Update Form. Additional details on how to assign groups to employees can be found in the Employee Update Form Settings Tab and Quick Assign Sections of this document.
Insert - Opens the Group Level Update Form or the Group Update Form depending on the item selected on the Group Table. As detailed above, If a Group Level is selected, the Insert Button will open the Group Level Update form which can be used to create a new Group Level. If a Group Description is selected, the Insert Button will open the Group Update Form which can be used to create a new Group Description for the respective Group Level.
Change - Opens the Group Update Form or Group Level Update Form as appropriate for the selected item. The InfiniTime Administrator may then alter the Group Level or Group Description as desired.
Delete - Deletes the selected Group Description or Group Level from the Group Table. All employees assigned to a Group Description that is deleted will be assigned to the Default Group Description for the respective group level.
InfiniTime provides a unique and powerful interface tool that can be used to configure and assign basic settings to multiple employees, as specified using the Employee Filter. In this way InfiniTime Administrators can quickly assign policies, holiday types, shifts, etc to ten, twenty, or even hundreds of employees. Before attempting to use Quick Assign users should be familiar with use and operation of the Employee Filter. Refer to the Security section of this document for more information on the Employee Filter before continuing. It is important to note that Quick Assign requires a specific filter to be set, even if the user wishes to perform a given quick assign action for all employees. The warning below will be displayed if a filter is not set and the user attempts to Click OK on the Quick Assign Update Form.
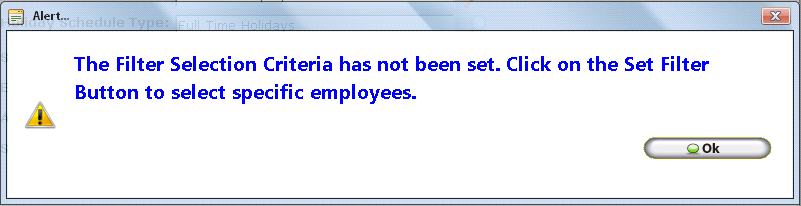
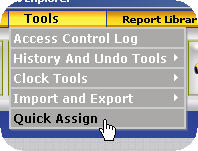
The Quick Assign History Table displays a history of all Quick Assign Actions performed. These actions can be undone by clicking on the Undo Button. This helps prevent time consuming troubleshooting in the event of a mistake while using Quick Assign. For example, if you were to assign a policy to all of the employees in a specific department and later notice that you assigned the wrong policy, the Quick Assign History window can be used to undo those changes.
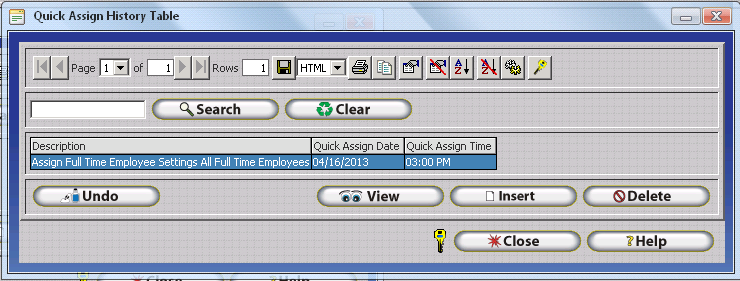
Undo - Reverts all employees affected by the selected Quick Assign Action to their original settings. To use the Undo Feature, select the Quick Assign action you wish to Undo, then click on the Undo Button.
Technical Note: The Undo Feature takes a snapshot of current settings. Using the Undo Button simply instructs the software to restore the settings that were saved in this snapshot. The snapshot is taken before the changes specified by the quick assign are applied. It is important to note that any manual changes made after the Quick Assign will be lost. For example, lets say all of the employees in your company are on the their respective departments. Employees are split amongst the following departments: Shipping, Sales, Technical Support, and Programming, Trainees. A quick assign is used to move a group of employees from the Trainees department into the Technical Support Department. The department for Jacque, one of the former trainees, is then manually changed to Sales. If undo were used at this point all of the employees that were moved from the Trainees Department to the Technical Support Department, including Jacque, would be reset to the Technical Support Department. The manual change made to Jacque's department is lost.
View - Displays the Quick Assign Update Form populated with details of the selected Quick Assign Action. View is often useful for reviewing Quick Assign Actions prior to utilizing the Undo Feature.
Insert - Opens the Quick Assign Update Form. The InfiniTime System Administrator may then set specific settings and options and select specific employees to assign the settings to. The Quick Assign too.l
Delete - Deletes the Selected Quick Assign Action from the Quick Assign Table. It is important to note that once a Quick Assign Action is deleted, it will no longer be possible to undo the Quick Assign Action using the Undo Feature.
Click insert on the Quick Assign Table to open the Quick Assign Update Form as shown below. The Quick Assign Tool allows users to assign items from departments to schedules for multiple employees at the same time. Quick Assign will assign all specified items to employees that have been selected with the Employee Filter, which can be accessed from the bottom of the Quick Assign window. Be sure to verify that only the employees whom you wish to configure are selected. There are a few general steps which must be followed in order to successfully perform a Quick Assign Action:
1. Enter a description for the Quick Assign Action. This description will be displayed in the Quick Assign History Table and should describe the action you are performing.
2. Choose the employees you wish to configure using the Employee Filter button, located at the bottom of the Quick Assign Form.
3. Choose the items you wish to assign to employees and enter them into the quick assign as appropriate.
The items below can be assigned using the Quick Assign Tool, if nothing is specified for a field then that item will not be altered for the selected employees. Keep in mind that any alterations will be made for all employees that are specified by the Employee Filter.
If settings are not configured in the software then they will not be shown in the Quick Assign Update Form. for example: If you are not using Access Control, then the Access control group will not show in the list, if you do not have any accruals set or holiday schedules, those two items will not show in the list to be assigned.
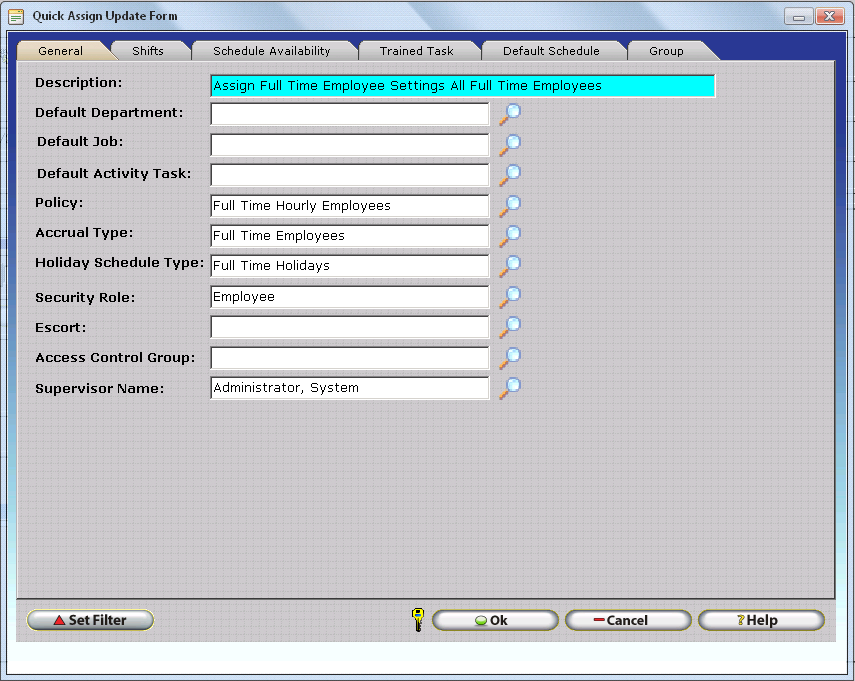
The general
tab is used to assign general employee settings to employees specified
by the employee filter. The Lookup button ![]() can be used to choose from available
items for each setting or you can simply type the item directly into the
field. Refer to Data Entry and Navigation Assistance for more information
on the operation of Lookups and Auto Fill.
can be used to choose from available
items for each setting or you can simply type the item directly into the
field. Refer to Data Entry and Navigation Assistance for more information
on the operation of Lookups and Auto Fill.
Description - Enter a description for the Quick Assign Action. This description will be displayed in the Quick Assign History Table after the Quick Assign action is performed.
Default Department - Assigns the selected department as the default department for all employees specified by the filter.
Default Job - Assigns the selected job as the default job for all employees specified by the filter.
Default Activity Task - Assigns the selected activity task as the default activity task for all employees specified by the filter.
Policy - Assigns the selected policy to all employees specified by the filter.
Accrual Type - Assigns the selected accrual type to all employees specified by the filter.
Holiday Schedule Type - Assigns the selected Holiday Schedule type to all employees specified by the filter.
Security Role - Assigns the selected security role to all employees specified by the filter.
Escort - Assigns the selected escort to all employees specified by the filter.
Access Control Group - Assigns the selected Access Control Group to all employees specified by the filter.
Supervisor Name - Assigns the selected employee as Supervisor for all employees specified by the filter.
The Shifts Tab can be used to assign shifts to employees. Two Options are available for assigning shifts to employees using the quick assign tool. Shifts can either be reset to only those specified by the quick assign, or shifts specified by the Quick Assign can be appended to the settings previously configured for employees.
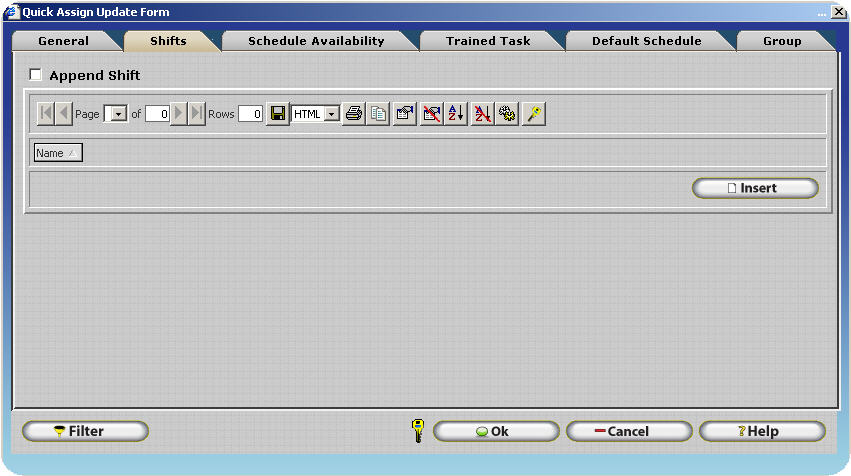
To Set Employee Shifts
Ensure the Append Shift check box is unchecked and use the insert button to specify shifts that will be assigned to the specified employees. Ensure a description is specified on the General Tab and check to make sure the Employee Filter is set appropriately. Click OK to Set Employee shifts.
All employees specified by the employee filter will have any shifts currently assigned to them removed and the shifts specified by the Quick Assign will be assigned.
To Append Shifts to an Employee
Ensure the Append Shift check box is checked and use the insert button to specify shifts that will be assigned to the specified employees. Ensure a description is specified on the General Tab and check to make sure the Employee Filter is set appropriately. Click OK to Assign the specified shifts.
All employees specified by the employee filter will be assigned the shifts specified by the Quick Assign. Any shifts currently assigned to employees will remain.
The Schedule Availability Tab can be used to assign schedule availability types to employees. Two Options are available for assigning Schedule Availability Types to employees using the quick assign tool. Schedule Availability Types can either be reset to only those specified by the quick assign, or Schedule Availability Types specified by the Quick Assign can be appended to the settings previously configured for employees.
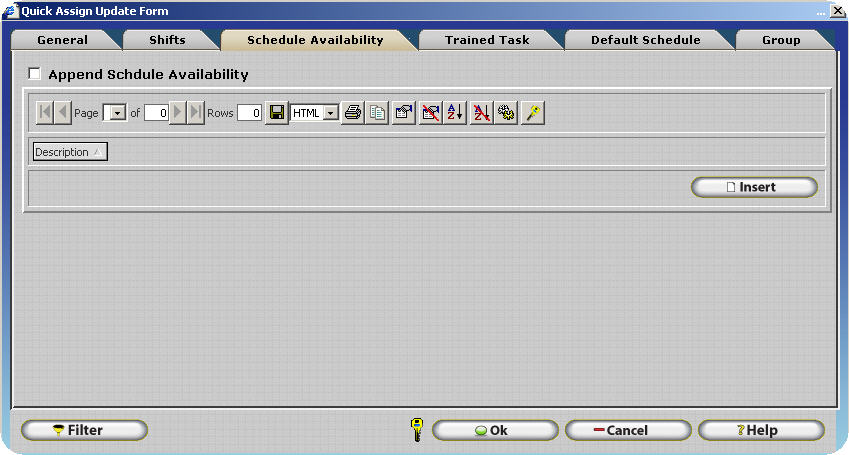
To Set Schedule Availability Types
Ensure the Append Schedule Availability check box is unchecked and use the insert button to specify Schedule Availability Types that will be assigned to the specified employees. Ensure a description is specified on the General Tab and check to make sure the Employee Filter is set appropriately. Click OK to Set Employee shifts.
All employees specified by the employee filter will have any Schedule Availability Types currently assigned to them removed and the Schedule Availability Types specified by the Quick Assign will be assigned.
To Append Schedule Availability Types to an Employee
Ensure the Append Schedule Availability check box is checked and use the insert button to specify Schedule Availability Types that will be assigned to the specified employees. Ensure a description is specified on the General Tab and check to make sure the Employee Filter is set appropriately. Click OK to Set Employee shifts.
All employees specified by the employee filter will be assigned the Schedule Availability Types specified by the Quick Assign. Any Schedule Availability Types currently assigned to employees will remain.
The Trained Task Tab can be used to assign shifts to employees. Two Options are available for assigning shifts to employees using the quick assign tool. Trained Task can either be reset to only those specified by the quick assign, or shifts specified by the Quick Assign can be appended to the settings previously configured for employees.
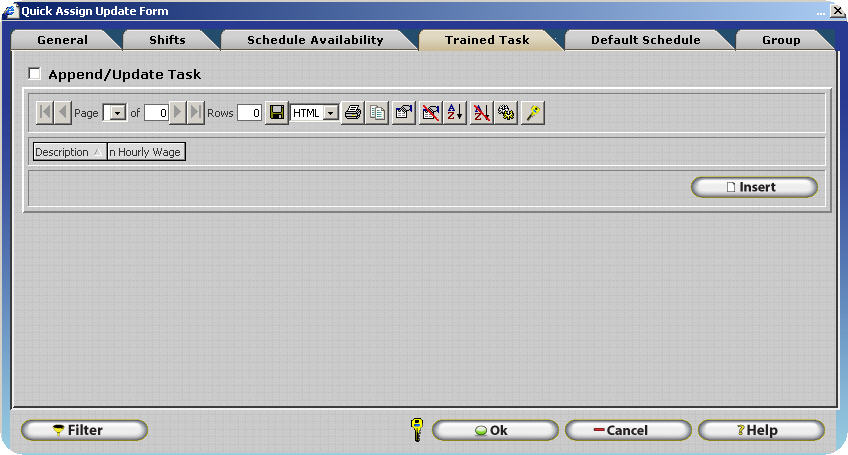
To Set Employee Trained Tasks
Ensure the Append Trained Task check box is unchecked and use the insert button to specify Trained Tasks that will be assigned to the specified employees. Ensure a description is specified on the General Tab and check to make sure the Employee Filter is set appropriately. Click OK to Set Employee Trained Tasks.
All employees specified by the employee filter will have any Trained Tasks currently assigned to them removed and the Trained Tasks specified by the Quick Assign will be assigned.
To Append Trained Tasks to an Employee
Ensure the Append Trained Task check box is checked and use the insert button to specify Trained Tasks that will be assigned to the specified employees. Ensure a description is specified on the General Tab and check to make sure the Employee Filter is set appropriately. Click OK to Assign the specified Trained Tasks.
All employees specified by the employee filter will be assigned the Trained Tasks specified by the Quick Assign. Any Trained Tasks currently assigned to employees will remain.
The Default Schedule Tab can be used to configure the Default Schedule for multiple employees at a time. This is especially useful when multiple employees in different departments have the same schedule. Simply use the Employee Filter to specify the employees whose Default Schedule will be updated and use the Quick Schedule button to define a schedule. Clicking OK will assign the specified schedule to all employees designated by the Employee Filter.
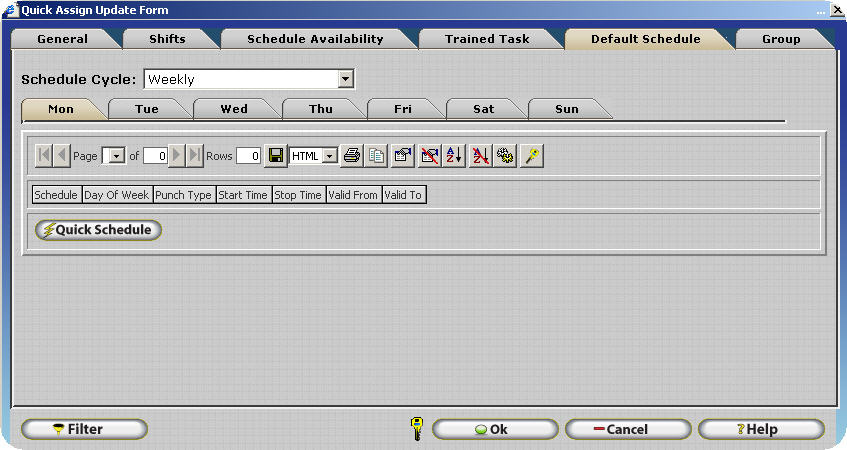
The Group Tab can be used to configure Groups for multiple employees at a time. Simply use the Employee Filter to specify the employees whose Groups will be updated and use the Change button to select a group from each group level. Clicking OK will assign the specified schedule to all employees designated by the Employee Filter. Refer to Chapter 5 Employee Setup - Employee Update Form - Groups for more information on the use and configuration of groups.
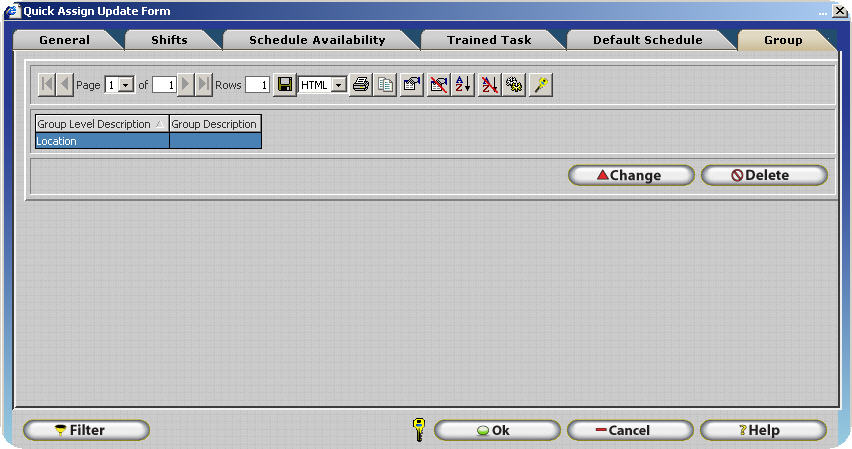
Note: A group description must be specified in order for the group assigned to the employee to be altered.
For Example:
The image below shows a blank group description. In this case, a group description has not yet been specified.
The Image below shows a filled group description. In this case, a group description has been specified and the Phoenix group will be assigned to all employees specified by the Employee Filter.
Hours mapping permits either scheduled or unscheduled hours for specific worked hours types (IE: Regular, OT1, OT2, OT3, OT4) to be separated into a different column on employee timecards. This functionality provides the InfiniTime Administrator with complete control over:
Which Hours Type Scheduled and / or Unscheduled Hours are totaled under on Employee Timecards and Timecard Reports (IE: Regular, OT1, OT2, OT3, OT4)
The pay rate employee hours are paid at
The payroll code exported for employee hours
Hours Mapping can be enabled for a variety of conditions, as outlined in the table below. This flexibility, along with existing Job Costing Functionality, allows Hours Mapping Rules to be applied based on Job Costing Categories selected by employees at the time of punch or specifically entered by supervisors during the review and editing of employee timecards. In this way, hours mapping can be used to meet the needs of a variety of special payment scenarios. Hours Mapping is an optional feature and is intended for use by organizations that differentiate between Scheduled and Unscheduled Hours and / or wish to track specific pay codes for Unscheduled Hours worked on Holidays or Specific Other Activity Types. Approximately 20 to 40 out of 100 companies require Hours Mapping to meet their Time and Attendance needs. InfiniTime Administrators attempting to configure Hours Mapping should have an understanding of Job Costing, Unscheduled Hours Mapping settings within the Policy, Other Activity Types and Other Activity Options, as well as a general understanding of the Payroll Export's use of payroll codes. Related topics are provided below for reference.
Schedule Settings and Rules: Unscheduled Hours Mapping
Other Activity Types: Introduction
Payroll Export - Payroll Codes
When configuring Hours Mapping there are three main tasks that must be performed. Each task is listed and described in detail below.
1. Identify the Type of Hours Mapping that applies to your scenario.
2. Identify the Hour Type(s) to be mapped.
3. Understand how the Hours Mapping Hierarchy will affect your pay premium(s)
1. Identify the Type of Hours Mapping that applies to your scenario.
InfiniTime supports five types of Hours Mapping, each of which are configured in a separate area of the InfiniTime Application. Hours Mapping Rules are applied for employees assigned to a specific policy and / or when employees have hours on a specific Other Activity Type, Department, Job, or Task that has been configured for Hours Mapping. While it is possible to configure multiple Hours Mapping Types for a single InfiniTime Installation, this is only recommended in specific situations in order to reduce the impact of the Hours Mapping Hierarchy. InfiniTime Administrators should chose and configure the specific Hours Mapping Type(s) which best meets the needs of their organization as outlined below.
Premium Type |
Location within InfiniTime |
Description |
| Policy Unscheduled Hours Mapping | 1. Click on Lookups, Calculations Setup, Policies. 2. Click on the Schedule Settings / Rules Section. 3. Unscheduled Hours Mapping Settings are displayed on the General Tab. | Unscheduled
Hours Mapping Settings are applied to all employees assigned to
a policy. Policy Unscheduled Hours Mapping settings are configured
separately for each policy within InfiniTime.
Policy Unscheduled Hours Mapping Settings are commonly used to separate all Unscheduled Hours into a single Overtime Bucket such as OT4. |
| Holiday Hours Mapping | 1. Click on Lookups - Calculations Setup - Holiday Schedule Types. 2. Click Change while highlighting an existing Holiday Type or click Insert. 3. Click on the Dates Tab. 4. Click Change while highlighting an existing Holiday Date or click Insert. 5. Click on the Hours Mapping Tab. The Hours Mapping Tab is only available for Holiday Dates with 'All Worked Hours are Holiday Pay' = Yes. | Holiday Hours Mapping Settings are applied to all employees assigned to the respective Holiday Type with Worked Hours on the respective Holiday Date.
Holiday Hours Mapping Settings are commonly used to separate all Unscheduled Hours worked on a Holiday into a separate bucket such as OT4. |
| Other Activity Hours Mapping | 1. Click on Lookups, Calculations Setup, Other Activity Types. 2. Click Change while highlighting an existing Other Activity Type or click Insert. 3. Click on the Hours Mapping Tab. The Hours Mapping Tab is only displayed for Other Activity Types with 'Count as Regular Hours' or 'Only Count as Regular Hours if Scheduled' checked. | Other Activity Hours Mapping Settings are applied to Other Hours for other activity types with Hours Mapping Configured. Other Activity Hours Mapping Settings are configured separately for each Other Activity Type.
Other Activity Hours Mapping Settings are commonly used to pay a different rate for hours on a day where the employee was not scheduled to work for other Activity Types set to 'Count as Regular Hours.' The most prevalent scenario that requires Other Activity Hours Mapping is Unscheduled Hours worked on a Holiday Date where All Worked Hours are Holiday Pay is set to No. |
| Department Hours Mapping | 1. Click on the Department Button. 2. Click Change while highlighting an existing department or click Insert. 3. Click on the Hours Mapping Tab. |
Department
Hours Mapping Settings are applied to Worked Hours in a given
department and are configured separately for each Department.
Department Hours Mapping Settings are commonly used to separate hours worked for a given department into a specific Overtime Bucket to be paid at a premium rate per hour. |
| Job Hours Mapping | 1. Click on Lookups, Employee Setup, Job Costing Lookups, Activity Jobs. 2. Click Change while highlighting an existing job or click Insert. 3. Click on the Hours Mapping Tab. |
Job
Hours Mapping Settings are applied to Worked Hours in a given
Job and are configured separately for each Job.
Job Hours Mapping Settings are commonly used to separate hours worked for a given job into a specific Overtime Bucket to be paid at a premium rate per hour. |
| Task Hours Mapping | 1. Click on Lookups, Employee Setup, Job Costing Lookups, Activity Tasks. 2. Click Change while highlighting an existing task or click Insert. 3. Click on the Hours Mapping Tab. |
Task
Hours Mapping Settings are applied to Worked Hours in a given
Task and are configured separately for each Task.
Task Hours Mapping Settings are commonly used to separate hours worked for a given task into a specific Overtime Bucket to be paid at a premium rate per hour. |
2. Identify the Hour Type(s) to be mapped.
After Identifying the Hours Mapping Type, the type of hours to be configured for Hours Mapping must be identified. Hours Mapping is configured separately for each type of worked hours. The table below provides an example of each worked hours type alongside specific policy settings and employee schedules.
Related Settings:
The following policy settings for XYZ Company are utilized for the examples below.
OT1 = Daily > 8 Hours.
OT2 = Daily > 10 Hours.
OT3 = Day of Week Overtime: Regular, OT1, and OT2 hours worked on Sunday.
OT4 = Holiday Hours Mapping: Regular, OT1, and OT2 Hours worked on a Holiday Date.
| Working Hours Type | Example |

Total Hours: 8 Scheduled Regular Hours, 1 Hour Unpaid Break Scheduled Regular Hours are Working Hours which do not qualify for any Overtime Bucket that fall within the bounds of an employee's schedule. In this case, based on the policy settings above, hours less than 8 in a day are considered Regular Hours. As shown above, the employee is scheduled from 8:00 AM to 5:00 PM. All hours worked between 8:00 AM and 5:00 PM will be considered Scheduled Hours. |
|

Total Hours: 8 Scheduled Regular Hours, 1 Hour Unpaid Break, 1 Hour Scheduled OT1 Scheduled OT1 Hours are OT1 Hours that fall within the bounds of an employee's schedule. In this case, based on the policy settings above, hours between 8 and 10 in a day are considered OT1 Hours. Hours greater than 10 in a day are OT2 Hours and as such are not OT1 Hours. As shown above, the employee is scheduled from 8:00 AM to 6:00 PM. All hours worked between 5:00 PM and 6:00 PM are considered Scheduled Hours. |
|

Total Hours: 8 Scheduled Regular Hours, 1 Hour Unpaid Break, 2 Scheduled OT1 Hours, 1 Hour Scheduled OT2 Scheduled OT2 Hours are OT2 Hours that fall within the bounds of an employee's schedule. In this case, based on the policy settings above, hours greater than 10 in a day are considered OT2 Hours. As shown above, the employee is scheduled from 6:00 AM to 6:00 PM. All hours worked between 5:00 PM and 6:00 PM are considered Scheduled Hours. |
|

Total Hours: 8 Scheduled OT3 Hours Scheduled OT3 Hours are OT3 Hours that fall within the bounds of an employee's schedule. In this case, based on the policy settings above, all hours worked on a Sunday are OT3 Hours. As shown above, the employee is scheduled from 6:00 AM to 6:00 PM. All hours worked between 5:00 PM and 6:00 PM are considered Scheduled Hours. |
|

Total Hours: 8 Scheduled OT4 Hours Scheduled OT4 Hours are OT4 Hours that fall within the bounds of an employee's schedule. In this case, based on the policy settings above, all hours worked on a Holiday Date are OT4 Hours. As shown above, the employee is scheduled from 6:00 AM to 3:00 PM on July 4th 2013. All hours worked between 6:00 AM and 3:00 PM are considered Scheduled Hours. |
|
|
Unscheduled Regular Hours w/ 'Only Hours Worked in Excess of Scheduled Hours are Unscheduled' disabled 
Total Hours: 2 Unscheduled Regular Hours, 6 Scheduled Regular Hours, 1 Hour Unpaid Break Unscheduled Regular Hours are Working Hours which do not qualify for any Overtime Bucket that fall outside the bounds of an employee's schedule. In this case, based on the policy settings above, hours less than 8 in a day are considered Regular Hours. As shown above, the employee is scheduled from 8:00 AM to 5:00 PM. All regular hours worked outside of 8:00 AM and 5:00 PM will be considered Unscheduled Regular Hours.* NOTE: The 'Only Hours Worked in Excess of Scheduled Hours are Unscheduled' option on the Schedule Settings / Rules section of the policy is intended for organizations who require employees to work at least the scheduled number of hours on a given date prior to receiving Unscheduled Hours. As shown below, if 'Only Hours Worked In Excess of Scheduled Hours are Unscheduled' employees will only receive Unscheduled Hours for hours beyond the duration of their schedule. Unscheduled Regular Hours w/ 'Only Hours Worked in Excess of Scheduled Hours are Unscheduled' enabled
Example 1: Worked Hours Do Not Exceed Scheduled Hours
Total Hours: 8 Scheduled Regular Hours, 1 Hour Unpaid Break
When 'Only Hours Worked in Excess of Scheduled Hours are Unscheduled' is enabled, worked hours must exceed scheduled hours in order for employee's to receive Unscheduled Hours. As shown above, the employee is scheduled from 8:00 AM to 5:00 PM for a total of 8 Working Hours. In this scenario, since Regular Hours are Worked Hours Under 8 in a Day, it is not possible for an employee to receive Unscheduled Regular Hours.
Example 2: Worked Hours Exceed Scheduled Hours
Total Hours: 6 Scheduled Regular Hours, 1 Hour Unpaid Break, 2 Unscheduled Regular Hours 
When 'Only Hours Worked in Excess of Scheduled Hours are Unscheduled' is enabled, worked hours must exceed scheduled hours in order for employee's to receive Unscheduled Hours. As shown above, the employee is scheduled from 8:00 AM to 3:00 PM for a total of 6 Working Hours. In this scenario, since worked hours exceed scheduled hours, the employee receives two hours Unscheduled Regular Hours. |
|

Total Hours: 8 Scheduled Regular Hours, 1 Hour Unpaid Break, 1 Hour Unscheduled OT1 Unscheduled OT1 Hours are OT1 Hours that fall outside the bounds of an employee's schedule. In this case, based on the policy settings above, hours between 8 and 10 in a day are considered OT1 Hours. Hours greater than 10 in a day are OT2 Hours and as such are not OT1 Hours. As shown above, the employee is scheduled from 8:00 AM to 5:00 PM. All hours worked between 5:00 PM and 7:00 PM are considered Unscheduled OT1 Hours. |
|

Total Hours: 8 Scheduled Regular Hours, 1 Hour Unpaid Break, 2 Hour Unscheduled OT1, 1 Unscheduled OT2 Unscheduled OT2 Hours are OT2 Hours that fall outside the bounds of an employee's schedule. In this case, based on the policy settings above, hours over 10 in a day are considered OT2 Hours. As shown above, the employee is scheduled from 6:00 AM to 3:00 PM. All hours worked beyond 5:00 PM are considered Unscheduled OT2 Hours. |
|

Total Hours: 8 Scheduled OT3 Hours, 1 Hour Unpaid Break, 3 Hours Unscheduled OT3 Unscheduled OT3 Hours are OT3 Hours that fall outside the bounds of an employee's schedule. In this case, based on the policy settings above, hours worked on a Sunday are considered OT3 Hours. As shown above, the employee is scheduled from 6:00 AM to 3:00 PM on Sunday 8/11/13. All hours worked beyond 3:00 PM are considered Unscheduled OT3 Hours. |
|

Total Hours: 8 Scheduled OT4 Hours, 1 Hour Unpaid Break, 3 Hours Unscheduled OT4 Unscheduled OT4 Hours are OT4 Hours that fall outside the bounds of an employee's schedule. In this case, based on the policy settings above, hours worked on a Holiday are considered OT4 Hours. As shown above, the employee is scheduled from 6:00 AM to 3:00 PM. All hours worked beyond 3:00 PM are considered Unscheduled OT4 Hours. |
As an example for each Hours Mapping Type, let us assume that XYZ Company pays the Hours Types below at the same rate as Unscheduled OT3. In other words - Unscheduled OT1 and Unscheduled OT2 Hours can be grouped together with Unscheduled OT3 Hours and paid together.
The following Hours Mapping settings are required to map Unscheduled OT1 and Unscheduled OT2 Hours into OT3:
Scheduled Hours Mapping Settings:

Unscheduled Hours Mapping Settings:
The table below describes when Unscheduled OT1 and Unscheduled OT2 Hours would be mapped to OT3 if the above settings were configured for each Hours Mapping Type individually.
| Hours Mapping Type | Unscheduled OT1 and Unscheduled OT2 Hours would be mapped to OT3... |
| Policy Unscheduled Hours Mapping | Unscheduled OT1 and Unscheduled OT2 Hours would be mapped directly to OT3 for all employees assigned to the respective policy automatically. No additional actions, such as working on a specific Department / Job / Task or Other Activity Type are required. |
| Holiday Hours Mapping | All Unscheduled OT1 and Unscheduled OT2 Hours worked on the Holiday Date would be mapped to OT3. |
| Other Activity Hours Mapping | All Unscheduled OT1 and Unscheduled OT2 Hours for the respective Other Activity Type would be mapped to OT3. |
| Department Hours Mapping | All Unscheduled OT1 and Unscheduled OT2 Hours assigned to the respective Department would be mapped to OT3. |
| Job Hours Mapping | All Unscheduled OT1 and Unscheduled OT2 Hours assigned to the respective Job would be mapped to OT3. |
| Task Hours Mapping | All Unscheduled OT1 and Unscheduled OT2 Hours assigned to the respective Task would be mapped to OT3. |
3. Understand how the Hours Mapping Hierarchy will affects Employee Hours
In some scenarios employees may be eligible for multiple types of hours mapping by meeting the conditions of multiple hours mapping settings. If your company will only be tracking a single type of hours mapping this section can be ignored. When using multiple hours mapping types, the following key points should be kept in mind:
Hours Mapping Settings for each Hours Mapping Type are applied sequentially in the order below.
Worked Hours mapped to a different hours type can be mapped again by a higher priority Hours Mapping Type.
Sequential Order:
1 Policy Unscheduled Hours Mapping (Lowest Priority)
2 Holiday Hours Mapping
3 Other Activity Hours Mapping
4 Department Hours Mapping
5 Job Hours Mapping
6 Task Hours Mapping (Highest Priority)
For example, ABC Manufacturing Company pays Unscheduled Hours on Holiday Dates at a different rate than Unscheduled Hours on regular working days for Production Employees. The hours mapping settings shown below will map Unscheduled Regular and OT1 Hours to OT2 for all employees assigned to the Production Employees policy. Additionally, if an employees on the Production Employee's policy work Unscheduled Regular or OT1 Hours on a Holiday Date the Unscheduled OT2 Hours will be posted to OT4.
ABC Manufacturing Company - Hours Mapping Settings |
|
Hours Mapping Type |
Hours Mapping Settings |
Policy Unscheduled Hours Mapping |
|
Holiday Hours Mapping |
|
ABC Manufacturing - Policy Unscheduled Hours Mapping Example:
July 6th 2013 is a normal scheduled working day for John Smith. Notice how John worked a total of 10 hours with 2 Unscheduled OT1 hours posting to OT2 due to Policy Unscheduled Hours Mapping Settings.
ABC Manufacturing - Holiday Hours Mapping Example:

July 4th 2013 is a scheduled working day for John Smith that also happens to be a Holiday Date. Notice how John worked a total of 10 hours with 2 Unscheduled OT1 hours. However - instead of posting to OT2 Unscheduled OT1 Hours are posted to OT4 due to both Policy Unscheduled Hours Mapping Settings and Holiday Hours Mapping Settings. This occurs because the Holiday Hours Mapping Type is higher priority than the Policy Unscheduled Hours Mapping Type.
Premium Pay makes it possible to define Premiums, or bonuses in the form of an increased wage, which are paid to employees based upon the Shift, Department, Job, or Task the employee works on. Premiums can be configured separately for the Regular, Overtime One, Overtime Two, Overtime Three, and Overtime Four hour types. This flexibility makes it possible to meet the needs of a variety of special payment scenarios. Pay Premiums are optional and are intended for special scenarios that require specific rules for Medical, Union, and Manufacturing employees. Approximately 20 to 40 out of 100 companies (20% - 40%) require Premium Pay to calculate wages appropriately for employees.
When configuring Premium Pay there are four main tasks that must be performed. Each task is listed and described in detail below.
1. Identify the Type of Premium.
2. Identify the Hour Type(s) eligible for the premium.
3. Identify an appropriate Pay Method.
4. Understand how the Premium Hierarchy will affect your pay premium(s)
InfiniTime supports five types of premiums, each of which are configured in a separate area of the InfiniTime Application. Employees receive premium pay when they work in a Shift, Department, Job, Task, or Hours Type that has been configured with a premium. While it is possible to configure multiple Premium Types and Pay Methods for a single InfiniTime Installation, it is recommended that only a single premium type be configured to reduce the impact of the Premium Type Hierarchy. InfiniTime Administrators should chose and configure the single Premium Type which best meets the needs of your organization as outlined below. Selecting the type of premium is best explained through example. Many hospitals pay employees filling the role of Head Nurse, or the nurse who oversees all other nurses for a given shift, an additional premium. To determine the necessary type of premium the user must understand how the role of head nurse is tracked within InfiniTime. If Head Nurse is a department which employees punch into when they fill the Head Nurse role then the premium would be configured on the Head Nurse department. Similarly, if Head Nurse was a Job or Task then the premium would be configured on the Job or Task respectively.
Premium Type |
Location within InfiniTime |
Description |
Shift Differentials |
1. Click on Lookups, Scheduling Setup, Shifts. 2. Click Change while highlighting an existing shift or click Insert. 3.Check the box labeled 'Used for Differential' 4. Click on the Differential Pay Tab. |
Shift differentials are periods of time during which employees receive bonuses in the form of additional pay. Employees working during the hours defined by the shift differential will receive shift differential pay. |
Department Premiums |
1. Click on the Department Button. 2. Click Change while highlighting an existing department or click Insert. 3. Click on the Premium Pay Tab. |
Department premiums are configured separately for each department in InfiniTime. Employees will receive Department Premiums when working in a department configured with a Premium. |
Job Premiums |
1. Click on Lookups, Employee Setup, Job Costing Lookups, Activity Jobs. 2. Click Change while highlighting an existing job or click Insert. 3. Click on the Premium Pay Tab. |
Job premiums are configured separately for each Job in InfiniTime. Employees will receive Job Premiums when working in a Job configured with a Premium. |
Task Premiums |
1. Click on Lookups, Employee Setup, Job Costing Lookups, Activity Tasks. 2. Click Change while highlighting an existing task or click Insert. 3. Click on the Premium Pay Tab. |
Task premiums are configured separately for each Task in InfiniTime. Employees will receive Task Premiums when working in a Task configured with a Premium. |
Overtime Premiums |
1. Click on Company, Setup, Policies. 2. Click Change while highlighting an existing policy or click Insert. 3. Click on Overtime Rules. Refer to Overtime Settings for more information on Overtime Pay Methods. |
Overtime Premiums are configured separately for each Overtime Type from OT1 to OT4. Employees will receive Overtime Premiums for any Overtime Type with a premium configured. For example, if a premium is set for OT1, any OT1 hours will be calculated as Premium Pay. |
Identify the Hours Type(s) eligible for the premium
After identifying the Premium Type, the type of hours eligible for premium must be identified. Premiums are configured separately for each type of hours from Regular and Overtime 1 to Overtime 4. Again, this concept is best illustrated through example. Two examples are provided below for clarity. Remember, any combination of premiums can be used to meet the user's needs. The examples below are simply example scenarios.
Regular and Overtime 1 Hours in the Head Nurse Department receive Premium Pay
If both regular and overtime 1 hours in the Head Nurse department receive premium pay then the premium must be configured separately for both Regular Hours and Overtime 1 hours as shown. The example below uses an Amount Pay Method which pays employees an additional dollar amount for every hour eligible for the premium. In the example, Regular Hours worked as a Head Nurse receive an additional dollar per hour while Overtime Hours receive an additional two dollars per hour.
Only Overtime 1 Hours in the Head Nurse Department receive Premium Pay
If only Overtime 1 hours in the Head Nurse department receive premium pay then the premium should only be configured for Overtime 1 hours as shown. The example below uses an Amount Pay Method which pays employees an additional dollar amount for every hour eligible for the premium. In the example, Overtime hours worked as a Head Nurse receive an additional two dollars per hour while Regular Hours do not receive a premium and are paid at the employee's base wage.
Identify an appropriate Pay Method
When configuring Pay Premiums be sure to select the Pay Method that matches your needs. InfiniTime supports three separate pay methods as listed below. Pay special attention to the labels and units on the form when selecting Pay Premiums. If 'None' is selected in the Premium Pay Drop Down a premium will not be applied for the Hours Type.
Amount Pay Method
The Amount Pay Method pays employees an additional dollar amount for each hour they work. For example, an amount of 5.00 as shown below will pay employees their default wage plus an additional five dollars per hour for Regular Hours worked on the Department.. An example calculation is below.
Employee Default Wage + Dollar Amount = Hourly Wage
$10.00 + $5.00 = Hourly Wage
$15.00 = Hourly Wage
Percent Pay Method
The Percent Pay Method pays employees an additional percentage of their default wage for each hour they work. For example, a percent wage increase of 50 Percent is equivalent to Time and a Half or 1.5 times the employee's default wage. An example calculation is below.
Employee Default Wage + (Employee Default Wage * Percent Wage Increase) = Hourly Wage
$10.00 + ($10.00 * 50%) = Hourly Wage
$10.00 + ($5.00) = Hourly Wage
$15.00 = Hourly Wage
Rate Pay Method
The Rate Pay Method defines a specific wage for overtime hours. When the Rate Pay Method is used employee default wages are ignored and the Premium Rate is used for overtime hours.
WARNING: The Rate Pay Method is not a multiplier of the employee's wage. Selecting the Rate Pay Method and entering 1.5 as the Overtime Rate will pay the employee $1.50 per hour. Remember, the Employee's default wage is ignored when the Rate Pay Method is selected. The Overtime Rate is entered in dollars per hour and will be used as the employee's overtime wage.
Understand how the Premium Hierarchy will affect your pay premium(s)
In some scenarios employees may be eligible for multiple types of premium pay for the same hours type at the same time by meeting the conditions of multiple premium types. If your company will only be tracking a single type of premium pay this section can be ignored. Premiums are applied in a predefined order, beginning with an employee's base rate. The base rate is determined by either the Default Wage on the employee's HR Profile Tab or by Wages defined in the employee's Wages Table. Refer to the Wages Section of this document for more information on Employee Wages.
After InfiniTime determines an employee's base rate Premium Pay is applied in order as listed below. Shift differentials are considered separate from Premium Pay. Employees who qualify for Shift Differential Pay will not receive additional pay from Department, Job, Task, or Policy based Premiums. Example calculations and scenarios are provided below to illustrate the Premium Pay Hierarchy. There are two things to keep in mind:
Premiums of the Amount and Percent Pay Methods are cumulative.
Higher priority Premiums of the Rate Pay Method will override lower priority premiums.
Higher priority Premiums of the Amount and Percent Pay Method will build on top of lower priority rate premiums.
Premium Hierarchy
1. Department Premiums are applied. (Lowest Priority)
2. Job Premiums are applied
3. Task Premiums are applied.
4. Policy Overtime Premiums are applied. (Highest Priority)
Note: Premiums are listed from lowest priority to highest priority.
Premiums of the amount pay method are cumulative. For example, the equations below show how each type of premium would be applied to an employee's base rate if an employee were to meet the requirements of Department, Job, Task, and Policy Overtime premiums each configured with the Amount Pay method.
Department Premium: Amt + WAGE = DWAGE
Job Premium: Amt + DWAGE = JWAGE
Task Premium: Amt + JWage = TWAGE
Policy Premium: Amt + TWAGE = Hourly Wage
Ex.# |
Base Rate |
Department Premium Amount |
Job Premium Amount |
Task Premium Amount |
Policy Overtime Premium Amount |
1 |
$10.00 |
$0.50 |
$0.25 |
$0.25 |
$1.00 |
2 |
$15.00 |
$0.50 |
$0.50 |
$0.25 |
$0.50 |
Note: Values from the table are used in the examples below.
Example 1
Premium Type |
Calculation |
Resulting Hourly Wage |
DEPT |
$0.50 + $10.00 |
$10.50 |
JOB |
$0.25 + $10.50 |
$10.75 |
TASK |
$0.25 + $10.75 |
$11.00 |
POLICY |
$0.50 + $11.00 |
$11.50 |
Note: The Hourly Wage shown in bold is the final wage after all premiums are applied. The employee would be paid the final wage for any hours qualifying for all premiums.
Example 2
Premium Type |
Calculation |
Resulting Hourly Wage |
DEPT |
$0.50 + $15.00 |
$15.50 |
JOB |
$0.50 + $15.50 |
$16.00 |
TASK |
$0.25 + $16.00 |
$16.25 |
POLICY |
$0.50 + $16.25 |
$16.75 |
Note: The Hourly Wage shown in bold is the final wage after all premiums are applied. The employee would be paid the final wage for any hours qualifying for all premiums.
Premiums of the Percent pay method are cumulative. For example, the equations below show how each type of premium would be applied to an employee's base rate if an employee were to meet the requirements of Department, Job, Task, and Policy Overtime premiums each configured with the Percent Pay method.
Department Premium: (% * WAGE) + WAGE = DWAGE
Job Premium: (% * DWAGE) + DWAGE = JWAGE
Task Premium: (% * JWAGE) + JWage = TWAGE
Policy Premium: (% * TWAGE) + TWAGE = Hourly Wage
Ex.# |
Base Rate |
Department Premium Percent |
Job Premium Percent |
Task Premium Percent |
Policy Overtime Premium Percent |
1 |
$10.00 |
5% |
10% |
10% |
15% |
2 |
$15.00 |
5% |
5% |
5% |
15% |
Note: Values from the table are used in the examples below.
Example 1
Premium Type |
Calculation |
Resulting Hourly Wage |
DEPT |
(.05 * $10.00) + $10.00 |
$10.50 |
JOB |
(.10 * $10.50) + $10.50 |
$11.55 |
TASK |
(.10 * $11.55) + $11.55 |
$12.71 |
POLICY |
(.15 * $12.71) + $12.71 |
$14.62 |
Note: The Hourly Wage shown in bold is the final wage after all premiums are applied. The employee would be paid the final wage for any hours qualifying for all premiums.
Example 2
Premium Type |
Calculation |
Resulting Hourly Wage |
DEPT |
(.05 * $15.00) + $15.00 |
$15.75 |
JOB |
(.05 * $15.75) + $15.75 |
$16.54 |
TASK |
(.05 * $16.54) + $16.54 |
$17.37 |
POLICY |
(.15 * $17.37) + $17.37 |
$19.98 |
Note: The Hourly Wage shown in bold is the final wage after all premiums are applied. The employee would be paid the final wage for any hours qualifying for all premiums.
Premiums of the Percent pay method are not cumulative. Higher priority premiums simply override lower priority premiums. For example, the equations below show how each type of premium would be applied to an employee's base rate if an employee were to meet the requirements of Department, Job, Task, and Policy Overtime premiums each configured with the Rate Pay method.
Department Premium: Rate = DWAGE
Job Premium: Rate = JWAGE
Task Premium: Rate = TWAGE
Policy Premium: Rate = Hourly Wage
Ex.# |
Base Rate |
Department Premium Rate |
Job Premium Rate |
Task Premium Rate |
Policy Overtime Premium Rate |
1 |
$10.00 |
$8.00 |
$8.50 |
$9.00 |
$9.50 |
2 |
$15.00 |
$16.00 |
$18.00 |
$19.00 |
$20.00 |
Note: Values from the table are used in the examples below.
Example 1
Premium Type |
Calculation |
Resulting Hourly Wage |
DEPT |
$8.00 = Hourly Wage |
$8.00 |
JOB |
$8.50 = Hourly Wage |
$8.50 |
TASK |
$9.00 = Hourly Wage |
$9.00 |
POLICY |
$9.50 = Hourly Wage |
$9.50 |
Note: The Hourly Wage shown in bold is the final wage after all premiums are applied. The employee would be paid the final wage for any hours qualifying for all premiums.
Example 2
Premium Type |
Calculation |
Resulting Hourly Wage |
DEPT |
$16.00 = Hourly Wage |
$16.00 |
JOB |
$18.00 = Hourly Wage |
$18.00 |
TASK |
$19.00 = Hourly Wage |
$19.00 |
POLICY |
$20.00 = Hourly Wage |
$20.00 |
Note: The Hourly Wage shown in bold is the final wage after all premiums are applied. The employee would be paid the final wage for any hours qualifying for all premiums.
Additional Example: Rate Pay Method Overrides lower Priority Premiums
Remember, Premiums of the Rate Pay Method will override lower priority premiums. An example of this concept is provided below.
Department Premium: Amt + WAGE = DWAGE
Job Premium: Amt + DWAGE = JWAGE
Task Premium: Amt + JWage = TWAGE
Policy Premium: Rate = Hourly Wage
Ex.# |
Base Rate |
Department Premium Amount |
Job Premium Amount |
Task Premium Amount |
Policy Overtime Premium Rate |
1 |
$10.00 |
$0.50 |
$0.25 |
$0.25 |
$14.00 |
2 |
$15.00 |
$0.50 |
$0.50 |
$0.25 |
$19.00 |
Note: Values from the table are used in the examples below.
Example 1
Premium Type |
Calculation |
Resulting Hourly Wage |
DEPT |
$0.50 + $10.00 |
$10.50 |
JOB |
$0.25 + $10.50 |
$10.75 |
TASK |
$0.25 + $10.75 |
$11.00 |
POLICY |
$14.00 = Hourly Wage |
$14.00 |
Note: The Hourly Wage shown in bold is the final wage after all premiums are applied. The employee would be paid the final wage for any hours qualifying for all premiums.
Example 2
Premium Type |
Calculation |
Resulting Hourly Wage |
DEPT |
$0.50 + $15.00 |
$15.50 |
JOB |
$0.50 + $15.50 |
$16.00 |
TASK |
$0.25 + $16.00 |
$16.25 |
POLICY |
$19.00 = Hourly Wage |
$19.00 |
Note: The Hourly Wage shown in bold is the final wage after all premiums are applied. The employee would be paid the final wage for any hours qualifying for all premiums.
Additional Example: Amount and Percent Pay Methods build on top of lower priority rate premiums
Remember, Premiums of the Amount and Percent Pay Methods will build on lower priority rate premiums. An example of this concept is provided below.
Department Premium: Rate = DWAGE
Job Premium: Amt + DWAGE = JWAGE
Task Premium: Amt + JWage = TWAGE
Policy Premium: Rate = Hourly Wage
Ex.# |
Base Rate |
Department Premium Rate |
Job Premium Amount |
Task Premium Amount |
Policy Overtime Premium Amount |
1 |
$10.00 |
$12.00 |
$0.25 |
$0.25 |
$1.00 |
2 |
$15.00 |
$17.00 |
$0.50 |
$0.25 |
$1.00 |
Note: Values from the table are used in the examples below.
Example 1
Premium Type |
Calculation |
Resulting Hourly Wage |
DEPT |
$12.00 = Hourly Wage |
$12.00 |
JOB |
$0.25 + $12.00 |
$12.25 |
TASK |
$0.25 + $12.25 |
$12.50 |
POLICY |
$1.00 + $12.50 |
$13.50 |
Note: The Hourly Wage shown in bold is the final wage after all premiums are applied. The employee would be paid the final wage for any hours qualifying for all premiums.
Example 2
Premium Type |
Calculation |
Resulting Hourly Wage |
DEPT |
$17.00 = Hourly Wage |
$17.00 |
JOB |
$0.50 + $17.00 |
$17.50 |
TASK |
$0.25 + $17.50 |
$17.75 |
POLICY |
$1.00 + $17.75 |
$18.75 |
Note: The Hourly Wage shown in bold is the final wage after all premiums are applied. The employee would be paid the final wage for any hours qualifying for all premiums.
Premium Pay: Premium Pay makes it possible to define Premiums, or bonuses in the form of an increased wage. Department premiums are paid when employees work in a given department which has premiums configured. Premiums can be configured separately for the Regular, Overtime One, Overtime Two, Overtime Three, and Overtime Four hour types. This flexibility makes it possible to meet the needs of a variety of special payment premiums. Refer to the Pay Premium Introduction for more information on how Pay Premiums are calculated.
Amount Pay Method
The Amount Pay Method pays employees an additional dollar amount for each hour they work in the department. For example, an amount of 0.50 as shown below will pay employees their default wage plus an additional fifty cents per hour for working in the department. An example premium for Regular Hours is shown below.
Employee Default Wage + Dollar Amount = Hourly Wage
$10.00 + $0.50 = Hourly Wage
$10.50 = Hourly Wage
Percent Pay Method
The Percent Pay Method pays employees an additional percentage of their default wage for each hour they work in the department. For example, a percent wage increase of 50 Percent is equivalent to Time and a Half or 1.5 times the employee's default wage. An example premium for Regular Hours is shown below.
Employee Default Wage + (Employee Default Wage * Percent Wage Increase) = Overtime Wage
$10.00 + ($10.00 * 50%) = Hourly Wage
$10.00 + ($5.00) = Hourly Wage
$15.00 = Hourly Wage
Rate Pay Method
The Rate Pay Method defines a specific wage for overtime hours. When the Rate Pay Method is used employee default wages are ignored and the Premium Pay Rate is used for all hours worked in the department.
Premium Pay: Premium Pay makes it possible to define Premiums, or bonuses in the form of an increased wage. Job premiums are paid when employees work in a given job which has premiums configured. Premiums can be configured separately for the Regular, Overtime One, Overtime Two, Overtime Three, and Overtime Four hour types. This flexibility makes it possible to meet the needs of a variety of special payment premiums. Refer to the Pay Premium Introduction for more information on how Pay Premiums are calculated.
Amount Pay Method
The Amount Pay Method pays employees an additional dollar amount for each hour they work in the job. For example, an amount of 0.50 as shown below will pay employees their default wage plus an additional fifty cents per hour for working in the job. An example premium for Regular Hours is shown below.
Employee Default Wage + Dollar Amount = Hourly Wage
$10.00 + $0.50 = Hourly Wage
$10.50 = Hourly Wage

Percent Pay Method
The Percent Pay Method pays employees an additional percentage of their default wage for each hour they work in the job. For example, a percent wage increase of 50 Percent is equivalent to Time and a Half or 1.5 times the employee's default wage. An example premium for Regular Hours is shown below.
Employee Default Wage + (Employee Default Wage * Percent Wage Increase) = Overtime Wage
$10.00 + ($10.00 * 50%) = Hourly Wage
$10.00 + ($5.00) = Hourly Wage
$15.00 = Hourly Wage
Rate Pay Method
The Rate Pay Method defines a specific wage for overtime hours. When the Rate Pay Method is used employee default wages are ignored and the Premium Pay Rate is used for all hours worked in the job.
WARNING: The Rate Pay Method is not a multiplier of the employee's wage. Selecting the Rate Pay Method and entering 1.5 as the Premium Pay Rate will pay the employee $1.50 per hour. Remember, the Employee's default wage is ignored when the Rate Pay Method is selected. The Premium Pay Rate is entered in dollars per hour and will be used as the employee's hourly wage for hours worked in the respective job.
Premium Pay: Premium Pay makes it possible to define Premiums, or bonuses in the form of an increased wage. Task premiums are paid when employees work in a given task which has premiums configured. Premiums can be configured separately for the Regular, Overtime One, Overtime Two, Overtime Three, and Overtime Four hour types. This flexibility makes it possible to meet the needs of a variety of special payment premiums. Refer to the Pay Premium Introduction section of this document for more information on how Pay Premiums are calculated.
Amount Pay Method
The Amount Pay Method pays employees an additional dollar amount for each hour they work in the task. For example, an amount of 0.50 as shown below will pay employees their default wage plus an additional fifty cents per hour for working in the task. An example premium for Regular Hours is shown below.
Employee Default Wage + Dollar Amount = Hourly Wage
$10.00 + $0.50 = Hourly Wage
$10.50 = Hourly Wage
Percent Pay Method
The Percent Pay Method pays employees an additional percentage of their default wage for each hour they work in the task. For example, a percent wage increase of 50 Percent is equivalent to Time and a Half or 1.5 times the employee's default wage. An example premium for Regular Hours is shown below.
Employee Default Wage + (Employee Default Wage * Percent Wage Increase) = Overtime Wage
$10.00 + ($10.00 * 50%) = Hourly Wage
$10.00 + ($5.00) = Hourly Wage
$15.00 = Hourly Wage
Rate Pay Method
The Rate Pay Method defines a specific wage for overtime hours. When the Rate Pay Method is used employee default wages are ignored and the Premium Pay Rate is used for all hours worked in the task.
WARNING: The Rate Pay Method is not a multiplier of the employee's wage. Selecting the Rate Pay Method and entering 1.5 as the Premium Pay Rate will pay the employee $1.50 per hour. Remember, the Employee's default wage is ignored when the Rate Pay Method is selected. The Premium Pay Rate is entered in dollars per hour and will be used as the employee's hourly wage for hours worked in the respective task.
Shift differentials can be configured in order to compensate employees for working undesirable shifts. InfiniTime provides incredible flexibility when configuring shift differentials through multiple payment methods, as configured in the policies, and various differential pay options. These options are outlined below. Additional details on the use and configuration of Shift Differentials can be found in the Scheduling Section of this document.

These fields will allow you to assign a differential pay based on the type of hours.
Differential Pay - This drop down box allows you to select the type of pay. The options are rate, amount, and percentage.
Amount - Selecting amount specifies that the value entered into the differential pay amount field is a dollar value, which will be added to the employees base wage as specified in the employees record.
Example:
Employee Base Wage: $15.00
Differential Amount: $1.00
Total Hourly Differential Pay Rate: $16.00

Percent - Selecting percent specifies that the value entered into the differential pay amount field is a percentage value, which will be multiplied by the employees base wage to determine the additional amount paid during differential time.
Example:
Employee Base Wage: $10.00
Differential Percent: 20%
Additional Differential Pay Amount: $2.00
Total Hourly Differential Pay Rate: $12.00

Rate - Selecting rate specifies that the value entered into the differential pay amount field is a dollar value, which will be considered the total hourly pay during differential time. The Employee's base wage is ignored when a rate is specified. All employees will receive the same pay rate when they qualify for differential time.
Example:
Employee Base Wage: $15.00
Differential Rate: $18.00
Total Hourly Differential Pay Rate: $18.00

Differential Pay Amount - This field will allow you to enter the amount of the pay according to the selected differential pay type, for example, if you had selected amount for differential pay a dollar amount would be entered into this field. Refer to the above examples for usage.
![]()
Before Shift Grace Differential (Optional)– This is the amount of time the employee has before the shift starts to clock in and be considered to be in that shift for differential purposes.
After Shift Grace Period (Optional)– This is the amount of time the employee has after the shift has started to clock in and still be considered in that shift for differential purposes.
Map Shift Hours To – Allows versatile shift differential payment methods. Shift Differential mapping makes it possible to pay shift differential hours according to the hours on another shift. Shift mapping is subject to the following requirements and conditions:
Two Shifts must be configured for differential. Use for differential must be checked for each shift.
1 Primary Differential Shift
1 Secondary Differential Shift
The Primary differential shift contains the map to setting, which points to the Secondary Differential Shift. The employee must work the hours as defined on the Primary Differential Shift in order to qualify for differential payment. Differential hours will be paid according to the Differential Pay and Differential Amount settings defined on the Secondary Differential Shift. Differential Pay and Differential Amount Settings can be left blank on the Primary Differential Shift.
The Secondary Differential Shift determines hours to be paid as differential. When an employee qualifies for differential payment on the Primary Differential Shift the employee will be paid according to the hours on the Secondary Differential Shift.
Note: Examples are presented by Shift Differential Pay Method as defined within the Schedule settings / Rules in the company policy.
Secondary Differential Shift
Start Time: 2:00 PM
End Time: 10:00 PM

Zone - Zone pays shift differential according to the period an employee is working. The employee in question worked from 4:00 PM to 12:00 AM. By working 4:00 PM to 8:00 PM the employee qualifies for the mapped shift differential. Of the total hours worked six hours (4:00 PM – 10:00 PM) qualify for differential payment and two hours (10:00 PM – 12:00 AM) are considered regular time, or outside of the differential period.
Employee Work Hours: 4:00 PM – 12:00 AM
Employee Base Wage: $15.00
Differential Amount: $1.00
Total Hourly Differential Pay Rate: $16.00
Qualifying Differential Hours: 4:00 PM – 10:00 PM (6 Hours)
Regular Pay Hours: 10:00 PM – 12:00 AM (2 Hours)
Total Differential Pay: $16.00 * 6 Hours = $96.00
Total Regular Pay: $15.00 * 2 Hours = $30.00
Total Pay: $126.00
Clock In - Clock in pays shift differential according to where the employee clocks in. The employee in question clocked in at 4:00 PM, which falls within a period defined for differential payment. All hours are paid at the differential rate defined in the Secondary Differential Policy since mapping is being used.
Employee Work Hours: 4:00 PM – 12:00 AM
Employee Base Wage: $15.00
Differential Amount: $1.00
Total Hourly Differential Pay Rate: $16.00
Qualifying Differential Hours: 4:00 PM – 12:00 PM (8 Hours)
Regular Pay Hours: 0
Total Differential Pay: $16.00 * 8 Hours = $128.00
Total Regular Pay: $15.00 * 0 Hours = $0.00
Total Pay: $128.00
Clock Out - Clock out pays shift differential according to where the employee clocks out. The employee in question clocked out at 12:00 AM, which does not fall within a period defined for differential payment.
Employee Work Hours: 4:00 PM – 12:00 AM
Employee Base Wage: $15.00
Differential Amount: $1.00
Total Hourly Differential Pay Rate: $16.00
Qualifying Differential Hours: 0 Hours
Regular Pay Hours: 8
Total Differential Pay: $16.00 * 0 Hours = $0.00
Total Regular Pay: $15.00 * 8 Hours = $120.00
Total Pay: $120.00
Majority - Majority hours pays shift differential according to where the employee spent the most hours. By working from 4:00 PM to 8:00 PM the employee in question qualifies for the mapped shift differential, which provides the employee with 6 hours differential time and 2 hours regular time under zone circumstances. In this scenario, the employee has majority hours in differential time. All hours are paid at the differential rate.
Employee Work Hours: 4:00 PM – 12:00 AM
Employee Base Wage: $15.00
Differential Amount: $1.00
Total Hourly Differential Pay Rate: $16.00
Qualifying Differential Hours: 4:00 PM – 12:00 PM (8 Hours)
Regular Pay Hours: 0
Total Differential Pay: $16.00 * 8 Hours = $128.00
Total Regular Pay: $15.00 * 0 Hours = $0.00
Total Pay: $128.00
As a versatile Time and Attendance Solution with the ability to meet the needs of enterprise organizations with a single location to organizations with multiple locations and unique requirements InfiniTime offers a variety of features. It is important to note that nearly all features within the InfiniTime Time and Attendance application are optional and can be configured or ignored (IE: Disabled) to meet the needs of the organization. With this in mind, the table below provides a list of specific features that must be configured in order to successfully transfer employee hours and earnings to a Payroll Application - either manually using InfiniTime Reports and Data Entry or automatically using the InfiniTime Payroll Export Feature. For clarity, each feature and its place in the day to day operational use of InfiniTime, or process flow, is also provided below.
InfiniTime Initial Configuration
| Step | Task | Related Deliverable(s) | Related Documentation |
| 1 | InfiniTime Installation |
|
|
| 2 | Distribute Client Shortcuts to all Client Machines |
|
|
| 3 | Create Employee Profile for all Supervisors and Administrators |
|
|
| 4 | Software Administrators should familiarize themselves with the InfiniTime Application and gather employee information from existing Human Resources and / or Payroll Software for import. |
|
|
| 5 | Install all Hardware Time and Attendance Terminals and confirm Punch Flow |
|
|
| 6 | Software Administrators and Human Resources Managers should document current Time and Attendance Rules using the provided Questionnaire. |
|
|
| 7 | Software Administrators and Human Resources Managers should review available features and determine which optional features, if any, are desired. |
|
Optional Features: |
| 8 | Software Administrators and Human Resource Managers should:
|
|
The following items are Required Features for tracking and transferring employee hours / earnings to payroll and must be configured for all InfiniTime Installations: |
| 9 | Software Administrators and Human Resource Managers should review the benefits of Scheduling and determine if InfiniTime Scheduling will be implemented. |
|
|
| 10 | Software Administrators and Human Resource Managers should familiarize themselves with InfiniTime Timecard Editing. |
|
|
| 11 | Software Administrators and Human Resource Managers should familiarize themselves with available reports and select specific reports for production use. |
|
|
| 12 | Software Administrators and Human Resource Managers should familiarize themselves with available Security Roles and Security Configuration. |
|
|
| 13 | A Parallel Payroll Run should be performed for the first two pay periods after InfiniTime has been configured to ensure all Hours and Earning Types have been identified and Employee Policies have been configured appropriately. |
|
|
InfiniTime Day to Day Operational Use - Maintenance Tasks
During normal day to day business operations, certain events will require InfiniTime Software Administrators, Payroll Clerks, and / or Supervisors to take specific actions within InfiniTime. Several such tasks are outlined below.
Event |
Task Description |
| Employee Turnover |
|
| New Hire |
|
| New Year |
|
| Change in Time and Attendance or Paid / Unpaid Leave Policies |
|
Employee Hours and Earnings Exported by InfiniTime do not match those exported from the existing Time and Attendance Solution during the Parallel Payroll Run |
|
InfiniTime Day to Day Operational Use - Example Process Flow
While the exact process flow will vary from organization to organization based on specific features implemented within InfiniTime, a common process flow is provided below for example purposes. As outlined below, certain tasks should be performed Daily, Weekly, and for each Pay Period prior to running payroll.
Daily Tasks
Edit Employee Timecards to correct Exceptions
Weekly Tasks
Mark Employee Timecards as Reviewed
Check and Create Employee Schedules for Next Week / Next Pay Period as appropriate
Payroll Tasks
Edit and Review any Unreviewed Timecards as needed
Check for Unreviewed Timecards once more
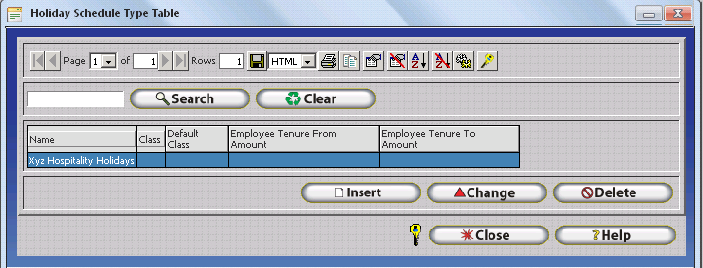

 OT2
OT2 OT2
OT2